Skip to content

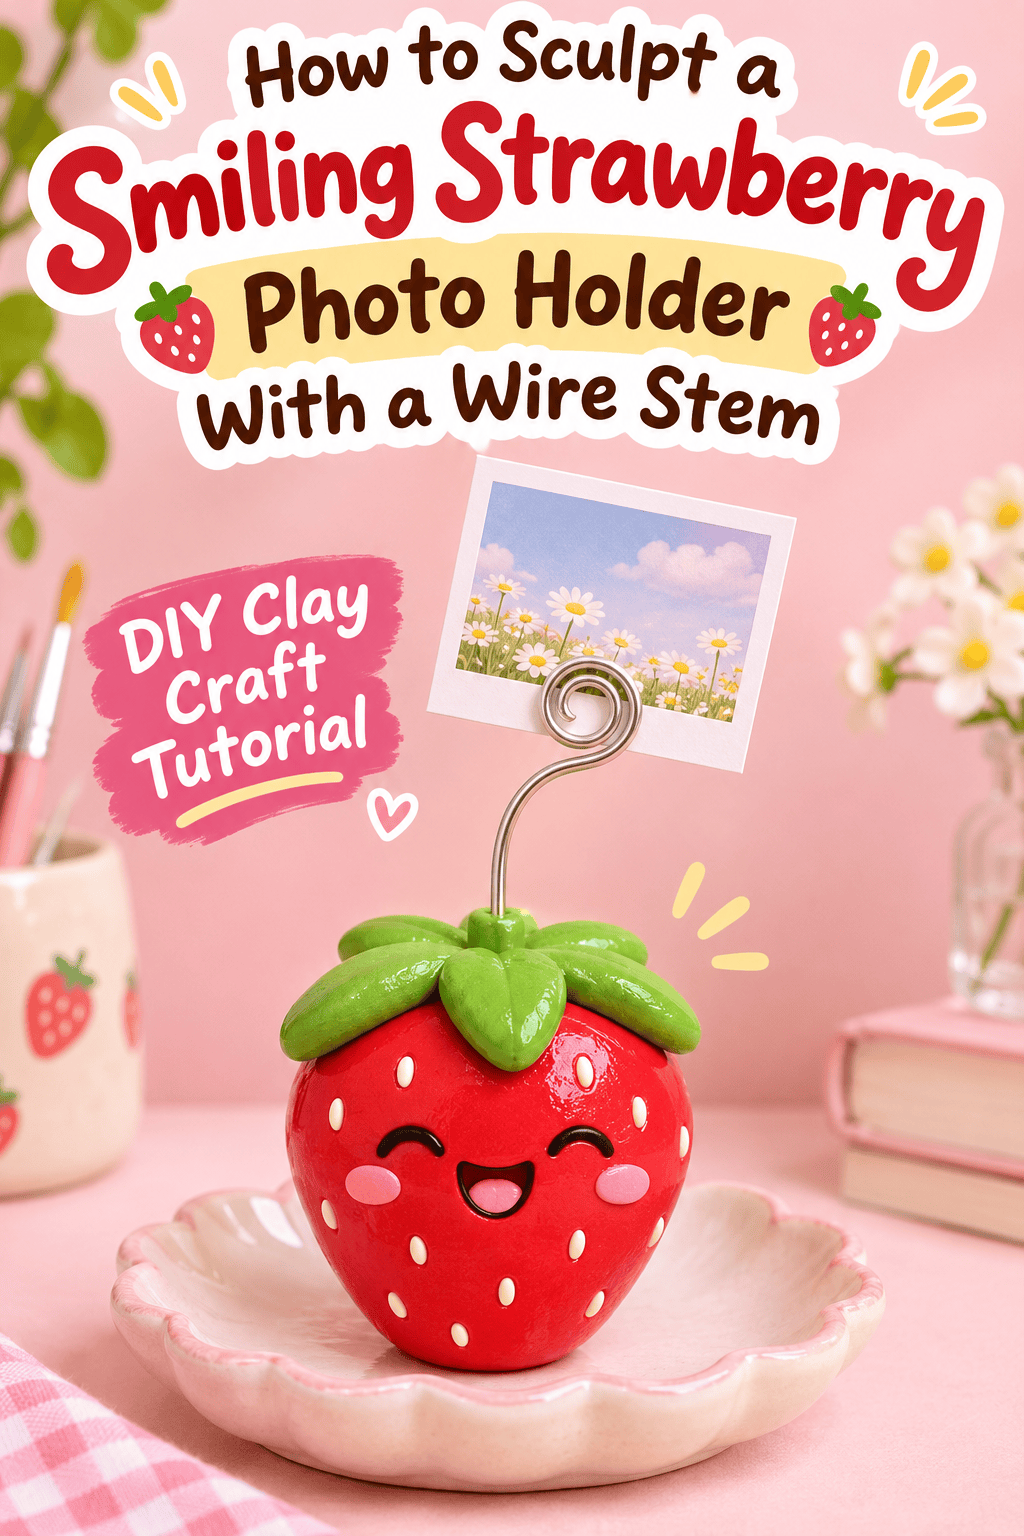
Meet the happiest little desk buddy you’ll ever make: a plump red strawberry with rosy cheeks, a sweet smile, and a bendy wire stem that holds your favorite photo.
It’s cute, useful, and easier than it looks. All you need is clay, wire, and a little imagination. Let’s sculpt one.

What You’ll Need
- Red air-dry or polymer clay
- A small amount of green clay for the leaves
- Black clay or tiny black beads for eyes
- Pink chalk pastel or blush paint for the cheeks
- 18 to 20 gauge craft wire (about 12 inches)
- Round-nose pliers and wire cutters
- Toothpick or needle tool
- Small wooden disc or clay base (optional)
- Glossy glaze or clear nail polish
- Baking sheet and parchment paper (for polymer clay)
Tip: Polymer clay gives a smoother, glossier finish. Air-dry clay is easier for beginners and needs no oven.

Step 1: Shape the Strawberry
- Warm a walnut-sized piece of red clay in your hands.
- Roll it into a smooth ball.
- Pinch one end gently into a rounded point.
- Flatten the top slightly so the leaves will sit neatly.
Aim for a plump, slightly wide shape. Chubby strawberries look the cutest.
Step 2: Add the Seed Texture
- Press a toothpick lightly into the clay in staggered rows
- Keep the dots shallow and evenly spaced
- Leave the face area (the center front) smooth
- Optional: fill the dots with pale yellow paint after drying
Pro tip: Work around the face first, then fill in the sides and back so the pattern feels balanced.
Step 3: Create the Smiling Face
This is where the personality appears.
- Press two black beads into the clay, spaced widely apart, for eyes.
- Draw a small curved smile with a toothpick.
- Add tiny white dots on each eye later for sparkle.
- Brush soft pink blush on each cheek once dry.
Keep the features small and low on the berry for the sweetest, most “kawaii” look.

Step 4: Sculpt the Leafy Cap
- Roll a small ball of green clay and flatten it into a thin circle.
- Use a craft knife or toothpick to cut 5 to 6 pointed leaves.
- Press a faint vein line down each leaf.
- Place the cap on top of the strawberry and curl the tips slightly.
- Add a tiny stem nub in the center.
Slightly uneven leaves look natural and charming.
Step 5: Add the Wire Stem
The wire is what turns your strawberry into a photo holder.
- Cut a 10 to 12 inch piece of craft wire
- Bend one end into a small flat spiral with round-nose pliers
- Bend the other end into a small loop or a tiny clip shape for holding photos
- Push the spiral end into the center of the leaf cap, then pull it out
- Add a dab of glue or liquid clay and reinsert it firmly
Curve the wire gently into an “S” so it looks like a playful vine.
Pro tip: Press the spiral end deeper than you think you need. Deep anchoring keeps the stem steady under the weight of a photo.

Step 6: Dry or Bake
- Air-dry clay: let it dry for 24 to 48 hours, away from heat.
- Polymer clay: bake according to the package directions, then cool completely.
- Check that the wire is secure after drying.
- Fill any tiny cracks with a bit of wet clay and smooth.
Bake in a ventilated space, and keep clay tools separate from food prep items.
Step 7: Paint and Glaze
- Touch up the red with a thin coat of paint if needed
- Paint the leaves a rich green with soft highlights
- Add white dots to the eyes for sparkle
- Brush on glossy glaze for a juicy shine
- Let it dry fully before adding a photo

Style and Display Ideas
- Place it on a desk to hold a favorite snapshot
- Clip a to-do note or a tiny postcard instead of a photo
- Make a trio in different sizes for a mini “berry patch”
- Add a ribbon bow for a gift version
- Use it as a place card holder at a picnic party
Gift It Beautifully
- Tuck it into a small kraft box with tissue paper
- Add a handwritten note and a printed photo
- Tie with twine and a sprig of dried lavender
- Pair with a jar of strawberry jam for a sweet gift set

Troubleshooting Tips
- Wire wobbles? Add more glue and bury the spiral deeper
- Clay cracks? Smooth with a bit of water and let dry slowly
- Face looks flat? Add white eye highlights and deeper blush
- Strawberry too heavy? Make it smaller or hollow the base slightly
- Photo slips? Bend the clip end tighter or add a tiny dab of tacky glue
Final Thoughts
A smiling strawberry photo holder is small, sweet, and full of charm. With a bit of clay, some wire, and a gentle smile, you can make a keepsake that brightens any desk or shelf. Start with one berry, give it a personality, and watch it become your favorite little companion.
Loved this project? Save this post to your DIY Clay Crafts board and make your strawberry photo holder this weekend!