Skip to content

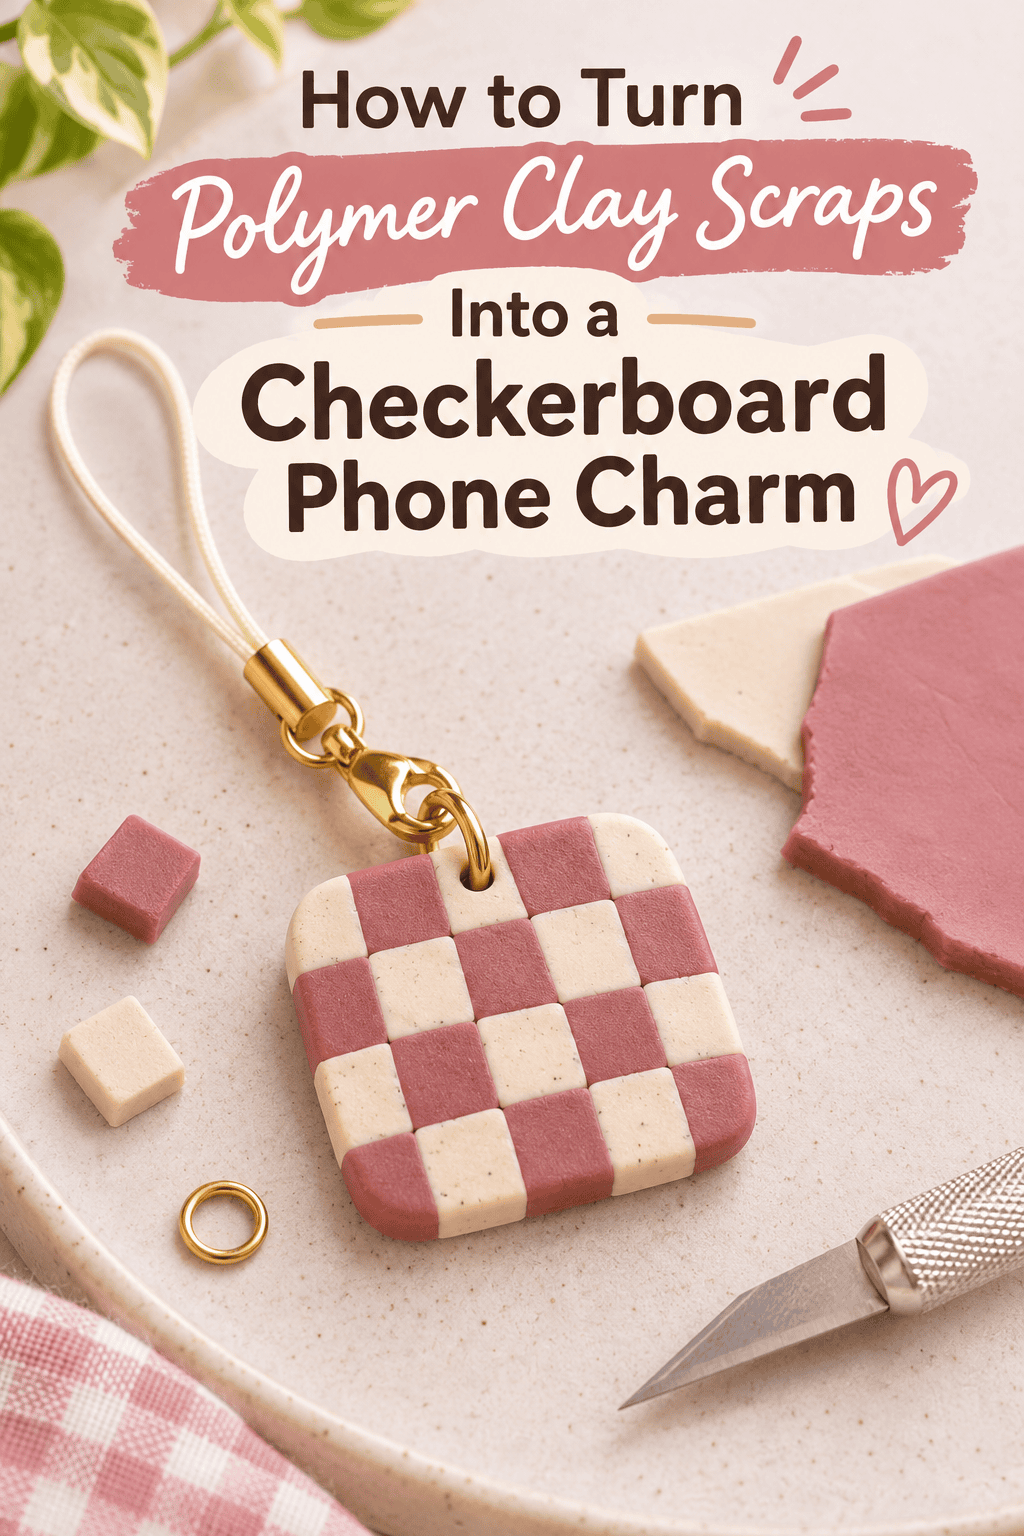
Those little leftover bits of polymer clay sitting in your craft drawer? They’re not trash. They’re tiny treasures waiting to become something adorable.
A checkerboard phone charm is bold, retro, and surprisingly easy to make. With a few simple cuts and stacks, your scraps turn into a pattern that looks like it came from a boutique. Let’s get crafting.

What You’ll Need
- Polymer clay scraps in 2 to 3 coordinating colors
- Acrylic roller or smooth glass jar
- Craft blade or tissue blade
- Ruler
- Eye pin or small screw eye
- Jump rings, lobster clasp, and phone charm strap
- Small beads for decoration (optional)
- Baking sheet and parchment paper
- Fine sandpaper (400 to 800 grit)
- Glossy glaze or clear sealer
Tip: Stick to colors that contrast well, like pink and cream, black and white, or mint and lavender, so the checkerboard really pops.

Step 1: Condition Your Scraps
Old scraps can be stiff, so warm them up first.
- Knead each color in your hands until soft and pliable.
- Roll each color into a smooth ball.
- Keep the colors separate so they stay clean and bright.
Wash your hands between colors to avoid muddy streaks.
Step 2: Roll Even Sheets
Even thickness is the secret to crisp squares.
- Flatten each color into a slab about 3 to 4 mm thick
- Roll in one direction first, then rotate and repeat
- Trim the edges to make neat rectangles
- Make each color sheet the same thickness for a clean finish
Pro tip: Use stacked playing cards or clay depth guides on each side of the roller to keep sheets uniform.
Step 3: Cut and Stack the Strips
Here’s where the checkerboard begins.
- Cut each sheet into strips about 5 to 6 mm wide.
- Stack the strips in alternating colors to make a striped block.
- Press gently so the strips fuse together without squishing.
- Trim the ends for a neat, flat edge.
Chill the block in the fridge for 10 to 15 minutes if the clay feels soft.

Step 4: Slice and Shift
This clever trick creates the checks.
- Slice the striped block into thin slabs, about 5 to 6 mm thick
- Lay the slices side by side, shifting each one by one stripe so colors alternate
- Press them together gently to form a checkerboard sheet
- Smooth the surface lightly with your roller
Take your time. Careful alignment makes a perfect pattern.
Step 5: Shape the Charm
Choose a shape that fits your style.
- Classic square: simple and bold
- Heart: cut with a small cookie cutter
- Circle: great for a retro look
- Rounded tile: pinch the corners softly for a pillowy shape
Press the eye pin into the top, pull it out, and dab a drop of liquid clay or glue before reinserting it firmly.
Tip: Keep your charm about 2 to 3 cm wide so it feels cute, not clunky.
Step 6: Bake and Finish
- Place the charm on parchment over a baking sheet.
- Bake according to your clay’s package directions.
- Let it cool completely before handling.
- Sand edges gently for a smooth finish.
- Brush on a thin layer of glaze and let it dry.
Bake in a ventilated space, and keep your clay tools separate from food prep items.

Step 7: Assemble the Phone Charm
- Attach a jump ring to the eye pin loop
- Add small beads and gold spacers to a strap or chain
- Clip on a lobster clasp
- Connect the strap to your phone case or key ring
- Mix in a letter bead or pearl for personality
Check each connection so the charm stays secure.
Color Combos to Try
- Retro diner: red, white, and black
- Pastel dream: pink, mint, and cream
- Moody neutrals: black, gray, and ivory
- Sunny pop: yellow, white, and sky blue
- Cozy autumn: burnt orange, cream, and brown
Troubleshooting Tips
- Colors blending? Chill the clay and clean your hands between colors
- Uneven squares? Use a ruler and keep strips the same width
- Cracks after baking? Condition the clay longer next time
- Charm too heavy? Make it smaller or thinner
- Dull finish? Add another thin coat of glaze
Style and Gift It
Turn your charms into gifts.
- Make a matching set for friends
- Attach one to a keychain or bag zipper
- Pair with a small pouch for gifting
- Create a mini collection in different color palettes

Final Thoughts
Polymer clay scraps don’t have to go to waste. With a little slicing, stacking, and shifting, you can turn them into a charm that’s stylish, personal, and totally you. Start small, play with color, and enjoy the satisfying reveal of each checkerboard slice.
Loved this project? Save this post to your Polymer Clay board and make your checkerboard charm this weekend!