Skip to content

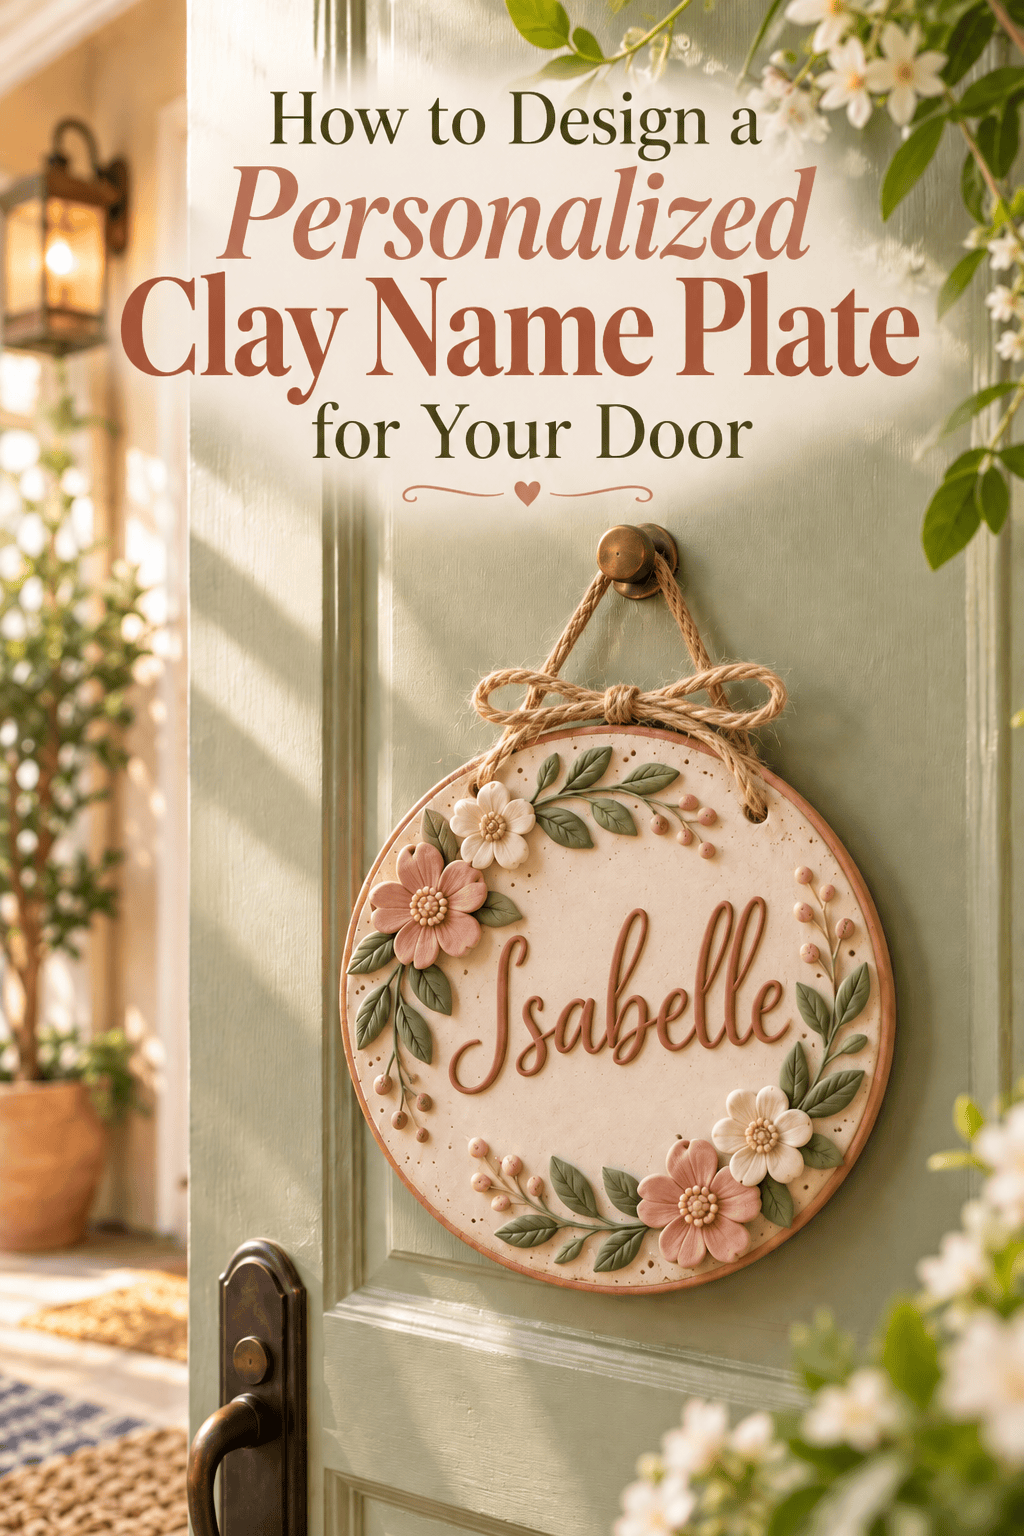
Your front door is the first thing the world sees of your home — and right now, if it has a nameplate at all, it’s probably a generic brass number plate that could belong to absolutely anyone. What if it said something more? What if it said, unmistakably and beautifully, you live here — in something handmade, personal, and designed entirely around your own taste?

A personalized clay nameplate is one of the most impactful small projects you can make — high visibility, high meaning, and genuinely impressive to anyone who walks through your door. It costs almost nothing to make, and the result looks like something you’d pay serious money for at an artisan market.
Let’s make yours.
What You’ll Need
Everything here is craft-store accessible. The most important consideration for a door nameplate — unlike indoor clay projects — is weatherproofing, so pay attention to the sealant choice.
- Air-dry clay — a 500g block is sufficient for most nameplate sizes
- A rolling pin or smooth glass bottle
- A sharp craft knife, ruler, and set square for clean edges
- Alphabet stamps — the most reliable method for clean, consistent lettering
- A toothpick or skewer for freehand details and borders
- A drinking straw for punching mounting holes
- Sandpaper — medium grit (120) and fine grit (220)
- Acrylic paint in your chosen finish
- Exterior-grade waterproof sealant — this is non-negotiable for anything mounted outdoors. Use exterior polyurethane varnish, not standard indoor craft sealant.
- Small screws or picture-hanging hardware for mounting
- Optional: real leaves, twigs, or botanicals for pressed border decoration

Planning Your Nameplate Design
Ten minutes of planning here saves an hour of frustration later. Answer these questions before touching the clay:
What does it say?
- Family surname only — classic and timeless
- Full “The [Surname] Family” — warmer and more welcoming
- House name if your home has one — charming and distinctive
- First names of all residents — personal and modern
- House number plus name — practical and beautiful
What shape?
- Rectangle — the most classic, easiest to execute cleanly, works with any lettering length
- Arch top — a rectangular base with a rounded top edge. Elegant and slightly more decorative.
- Organic oval — softer, more artisan, particularly beautiful with botanical border details
- Long horizontal banner — great for longer names or “The [Surname] Family” text
What style?
- Clean and minimal — smooth surface, stamped text, no border detail
- Botanical — pressed leaf border framing the lettering
- Geometric — toothpick-etched frame lines and corner details
- Rustic — deliberately organic edges, textured surface, raw finish
Sketch your chosen combination on paper — include approximate dimensions — before rolling any clay.
Building the Nameplate

Condition your clay — two full minutes of kneading until completely smooth and pliable. Cold or under-conditioned clay cracks at cut edges.
- Roll your slab to 8–10mm thickness. A nameplate needs to be substantial — it will be mounted outdoors and needs the mass to feel permanent and weather-resistant.
- Cut your shape using a ruler, set square, and craft knife. For a rectangle, measure and mark all four lines before cutting any of them. Clean geometry requires deliberate measurement, not freehand guessing.
- Smooth every edge immediately with a dampened fingertip — run it along each cut edge in one confident stroke to soften without rounding.
- Punch mounting holes using a drinking straw — one in each upper corner, roughly 1cm from each edge. Make them slightly larger than your mounting screws to allow for any expansion and contraction with temperature changes outdoors.
- Add your border decoration now, while the surface is still fully receptive:
- Press real leaves face-down along the border area and roll gently over them for botanical impressions
- Draw frame lines with a toothpick and ruler for a geometric border
- Press a piece of lace or textured fabric lightly around the perimeter for an all-over background texture
Stamping Your Lettering

Lettering is the heart of this project — and the step that benefits most from preparation.
Before stamping on your actual piece:
- Practice on a scrap piece of clay at the same thickness
- Test your pressure — too light leaves a faint impression, too heavy distorts the surrounding clay
- Lay out all your letter stamps in word order before you begin so you’re not hunting mid-stamp
- Calculate your spacing by lightly marking the center of the nameplate and working outward from the middle letter or gap
Stamping technique:
- Press each stamp straight down — perpendicular to the surface, not at an angle
- Apply firm, even pressure and hold for two seconds before lifting straight up
- Don’t rock or slide the stamp — lift cleanly
- If a letter is faint, you can carefully re-stamp it if the clay is still soft — position the stamp precisely over the existing impression and press again
If you prefer freehand lettering:
- Lightly sketch letter positions with a barely-touching toothpick first
- Then deepen each letter with confident, even strokes
- Simple uppercase block letters are far more legible and forgiving than script at nameplate scale
Drying, Sanding, Painting, and Weatherproofing
Dry your nameplate completely flat for 72 hours minimum. A piece this thick dries slowly — and any warping will make flat-mounting against a door impossible to fix after the fact.
Once bone dry, sand in two stages:
- 120 grit — flatten the back completely, smooth rough edges, refine any uneven surface areas
- 220 grit — entire surface until smooth and consistent to the touch
Paint options:
- Matte cream or warm white — universally beautiful against any door colour
- Terracotta — earthy and warm, stunning against dark green, navy, or black doors
- Matte black — graphic and modern, particularly striking on natural wood or white doors
- Sage green — soft and botanical, beautiful with the pressed leaf detail
Two thin coats of acrylic paint, fully dried between each. Then — critically — exterior polyurethane varnish applied in five to six coats, with full curing time between each. This is what stands between your nameplate and the first rainy season.

On the Door Where It Belongs
Mount with small screws through the pre-punched holes — a dab of clear exterior silicone sealant around each screw head adds an extra layer of weatherproofing at the mounting points.
Step back to the pavement and look at your front door. Something has changed. It looks like someone who cares lives there. Because you do — and now your door says so.
Save this project for your next long weekend and consider making a second as a housewarming gift. A personalized clay nameplate wrapped in kraft paper, hand-lettered with the recipient’s family name, is one of the most thoughtful and genuinely lasting gifts you can give a new homeowner.