Skip to content

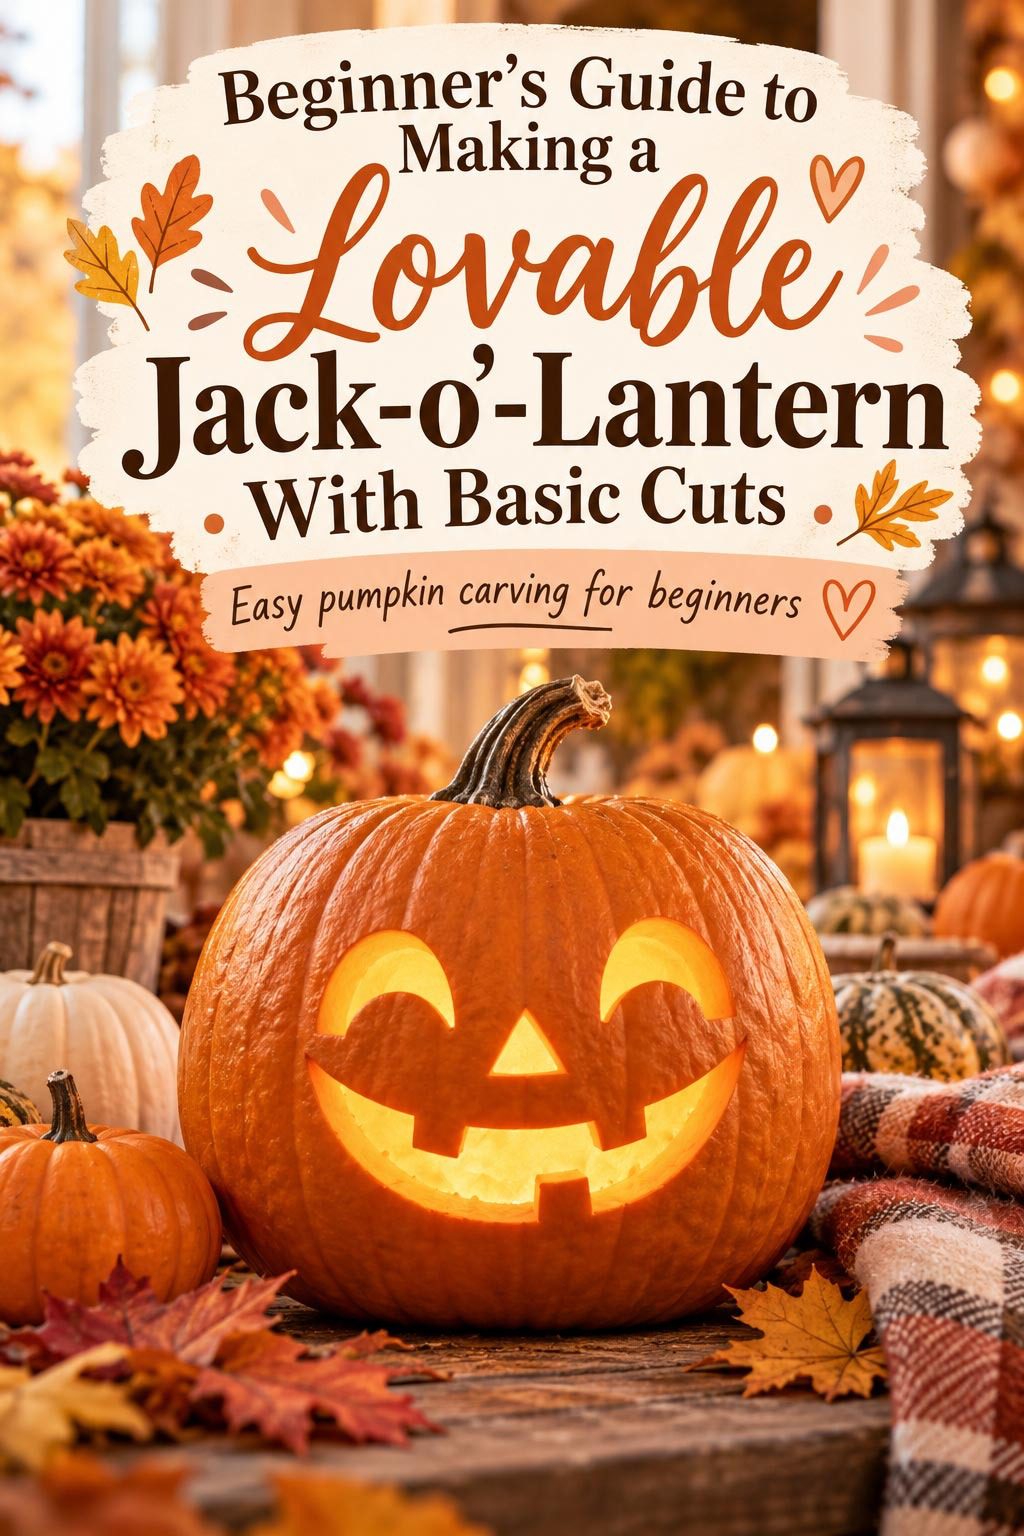
There is a very specific kind of satisfaction in carrying a plain orange pumpkin to a table, spending an hour with it, and ending up with something glowing on your porch that makes passing children stop and point. Jack-o’-lantern carving has this reputation for being either embarrassingly simple or intimidatingly complex — but the truth is that the most lovable lanterns, the ones that actually make people smile, are almost always made with the most basic cuts. A great jack-o’-lantern isn’t about technique. It’s about personality.

This guide is for beginners who want a result they’re genuinely proud of — not a masterpiece, but a jack-o’-lantern with real character that glows beautifully and looks like it was made with intention. Let’s carve.
Choosing the Right Pumpkin
Everything starts here. A beautiful carving on a badly chosen pumpkin is always an uphill battle — and the right pumpkin makes every step that follows easier and more enjoyable.
What to look for:
- A flat front face — the carving surface should be as smooth and flat as possible. A deeply curved or heavily ribbed surface makes cutting straight lines difficult and creates uneven glowing.
- Consistent wall thickness — press gently on different areas of the pumpkin’s surface. You want relatively even thickness throughout. Very thin patches will be fragile; very thick ones will require significantly more effort to cut through.
- A stable base — your pumpkin needs to sit flat and still without wobbling. A wobbling pumpkin during carving is both frustrating and potentially dangerous.
- Good stem — a firm, intact stem is a sign of freshness and gives you something to hold during carving.
- No soft spots or blemishes on the carving side — check the front face carefully. Soft or damaged areas will compromise the structural integrity of your cut pieces.
Size guidance: a medium pumpkin — roughly the size of a large melon — is the sweet spot for beginners. Large enough to carve comfortably, not so large that removing the interior takes the entire afternoon.
Tools and What Each One Does

You don’t need a specialist carving kit — though they’re inexpensive and useful. Here’s what each tool does and what you can substitute:
- Large sharp knife — for cutting the lid only. A chef’s knife works perfectly. Do not use this for the face cuts.
- Small serrated carving saw — the tool that does most of the work. The serrated edge grips the pumpkin flesh and cuts more controllably than a straight blade. Cheap plastic-handled sets from any supermarket in October are completely adequate.
- Large metal spoon or ice cream scoop — for gutting. The scraping edge of an ice cream scoop is faster than a spoon.
- Marker pen — for drawing your design on the pumpkin surface before cutting. Marker wipes off cleanly with a damp cloth, so mistakes don’t matter.
- Tea light or LED candle — for lighting. LED is strongly recommended over a real flame for safety, especially with children involved.
- Petroleum jelly — applied to all cut edges after carving to slow dehydration and extend your pumpkin’s life significantly.
Cutting the Lid and Gutting the Pumpkin
This is the preparation stage — and how well you do it determines how cleanly everything else goes.
Cutting the lid:
- Draw a circle or hexagon around the stem with your marker — roughly 12–15cm in diameter
- Angle your knife inward toward the center of the pumpkin as you cut, not straight down. This angled cut creates a ledge so the lid rests on the pumpkin walls rather than falling through.
- Cut slowly and steadily, keeping the angle consistent all the way around
- Twist the lid gently to break the final connection and lift out
Gutting:
- Pull out the large fibrous strands by hand first — they come out much faster than scraping
- Use your scoop or spoon to scrape the interior walls clean
- Scrape the inside of your carving area thinner — where you’ll be cutting the face, scrape the inner wall down to about 2–3cm thickness. Thinner walls require less force and produce cleaner cuts.
- Save the seeds if you want to roast them — they’re genuinely delicious with olive oil and salt

Designing Your Face
Here’s the secret to a jack-o’-lantern with real personality: exaggeration. Every feature should be slightly bigger, slightly more extreme than feels natural. Eyes that feel too large look just right when glowing. A smile that seems too wide is perfect at dusk.
The classic beginner face elements:
- Eyes — triangles are classic, but circles and ovals glow more warmly. Elongated ovals with a small triangle pupil cut out look surprisingly sophisticated with minimal effort.
- Nose — a small central triangle. Optional but fills the face visually and adds balance.
- Mouth — the personality carrier. The width should span at least the width between the outer edges of the eyes for proper proportion.
Mouth styles and their personalities:
- Classic gap-toothed grin — alternating rectangular teeth cut from a curved smile line. Friendly, iconic, impossible to get wrong.
- Jagged snarl — uneven pointed teeth, wider spacing. More menacing but still approachable.
- Wide open O — an oval or rounded rectangle with no teeth. Surprised, comic, perfect for children.
- Crooked smile — one corner higher than the other. Gives an instant, lopsided charm that plain symmetrical mouths never have.
Drawing it before you cut:
Use your marker to draw the complete face on the pumpkin surface before making a single cut. Step back and look at it. Adjust anything that feels off — the marker wipes away completely with a damp cloth. Only cut once you’re genuinely happy with the drawing.
Cutting the Face

The cutting stage rewards patience far more than speed. Rushing is where cuts go off-line and pieces crack.
Cutting technique:
- Use your small serrated saw with short, back-and-forth strokes rather than long pushing motions
- Let the saw do the work — don’t force or push hard
- Follow the outside edge of your drawn line so the marker disappears with the cut-out piece
- Cut corners carefully — at the sharp corners of triangles and teeth, pull the saw out, reposition, and cut from the new angle rather than trying to turn the blade mid-cut
- Don’t push cut pieces inward — they can crack the surrounding pumpkin. Cut each piece fully free and push gently from outside to pop it out.
If a piece cracks or a tooth breaks off, attach it back with a toothpick pushed through from the back. This fix is almost invisible once the pumpkin is lit.
Lighting and Extending the Life
Place your light source inside and replace the lid. An LED tea light on a small piece of foil reflects light upward into the features beautifully.
To extend your pumpkin’s carved life:
- Coat every cut edge generously with petroleum jelly immediately after carving — this seals the exposed flesh and dramatically slows moisture loss
- Store indoors or in shade during the day and bring out for evenings only
- A light misting of water on the exterior each day helps maintain freshness
- A carved pumpkin in cool conditions can last one to two weeks — in warm weather, more like five to seven days
Light It Up and Step Back
Carry it to the porch. Put the light inside. Step back to the pavement in the gathering dark and see what you made.
Save this guide for next October — and try a slightly more ambitious face each year. The only direction from a great first jack-o’-lantern is toward an even better second one. Share it with someone who thinks carving is too complicated. It never was.