Skip to content

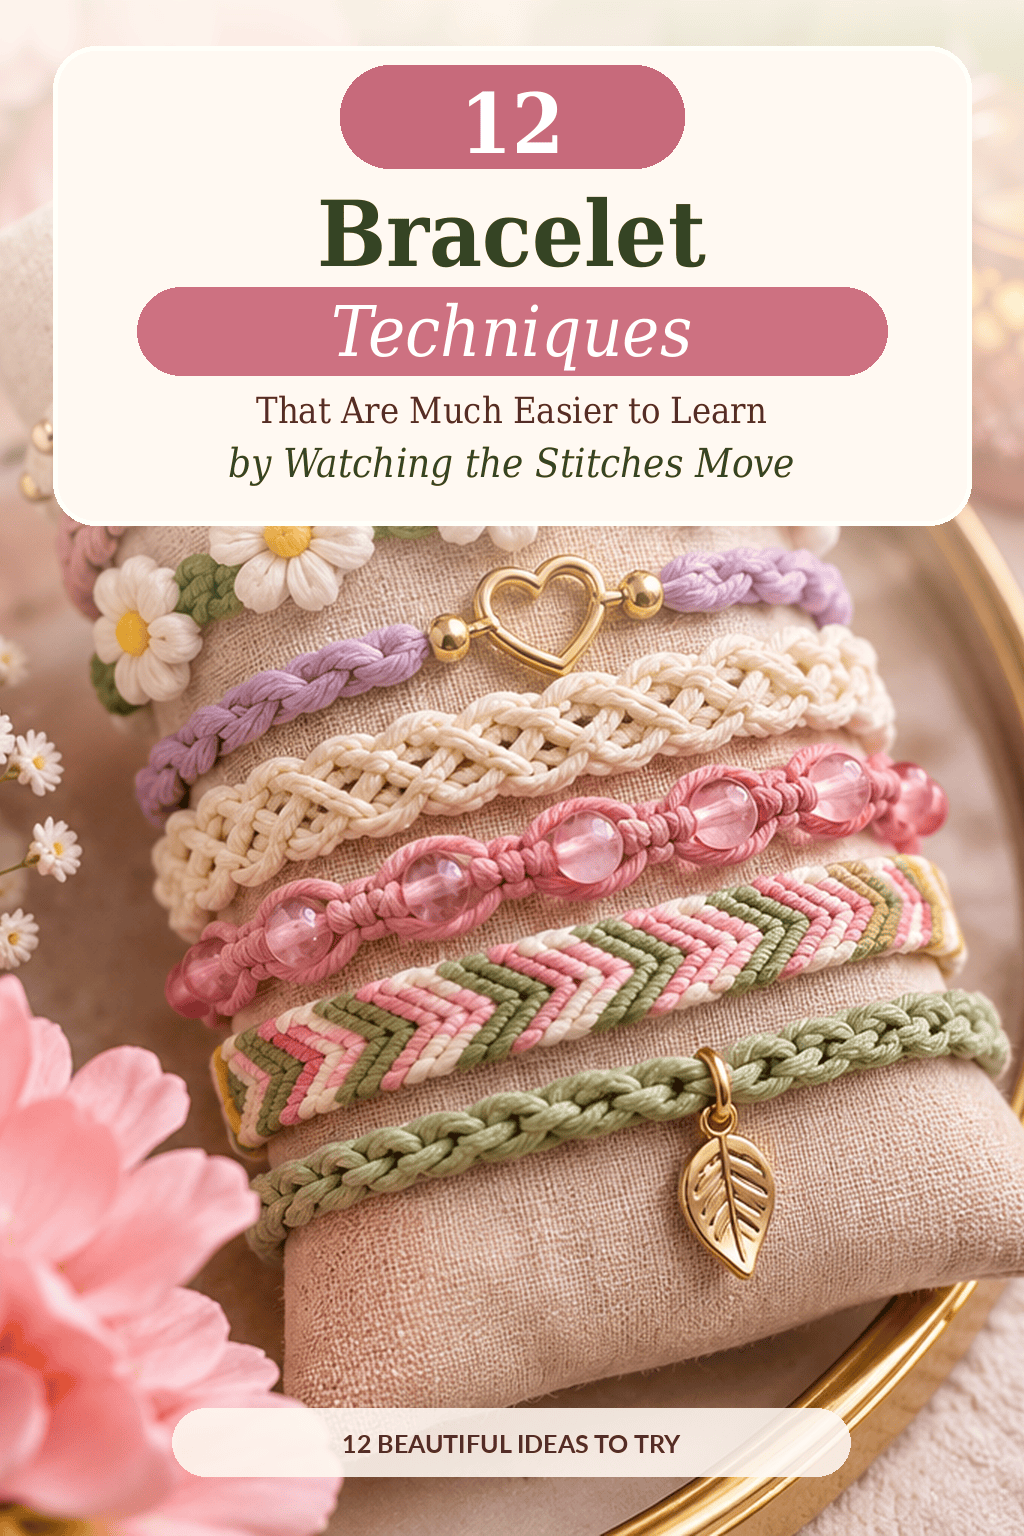

Some bracelet skills make more sense when you see the thread move. A knot that looks confusing on paper clicks once you watch it form, row by row. If you are searching for easy bracelet making techniques for beginners, this list gives you 20 styles to try. Each one starts with cheap supplies like floss, cord, beads, and clay. Each one takes less than an hour to finish. You will find knotted, braided, beaded, and woven bracelets. Pick one technique, find a short video to follow, and keep your hands moving along with it.
1. Basic Friendship Bracelet
The friendship bracelet is the classic starter. It uses one knot, repeated again and again.
Cut six strands of embroidery floss, each about 30 inches long. Use two strands each of three colors. Tie them together at the top with an overhand knot. Tape the knot to a table or pin it to a pillow.
Lay the strands in the order you want. Take the left strand and make a forward knot over the next one. That means looping it over and under the strand, twice. Pull it snug. Repeat across the row.

Start each new row with the left strand again. Watch the diagonal stripes appear. That is the pattern forming.
Keep tension even. Tight knots shrink the bracelet. Loose knots look sloppy.
Stop when the piece wraps your wrist. Tie off the end and braid the tails for a closing strap.
Save money by buying a multi-color floss pack. A bag of fifty skeins costs about the same as a coffee.
Watch a slow video the first time. Pause after each knot and copy it.
2. Three-Strand Braid Bracelet
A braid is the easiest bracelet you can make. If you can braid hair, you already know it.
Cut three cords, each about 24 inches. Use leather cord, waxed cotton, or floss. Knot them together at one end and tape the knot to a table.
Take the right strand and cross it over the middle one. Take the left strand and cross it over the new middle. Keep going, right over, left over. Watch each strand swap places.

Pull each cross snug. A flat, even braid looks neat.
Stop when the braid fits your wrist with a little room. Tie off the end.
Add a sliding knot to make it adjustable. Tie two overhand knots with the tails so they slide over each other. Trim the extra.
Save money by using shoelaces or yarn from your craft drawer. Both braid well.
Make a set in three color groups. Wear them stacked on one wrist for a layered look.
Try a bead in the middle by threading it onto the center cord before you start.
3. Chevron Pattern Bracelet
Chevron is a V-shaped pattern that looks tricky but follows a simple rule. You knot from the outside in, then switch sides.
Cut eight strands of floss, 30 inches each. Arrange them in a mirror order, such as A B C D D C B A. Knot them together at the top and secure the knot.
Start with the left outer strand. Make forward knots over each strand until you reach the center. Do the same from the right side, using backward knots. Meet the two center strands and tie them together.

Watch the V form at the center. Each new row grows the point.
The center knot is the trickiest step. Slow down there and pause the video if needed.
Keep colors in order. If the V looks off, you likely swapped two strands.
Save money by using leftover floss from other projects. Short strands work for chevron once you tie them in.
Practice with two colors first. Four colors can wait until the third try.
Finish with a braid or a sliding knot for an adjustable fit.
4. Diamond Pattern Bracelet
A diamond bracelet builds on chevron. You make the V, then flip it, and the shapes close into diamonds.
Cut eight to ten strands, each about 32 inches. Set them in a mirror order, with the same color on both sides. Knot and tape the top.

Make a chevron V for the first half of the diamond. Then reverse the knots. Use backward knots on the left and forward knots on the right. The strands now move outward again. Where two colors meet, the V closes into a diamond.
Count rows as you go. A good diamond takes about eight rows to finish.
Watch your colors. Each strand travels across the bracelet, and the pattern depends on its path.
Pull each knot snug but not too tight. Tight knots make the diamond narrow.
Save money by using two colors instead of five. A bold pair looks sharp.
Repeat the diamond three or four times along the bracelet. End with a braid or a bead.
5. Spiral Knot Bracelet
A spiral bracelet twists on its own as you knot. You use one knot and watch the coil appear.
Cut two cords, one about 40 inches and one about 20 inches. Use two colors for contrast. Fold the long cord in half over a clip or a loop, with the short cord in the middle. These center cords act as a core.

Make a half knot with the outside cords around the core. That means one cord goes over, the other goes under, and you pull tight. Repeat the same knot every time and never flip it.
Watch the spiral form. The piece twists around itself with each knot.
Keep tension steady. Uneven pulls make the spiral look lumpy.
Stop when you reach your wrist size. Tie off the end and trim.
Save money by using waxed cotton cord from a craft store. A spool makes many bracelets.
Add a small bead at the end for a closing loop. Slide it over the first knot to fasten.
Try thicker cord for a bold look.
6. Square Knot Cord Bracelet
The square knot is a macrame basic. It is flat, strong, and quick to learn by watching.
Cut two outer cords, each about 36 inches, and one center cord about 12 inches. Fold the outer cords in half over the center and tie them to a clip or a bead.
Make the first half. Cross the left cord over the center, then place the right cord over the left and under the center. Pull both cords to tighten. Now do the reverse. Cross the right cord over the center, then the left cord over the right and under the center. Pull tight.

Watch the square form. Two half knots make one full knot.
Repeat the pair of half knots until the bracelet is long enough. The knots sit flat and even.
Save money by using jute twine or cotton cord. Both cost little.
Add small beads on the center cord as you go. Slide them up and cover them with the next knots.
Finish with a sliding knot so the bracelet adjusts to any wrist.
7. Slip Knot Bead Bracelet
A sliding knot lets one bracelet fit any wrist. The knot looks tricky until you see it slide.
Cut a piece of waxed cord about 20 inches long. Thread on a few beads and leave plenty of cord at each end. Bring the two ends together so the cord forms a loop around your wrist.
Cross the right tail over the left tail. Wrap it around the left tail three times, then pass it through the loop you made. Pull tight. Do the same with the other tail on the opposite side.

Now tug the tails apart. Watch the knots slide along the cord and tighten the bracelet. Pull the bracelet open to loosen it.
Trim the tails and add a small bead at each end to stop them from slipping out.
Save money by using seed beads and wooden beads from a bulk bag. A pack costs a few dollars.
Mix a few clay beads into your set. Roll small balls, poke holes, bake, and paint.
Make three in matching colors for a stack.
8. Elastic Bead Stretch Bracelet
A stretch bracelet needs no clasp and no knots beyond one. It is the fastest bracelet on this list.
Cut elastic cord about 10 inches long. Thread on beads in the pattern you like. Try two small beads, one large bead, and repeat. Check the length against your wrist, leaving a little slack.
Tie a surgeon’s knot. Cross one end over the other twice, then pull tight. Repeat once more. Pull the knot snug and trim the tails, leaving about a quarter inch.

Add a dot of clear glue to the knot. Let it dry for a day. Tuck the knot inside a bead with a large hole to hide it.
Watch the elastic stretch as you tie. Pulling it firmly helps the knot hold.
Save money by buying bead mixes in a single bag. A mix often costs less than single colors.
Make your own clay beads from scrap clay. Roll, poke a hole, dry, and paint.
Make a stack of three in different colors. Wear them together for a layered look.
9. Loom Band Style Bracelet
A loom bracelet is colorful and easy to see as it grows. Each band loops over another in a chain.
Buy a small pack of rubber bands and a plastic hook tool. You do not need a loom for a simple chain. Place a band on your fingers, twist it once into a figure eight, and slip it over two fingers.

Add a second band on top. Pull the bottom loop over the top of your fingers. Repeat with a new band each time. Watch the chain grow link by link.
Keep the count steady. About fifteen to twenty links fits most wrists.
Fasten the ends with a plastic clip that comes in the pack.
Use two or three colors in a repeating order. Pink, white, and blue look sweet together.
Save money by buying a bag of mixed bands. A bag lasts many bracelets.
Try the fishtail pattern after the chain. It uses a two-pin setup and gives a flat braid look. Watch it move once and the loops make sense.
10. Hemp Cord Bracelet With a Clay Charm
Hemp cord has a natural look that suits a handmade charm. It is also very cheap.
Make a clay charm first. Roll a small ball of air-dry or polymer clay. Flatten it into a disk or a small heart. Poke two holes with a toothpick. Let it dry or bake it. Paint it if you want color.
Cut two lengths of hemp cord, each about 20 inches. Thread both cords through the charm holes. Center the charm.

Tie square knots on each side of the charm. Watch the knots hold the charm in place. Repeat on both sides until the bracelet fits your wrist.
Finish with a sliding knot so the bracelet can adjust.
Trim the tails and add a drop of glue on each knot.
Save money by buying a spool of hemp cord. A spool costs a few dollars and makes many bracelets.
Press a tiny pattern into the charm before it dries. A leaf, a dot, or a line works well.
Make matching charms for a friend. Each pair makes a nice small gift.
11. Woven Bracelet With a Cardboard Loom
Weaving a bracelet is slow to describe and quick to learn by watching. A cardboard loom costs nothing.
Cut a small rectangle of cardboard, about two by five inches. Cut tiny notches along the short ends, spaced a quarter inch apart. Wrap yarn or floss around the cardboard, hooking each strand into a notch. These strands are the warp.

Thread a needle with a second color. Weave it over and under each warp strand. At the end of the row, turn around and weave back in the opposite pattern. Watch the weft strand lock into place.
Push each row down with a comb or a fork. This keeps the weave tight and neat.
Keep going until the strip is long enough for your wrist. Cut the warp strands and tie them in pairs at each end.
Add a button and loop or a pair of cords to fasten it.
Save money by using cereal box cardboard for the loom. It works as well as store-bought ones.
Try stripes by switching colors every few rows. Stripes show the weave pattern clearly.
12. Wire and Bead Cuff
A wire cuff is a good change from thread. You bend and shape it with your hands.
Buy craft wire, about 20 gauge, in gold or silver. Cut a piece about 14 inches long. Use wire cutters and wear safety glasses. Thread on small beads in a pattern you like. Leave a few inches empty at each end.
Wrap the wire around a marker or a bottle to curve it into a cuff shape. Watch the coil form as you turn it.

Bend a small loop at each end with round-nose pliers, or use a pencil if you have no pliers. Press the loops flat so they do not scratch your skin.
Slip the cuff over your wrist and squeeze it gently to fit.
Save money by buying a starter pack of wire and beads from a craft store. A pack makes several cuffs.
Make a set of three thin cuffs in different colors. Wear them stacked.
Keep sharp ends away from the face and skin. File them smooth with a nail file if needed.
Add a clay bead for a handmade touch.
Conclusion
Bracelet making gets easier once you watch the knots take shape. Friendship bracelets, braids, beads, weaves, and wire cuffs each teach one new move, and every project here costs little and finishes fast. Start with a three-strand braid or a basic friendship bracelet. Find a short video, pause after each step, and copy what you see. Keep a small box of floss, cord, and beads so you can start any time. Add a new technique each week and build a stack you made yourself. Pick your first style today and start tying.