Skip to content

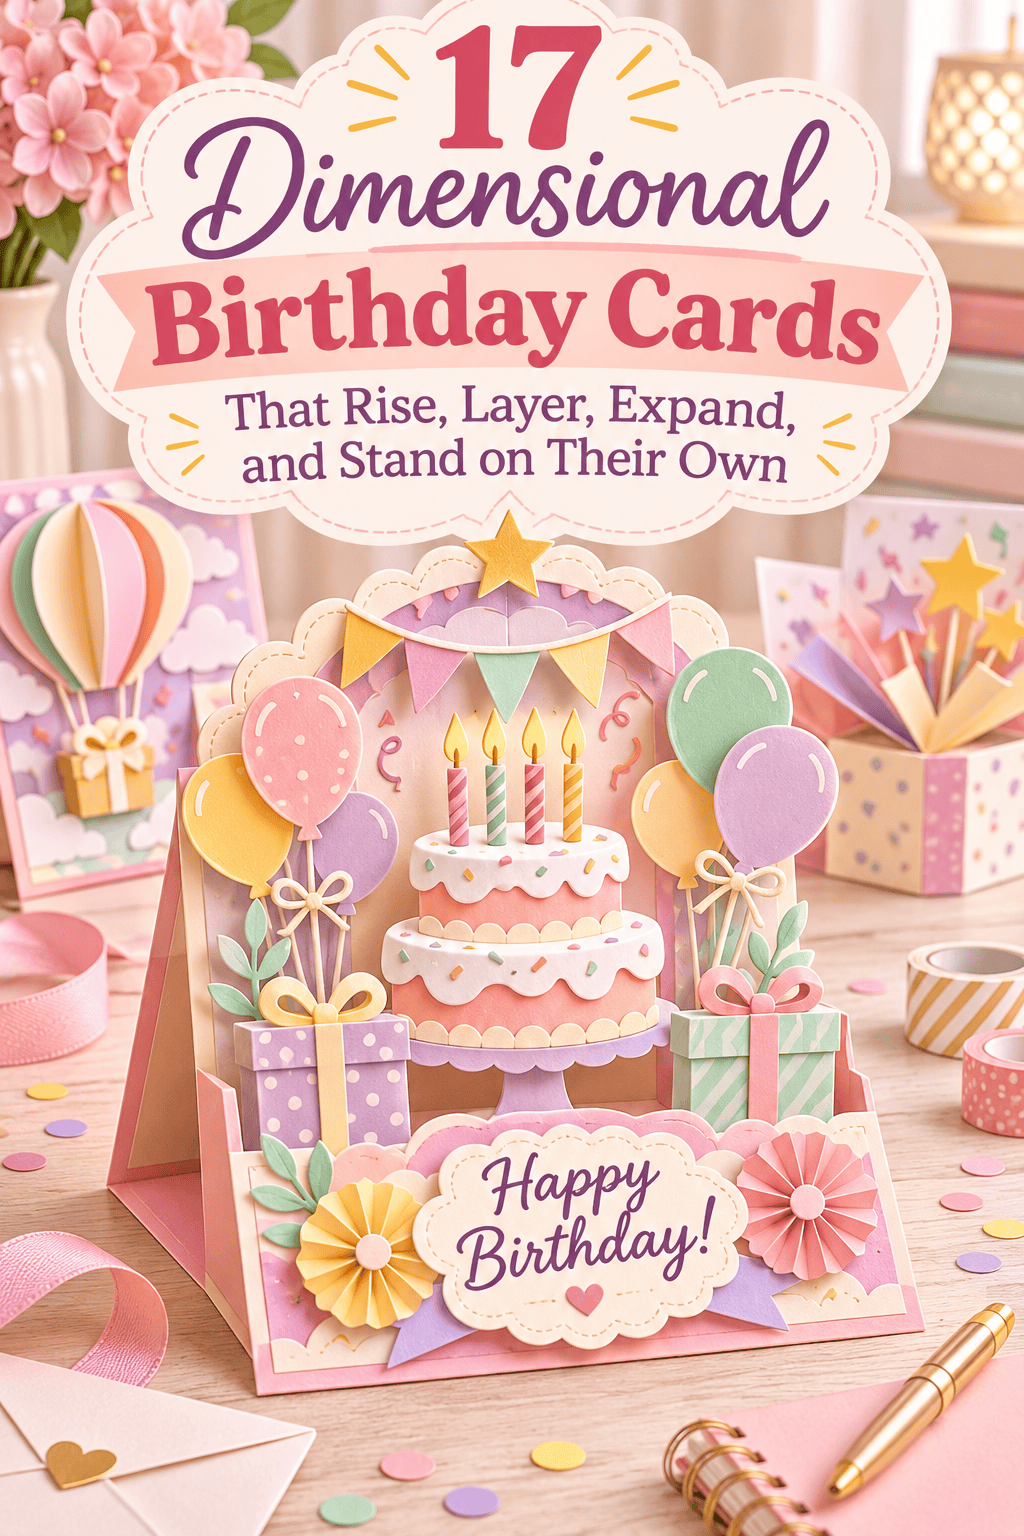

A flat birthday card is nice. A card that pops up, folds out, or stands on a shelf gets kept. Dimensional cards add depth with simple paper tricks, and you do not need fancy tools to make them. If you are searching for DIY pop-up birthday card ideas, this list gives you 20 designs to try. Each one uses cardstock, scissors, glue, and a few small extras like clay or ribbon. Each one finishes in under an hour. You will find cards that rise, layer, expand, and stand alone. Pick one, gather your supplies, and make a card someone will want to display.
1. Classic Pop-Up Cake Card
A pop-up cake is the best first dimensional card. It uses one fold and two cuts.
Fold a sheet of cardstock in half to make the card base. Fold a smaller strip of paper in half for the cake. Make it about three inches tall.
On the folded strip, mark a rectangle with a pencil. Cut two short slits on the fold side. Push the tab forward and crease it. Open the card and watch the tab pop out like a step.

Glue the strip to the inside of the card, lining the fold with the card spine. Check that it closes flat.
Decorate the cake with paper frosting, sprinkles from a hole punch, and tiny candles cut from scraps.
Save money by using cereal box cardboard for the cake and wrapping it in colored paper.
Make a small clay candle flame from a pea-sized scrap. Paint it yellow and glue it on top.
Test the pop-up before you glue anything. A tab that jams will tear the paper.
2. Layered Paper Balloon Card
Layers create depth without any cutting tricks. Balloons are simple shapes that look great stacked.
Cut five balloon shapes from colored cardstock. Use two or three colors. Cut a second, slightly smaller balloon for each one to use as a highlight.
Glue each small shape onto a larger one. Press foam tape or folded paper squares behind each balloon. This lifts the shape off the card and creates a shadow.

Arrange the balloons on the card front. Overlap a few for a full look. Vary the heights so they seem to float.
Add twine strings with tiny dots of glue. Let them curve and cross at the bottom.
Save money by using foam from old packaging in place of foam tape. Cut it into small squares.
Use paper scraps from other projects. Even small pieces make good highlights.
Keep the card flat enough to fit an envelope. Thick foam can make it too bulky to mail.
3. Accordion Fold Banner Card
An accordion card opens up and stretches across a table. It feels like a party in paper form.
Cut a long strip of cardstock, about four inches tall and 24 inches long. Fold it back and forth every four inches to make a zigzag. Press each crease with a ruler.
Cut two squares of cardstock slightly larger than one panel. Glue one on the first panel and one on the last. These form the front and back covers.

Decorate each panel with a simple design. Try a cake, a balloon, a star, and a gift box. Keep each drawing bold and flat.
Stand the card open on a shelf or desk. The folds hold it upright.
Save money by using kraft paper or a brown paper bag for the strip. Press it flat with an iron on low heat.
Add a ribbon tie around the closed card. Slip it off to reveal the zigzag.
Write a short message on the last panel. Use a fine pen and keep it simple.
4. Pull-Tab Surprise Card
A pull tab adds motion. The reader pulls a strip, and something slides into view.
Cut a long strip of cardstock, about one inch wide and six inches long. This is the tab. Cut two thin slits in the card front, one inch apart and about three inches long. The slits form a track.
Slide the strip through the slits from behind. Glue a small paper shape to the end of the strip on the front side. A gift box, balloon, or star works well. Stop the strip from slipping out by gluing a small paper block on the back end.

Decorate the card front around the track.
Test the pull. If the tab sticks, trim the strip a little or widen the slits.
Save money by using old greeting cards for the strip and shapes. Cut them up and reuse the pieces.
Hide a short note under the shape. The surprise makes the card special.
Add a tiny clay charm to the end of the tab as a pull knob.
5. Shaker Card With Confetti
A shaker card has a window filled with loose confetti. The reader tilts it and the bits move.
Cut a round window in the front of a card. Use a circle cutter or trace a bottle cap and cut with scissors.
Cut a piece of clear plastic from packaging, a page protector, or a clear folder. Make it slightly larger than the window. Glue it over the window from the back.

Build a foam frame around the window on the inside. Use thick foam tape or stacked layers of cardstock. Leave the center open. This is the well that holds the confetti.
Pour in confetti made from a hole punch and scrap paper. Add tiny beads or mini clay stars.
Peel the backing and press a second piece of cardstock over the frame. Seal the edges.
Save money by using a hole punch on old magazines. You get free colorful dots.
Keep the amount small. Too much confetti stops the shaking.
6. Easel Standing Card
An easel card stands on its own, so it works as a desk display. It looks like a tiny framed picture.
Cut a sheet of cardstock to eight by five inches. Fold it about one inch from the left edge to make a narrow flap. This flap is the easel back.
Score a second fold at the middle of the large panel. Open the card and fold the narrow flap inward. The card now forms a triangle that stands up.

Decorate the front panel with watercolor, collage, or paper layers. Keep the design inside the area that faces forward.
Glue a small piece of paper on the back of the front panel to hide the fold marks.
Test the stand on a flat table. Adjust the fold if the card leans.
Save money by painting with a cheap watercolor set or leftover craft paint.
Add a small clay figure at the base. A tiny pinch-pot cake or a mini star stays in place with a dab of glue.
Write a message on the back panel.
7. Box Card With a Hidden Gift Space
A box card holds a small gift. It is a card and a package in one.
Cut a square of cardstock about eight inches wide. Mark a line one third of the way in from each edge to form a grid of nine squares. Cut along the lines from each corner to the center square on two opposite sides. Fold up the sides to form a box.

Glue the tabs to the walls. Make a lid from a second piece, cut slightly larger.
Decorate the lid with ribbon, paper flowers, or a bow. Keep the weight light.
Tuck a tiny gift inside. Good options are a clay charm, a gift card, or a wrapped candy.
Save money by cutting boxes from cereal packaging. Cover it with decorative paper.
Add a note on the inside of the lid.
Test the lid so it closes without squashing the gift. Keep the contents under a half inch tall for easy mailing.
8. Fold-Out Staircase Card
A staircase card opens to a rising set of steps. Each step holds a small design.
Cut four strips of cardstock, each two inches wide and eight inches long. Use two colors for contrast. Fold each strip in half.
Glue the strips together at the folds so each one sits above the last. Overlap each strip by half an inch. When you open the card, the steps rise.

Test the fold. The card should close flat and stand up when opened.
Decorate each step with a small picture. A balloon, a gift, a candle, and a star tell a story as the card rises.
Glue the base to a larger card front. Add a ribbon to keep it closed.
Save money by using gift wrap scraps or old magazine pages for each step.
Keep the images small. Big shapes can bend the steps.
Write a short line on each step, one word at a time. Together they read like a birthday message.
9. Pop-Out Balloon Bouquet Card
A bouquet of balloons that stands up from a card is easy to make. It looks fancy but uses one slit trick.
Fold a card base from cardstock. Cut balloon shapes from colorful paper. Use three to five balloons in different colors.
Glue a thin paper strip to the back of each balloon as a stem. Make the strips different lengths, from three to six inches.

Cut a thin slit near the fold on the inside of the card. Slide the strips through, then tape them in place on the back. Open and close the card to test the motion.
The balloons should rise as you open the card.
Add a bow of ribbon where the strings meet.
Save money by cutting balloons from old paper bags or magazine pages.
Use a hole punch to make a shine mark on each balloon. Add it with a white pen.
Keep the strips stiff enough to stand. If they bend, add a second layer of paper.
10. Rotating Wheel Card
A spinning wheel invites the reader to play. It is easy to make with a brad.
Cut a circle of cardstock about four inches wide. Divide it into four equal parts with a pencil. Draw a simple picture in each part. A cake, a balloon, a gift, and a star work well.
Cut a window in the card front about one inch wide and one inch tall. Place the wheel behind the window. Poke a hole through the center of the wheel and the card.

Push a brass fastener or a small brad through the hole. Bend the legs flat on the back. The wheel should spin freely.
Turn the wheel and check that each picture lines up with the window.
Save money by using a paper clip and a dab of glue if you have no brads.
Decorate the card front around the window with stickers or stamps.
Add a tiny clay dot on the edge of the wheel to use as a handle. Glue it down and let it dry.
11. 3D Flower Card
A paper flower adds soft shape to a card. A single bloom looks lovely and costs very little.
Cut five circles of cardstock in graduating sizes, from two inches to one inch. Cut petal shapes into each circle with scissors. Make eight petals each.
Curl each petal around a pencil. This gives the flower a rounded look.

Stack the layers from largest to smallest. Glue them together at the center with a drop of glue. Add a small clay bead or a button as the center.
Cut two leaf shapes from green cardstock. Glue them under the flower.
Attach the flower to the card front with foam dots to raise it.
Save money by using coffee filters or tissue paper in place of cardstock. Dye them with watercolor.
Make three small flowers and group them on the card front.
Keep the layers light so the card stays flat enough to mail.
12. Pop-Up Gift Box Card
A pop-up gift box gives a card a surprise. It rises from the fold in one clean move.
Fold a card base from cardstock. Cut a rectangle of paper about three inches wide and two inches tall. Fold it in half.
Mark a square on the folded rectangle. Cut two slits and push the center forward. Crease the fold.

Glue the rectangle to the inside of the card, lining it with the spine. The box now pops forward when you open the card.
Wrap the box with bright paper and glue a ribbon on top. Add a tiny paper bow or a clay flower.
Close the card slowly and check that the box folds flat.
Save money by using gift wrap scraps for the wrapping.
Keep the box small, about two inches wide. A large box can jam the fold.
Add a short message under the box. The surprise makes the card feel special.
13. Window Peek-Through Card
A window card lets the reader peek at the scene inside. The layers add depth and mystery.
Cut a window in the card front. Try a circle, a heart, or a star. Use a craft knife or small scissors. Cut an even shape.
Decorate the inside of the card with a small scene. A cake, a bunch of balloons, or a party hat looks cute. Make sure the scene lines up behind the window.

Add a frame around the window with a strip of paper or a scalloped edge. Glue it on.
Close the card and check the view. The scene should sit in the center.
Save money by using scrap paper for the frame and the scene.
Layer two or three paper pieces behind the window with foam tape. This gives the scene depth.
Add a short message on the back of the card.
Use a hole punch to make tiny stars and sprinkle them inside for a party look.
14. Hanging Banner Standing Card
A tiny banner draped across a card adds a party feel. It also lets you add color in small bites.
Fold a card base that opens like a tent. Cut tiny triangles from colorful paper. Make about seven triangles, each one inch wide.
Cut a length of twine, about eight inches. Lay the triangles on the twine and glue each one over it. Space them an inch apart.

Attach each end of the twine to the card with a small piece of tape. Let the twine sag in a gentle curve.
Stand the card on a table. The banner hangs in front.
Save money by using scrapbook paper or old magazine pages. Cut triangles with scissors.
Write a message in tiny letters on each triangle if you want a spelled-out greeting.
Add a clay star at each end of the banner. Roll tiny balls, press flat, and paint gold.
Make the card slightly smaller than a standard envelope if you plan to mail it.
15. Rolled Paper Quilling Card
Quilling means rolling thin strips of paper into coils. The shapes stand up from the card and look lovely.
Cut thin strips of colored paper, about a quarter inch wide. Roll a strip around a toothpick or a needle. Release it and let the coil relax. Glue the end.
Pinch the coil into a petal, a teardrop, or a leaf. Try a few shapes.

Arrange five teardrops in a circle to form a flower. Glue them in place on the card. Add a small coil in the center.
Add leaves and stems with thin green strips.
Keep the glue small. A tiny dot holds each piece.
Save money by cutting strips from printer paper or old magazines. Cut a stack at a time.
Use a toothpick in place of a quilling tool. It works just as well.
Practice a few coils on scrap paper first. After a few tries, your hands remember the roll.
16. Cupcake Pop-Up Card
A cupcake pops out of a card like a treat. It works for any age.
Fold a card base. Cut a cupcake wrapper from patterned paper and a frosting swirl from pink cardstock. Add a small red circle for a cherry.
Glue the frosting on top of the wrapper. Press a small piece of foam tape behind the cherry to raise it.

Cut a pop-up tab from a folded strip of cardstock. Use the same tab trick as the cake card. Glue the cupcake to the front of the tab.
Glue the tab inside the card along the fold. Test the pop.
Decorate the card with a few sprinkles cut from paper scraps.
Save money by using cupcake liners for the wrapper. Press them flat and glue them.
Add a clay candle on top. Roll a tiny log, paint it, and attach a bit of orange paper for the flame.
Make a pair of cupcakes in different colors for a bigger display.
17. Fold-Flat Star Burst Card
A starburst opens like a firework. It folds flat for the mail and expands once the card is open.
Cut eight strips of cardstock, each about one inch wide and six inches long. Use two colors for contrast. Fold each strip in half and glue the two ends together to make a loop.
Pinch each loop into a teardrop shape and glue four together at the base to make a flower-like star. Repeat with the other four. Stack the two stars with a small rotation so the points do not line up.

Glue the star onto a small paper circle. Attach the circle to the center of the card inside.
Close the card. The star folds flat. Open it and watch the points spring up.
Save money by using gift wrap scraps for the loops.
Add a button or a clay bead in the center. Glue it down and let it dry.
Test the fold before you glue the star down. If the points catch, trim them slightly.
Conclusion
A dimensional card turns a quick note into a gift. Pop-ups, layers, pull tabs, and standing designs each add a small surprise, and every idea here uses cardstock, glue, and cheap extras you probably own. Start with a pop-up cake or a layered balloon card. Gather your paper, set aside an hour, and make one card before you start another. Keep a small box of scraps so you can make a card any time a birthday comes up. Pick your first design today and start folding.