 Skip to content

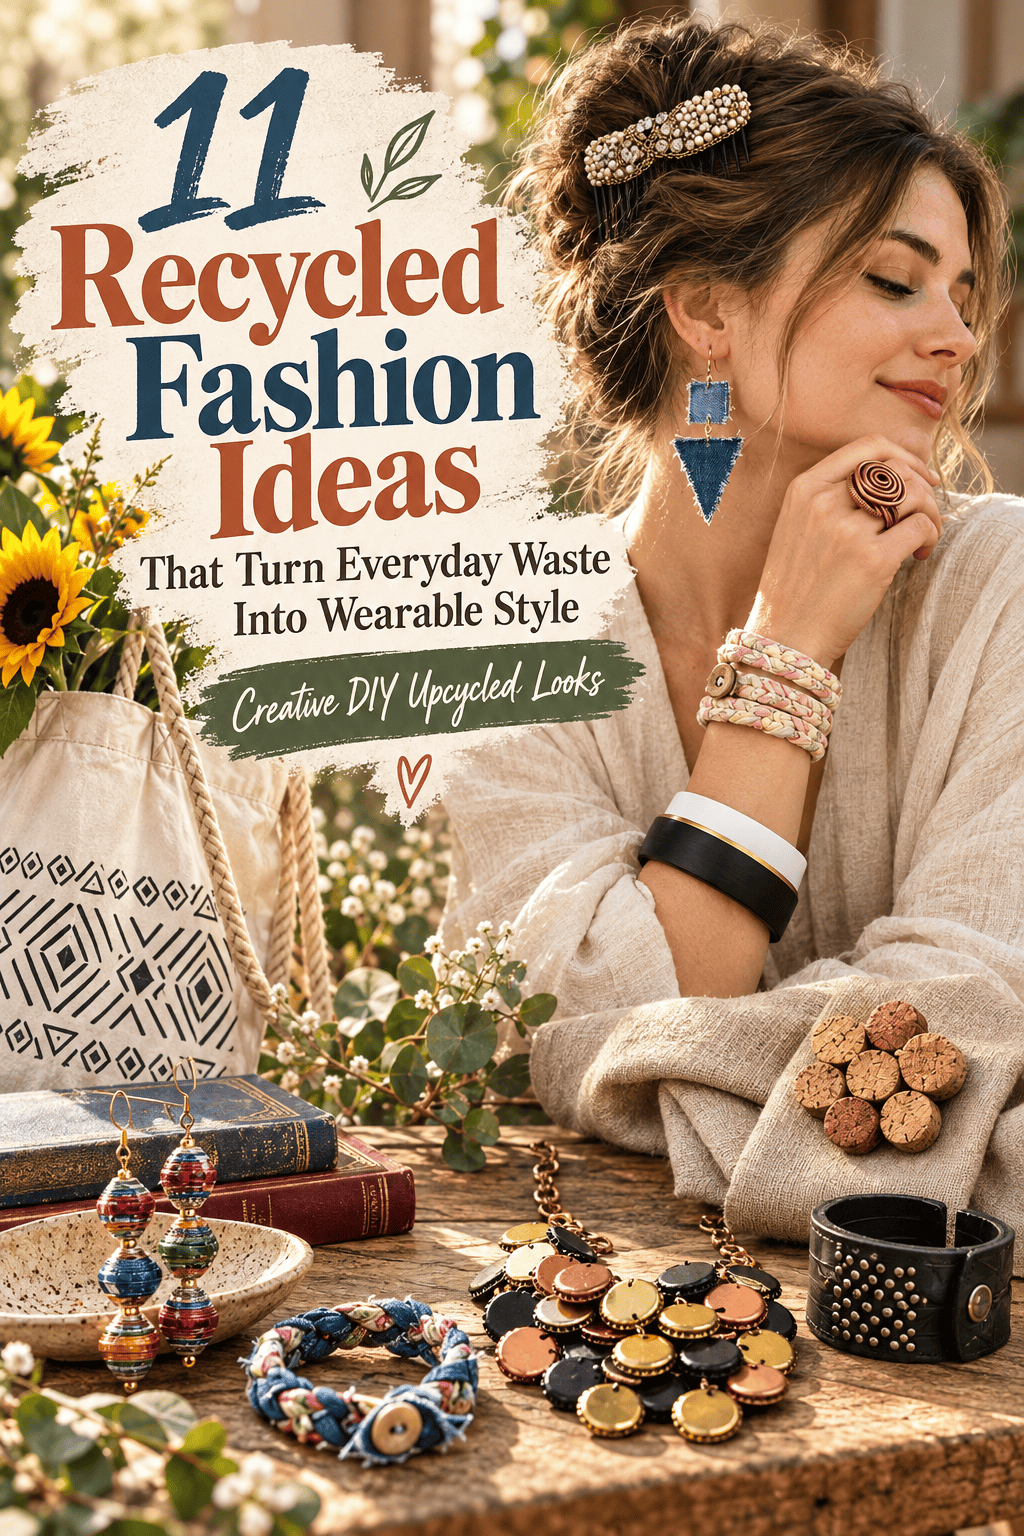

Throwing away old clothes, broken jewelry, and packaging materials is so automatic that most people never stop to consider what those materials could become. Recycled fashion turns that habit around — it looks at a worn-out denim jacket, a pile of bottle caps, or a stack of old magazines and asks what they could be instead of where they should go. The results are not craft projects that look apologetically homemade. Done well, recycled fashion produces wearable accessories and clothing pieces that look intentional, considered, and genuinely stylish. This guide covers 11 practical recycled fashion ideas — each one achievable at home, affordable to make, and wearable enough to carry into any social setting with confidence.
1. Bottle Cap Statement Necklace
Bottle caps are everywhere — and once flattened and painted, they become bold metal discs with genuine jewelry presence.
Collect metal bottle caps from beer or sparkling water bottles. Place each cap face-down on a hard surface and flatten with a hammer. The flattening opens the cap into a rough disc shape.

Punch a small hole through the top of each disc using a nail and hammer. This is your threading hole — position it close to the edge but not so close the hole tears through with wear.
Paint caps in a deliberate palette. Two or three colors — gold, copper, and matte black — create a cohesive collection rather than a random assortment.
Thread onto thick black cord or thin chain in your chosen color sequence. Alternate colors for rhythm.
Add a jewelry clasp at each end.
Budget Tip
Bottle caps cost nothing from your recycling bin. A small pack of jewelry clasps and a meter of cord costs under two dollars. The whole necklace takes about 30 minutes to make. These sell well at sustainable craft markets because the material story is immediately apparent and genuinely interesting to buyers.
2. Rolled Magazine Paper Earrings
Magazine paper bead earrings are lightweight, colorful, and made from material most households discard every week.
Cut long thin triangles from colorful magazine pages — about 30cm long and 2cm wide at the base. Look for pages with bold color photography or graphic design for the most vivid results.

Roll each triangle tightly from the wide base end around a thin skewer or toothpick. Keep the paper centered as you roll. Apply a small amount of glue to the final point to secure the bead end.
Slide the finished bead off the skewer once dry. Each bead is a tapered barrel shape with a hollow threading center.
Seal each bead with two coats of clear varnish or decoupage glue. The sealing step gives the paper a lacquered, glass-like surface and makes it water resistant.
Thread onto thin gold wire with a small loop at the bottom. Attach to ear hooks.
Budget Tip
Magazines are free from recycling bins or neighbors. Ear hooks cost a few cents each in bulk packs at craft stores. Different magazine sections produce completely different color palettes — fashion spreads give vivid mixed tones, nature pages produce earthy botanical tones. Sort your triangles by color before rolling to make coordinated sets.
3. Bicycle Inner Tube Cuff Bracelet
Old bicycle inner tubes are free, flexible, and have a naturally matte black industrial quality that suits streetwear and edgy fashion aesthetics without any modification to the material itself.
Ask your local bike repair shop for old punctured tubes — they generate them constantly and almost always give them away.
Cut a section of inner tube to your desired bracelet width — 4cm gives a substantial cuff. Cut along the length of the tube to open it into a flat strap.

Trim both long edges cleanly with sharp scissors. Even, straight edges are what separate a considered cuff from something that looks unfinished.
Press small metal studs through the rubber surface in a geometric pattern along the center. The rubber grips the stud posts naturally without glue.
Press a metal snap fastener through both ends to close the cuff.
Budget Tip
Inner tube rubber is consistently free from bike shops. Metal studs and snap fasteners cost very little from craft and leather supply stores. The industrial raw material paired with deliberate geometric studding reads as intentional fashion rather than recycled craft — the combination of found material and added hardware is what sells the aesthetic.
4. Hardcover Book Clutch Bag
A hardcover book with the pages removed is structurally a small rigid case — the right size, the right shape, and already finished on the exterior.
Choose a hardcover book with a cover worth carrying — vintage novel covers with typography, illustrated reference books, and books with bold spine designs all make visually strong clutches.

Remove the pages by running a sharp craft knife along the inner spine on both sides. The hard cover remains intact as the bag shell.
Line the interior with a piece of fabric cut to size and adhered with fabric glue or iron-on interfacing. The lining covers the raw interior and makes the bag feel finished.
Add a magnetic snap closure to the top edge — one half on the front cover inside edge, one half on the back cover inside edge.
Budget Tip
Old hardcover books from thrift stores cost under one dollar. Lining fabric comes from scrap material. Magnetic snaps cost a few cents each. The book title and cover become the bag’s statement — choose deliberately. A first edition paperback cover or a book with an iconic illustration makes a clutch that immediately communicates who the carrier is.
5. Wine Cork Rosette Brooch
Wine corks sliced and arranged into a flower shape make a brooch that looks like a piece of natural material jewelry — the circular cross-section grain of each cork does all the visual work.
Collect wine corks from your own kitchen or ask at restaurants. Cut each cork into discs about 5mm thick using a sharp craft knife or small serrated knife.

Arrange seven discs in a flower pattern — one in the center, six arranged closely around the outside edge touching the center disc.
Glue together with strong craft adhesive. Let cure completely before handling.
Sand the front face lightly with fine sandpaper for an even surface. Seal with one coat of matte varnish.
Glue a metal brooch pin to the back using epoxy adhesive.
Budget Tip
Wine corks are free from your own recycling or from bars and restaurants that collect them in large quantities. A single cork produces multiple slices — one cork makes components for several brooches. Brooch pin backs cost a few cents each. The cork rosette brooch suits linen and cotton clothing particularly well where the natural material language of cork reads as intentional.
6. Upcycled Pillowcase Tote Bag
A plain cotton pillowcase becomes a washable, sturdy tote bag with minimal sewing — the existing fabric tube structure does most of the construction work.
Take a standard cotton pillowcase. Fold the open end over twice and sew a straight stitch across the fold to seal the bag opening and create a clean top edge.

Cut two lengths of thick cotton rope or ribbon at 60cm each for handles. Fold each in half to create a loop. Sew the fold point firmly to the inside of the bag at each upper corner with reinforced stitching — handles take the most stress and need secure attachment.
Decorate the outside with fabric stamps, bleach pattern work, or fabric paint before or after construction.
Budget Tip
Thrift store pillowcases cost under one dollar. Cotton rope from hardware stores is affordable per meter. White cotton pillowcases are the most useful base because they take fabric paint, bleach, and stamped patterns equally well. A stamped geometric design in black fabric ink on a white pillowcase bag looks designed and intentional from a distance — which is exactly what makes it wearable.
7. Denim Scrap Drop Earrings
Old denim jeans contain enough fabric for dozens of earrings — and the frayed edge aesthetic that used to be a craft flaw is now a fashion detail in its own right.
Cut small geometric shapes from old denim — squares, triangles, and irregular quadrilaterals all work as earring forms. Cut from different areas of the jeans to capture the natural fade variation across the fabric.

Stiffen each shape with fabric stiffener or diluted PVA glue. Once fully dry, the denim holds its geometric shape without flopping and handles like a semi-rigid material.
Leave the cut edges to fray naturally for two or three days before stiffening — the fraying creates a soft textural border around each shape.
Punch a small hole through the top of each shape. Attach a jump ring and ear hook.
Budget Tip
Thrift store denim jeans cost very little and provide enough fabric for 20 or more earring pairs. The entire material cost per pair is essentially zero. Denim earrings in simple geometric shapes suit casual and contemporary fashion styles and are consistently popular with buyers who wear denim in their everyday wardrobe — a very large potential market.
8. Salvaged Copper Wire Ring
Copper wire stripped from old electrical cables or broken appliance cords has a warm metallic quality that makes genuinely beautiful handmade rings — and the raw material costs nothing.
Strip the plastic coating from old electrical wire using wire strippers or a sharp knife. The copper wire inside varies by cable type — thicker cables contain better wire for rings and bangles.

Wrap the copper wire tightly and repeatedly around a cylindrical mandrel — a thick marker pen, a dowel, or a lipstick tube of the right diameter. Wrap 6–8 times for a substantial band.
Trim the wire ends cleanly. Tuck them under the band using flat-nose pliers so no sharp ends are exposed.
Build a raised ring face by coiling extra wire over the band center — a tight circular spiral pressed flat creates a clean focal point.
Budget Tip
Old electrical cables from broken appliances or building waste are free. Pliers are the only tool needed. Copper oxidizes naturally over time into a deeper, darker warm tone — some wearers prefer the aged patina. Apply a thin coat of clear nail polish over the finished ring to slow oxidation and maintain the bright copper finish for longer.
9. PVC Pipe Color-Block Bangle
A short section of PVC plumbing pipe is already a perfect circular bangle shape — the clean geometry and smooth surface make it look like designed product rather than found material.
Cut a section of PVC pipe to your desired bangle width — 3cm for a slim bangle, 5cm for a statement cuff. Use a pipe cutter for the cleanest, squarest cut.

Sand both cut edges smooth progressing from coarse to fine grit sandpaper. Rough pipe edges will scratch the wrist in wear — smooth edges are non-negotiable for a comfortable bangle.
Apply painter’s tape across the center of the pipe to create a clean dividing line. Spray paint one half in your first color. Let dry. Flip and spray the other half in the second color.
Remove the tape to reveal the sharp color-block division. Add a thin gold line along the division using a fine brush and gold acrylic.
Seal with gloss lacquer.
Budget Tip
Short PVC pipe sections are free from plumbing supply off-cuts and hardware store scrap bins — ask for pieces before buying. Spray paint gives the most even finish at very low cost. Different pipe diameters produce different bangle sizes — measure your hand span against the pipe’s internal diameter before cutting to confirm wearability.
10. Fabric Scrap Wrap Bracelet
Fabric strips too small for any other sewing project are exactly the right size for a wrap bracelet — three strips braided together and wrapped multiple times around the wrist.
Cut three strips from old clothing or fabric scraps — each about 1cm wide and 80cm long. Different fabric types in the same color family work well together — a cotton strip, a jersey strip, and a lightweight denim strip produce a braid with varied texture.

Knot the three strips together at one end and braid firmly to the other. Keep tension consistent throughout — uneven tension produces a braid that does not lie flat when wrapped.
Wrap the finished braid two or three times around the wrist. Sew a small button to one end. Cut a small buttonhole loop from the same fabric at the other end. The button and loop closes the bracelet after wrapping.
Trim all loose thread ends.
Budget Tip
Fabric scraps too small for sewing projects are completely free from any making session. A small button costs almost nothing. Three strips of 80cm each — an amount too small for any other use — makes a complete bracelet. Make a coordinated set from the same piece of clothing fabric for a matched triple wrap set that suits stacking on the wrist.
11. Broken Jewelry Mosaic Hair Comb
Broken necklaces, single earrings without their pair, and damaged brooches all contain beautiful individual components — rhinestones, pearl beads, chain sections, and decorative charms — that combine into a decorated hair comb.
Collect broken and unwearable jewelry pieces. Disassemble them carefully into individual components — remove stones from settings with a small flat tool, separate chain links, cut away broken clasps.

Arrange components across the top bar of a plain wide-tooth hair comb before gluing anything. Move pieces around until you have a composition that reads well — mix sizes, balance colors, and create depth by layering smaller pieces over larger ones.
Once satisfied with the layout, glue each piece firmly with two-part epoxy adhesive. Work from the center outward.
Let cure for a full 24 hours before wearing.
Budget Tip
Broken costume jewelry from thrift stores is often sold in bags for almost nothing because the pieces are unwearable individually. One bag of broken necklaces provides enough components for three or four decorated combs. The individual rhinestones and pearls that cost almost nothing combined into a designed composition look like vintage-inspired bridal accessories that retail at a significant price in boutique accessory shops.
Conclusion
Recycled fashion is not a compromise — it is a choice about where materials come from and what happens to them afterward. The 11 ideas in this guide use materials that are already in most homes right now — old jeans, broken jewelry, wine corks, bicycle inner tubes, and magazine pages — and show exactly what those materials can become with a little skill and intention. None of these projects require expensive equipment or advanced training. Most take under an hour. All of them produce something wearable, personal, and genuinely different from anything available in a shop. Start with the material you have the most of right now. Make one piece this week and wear it. The satisfaction of wearing something you made from something that was headed for the bin is immediate and genuine — and once you feel it, looking at everyday waste as raw material for something beautiful becomes a permanent change in how you see the things around you.



