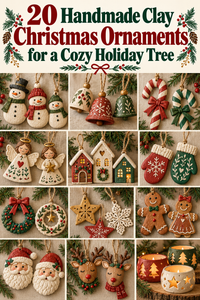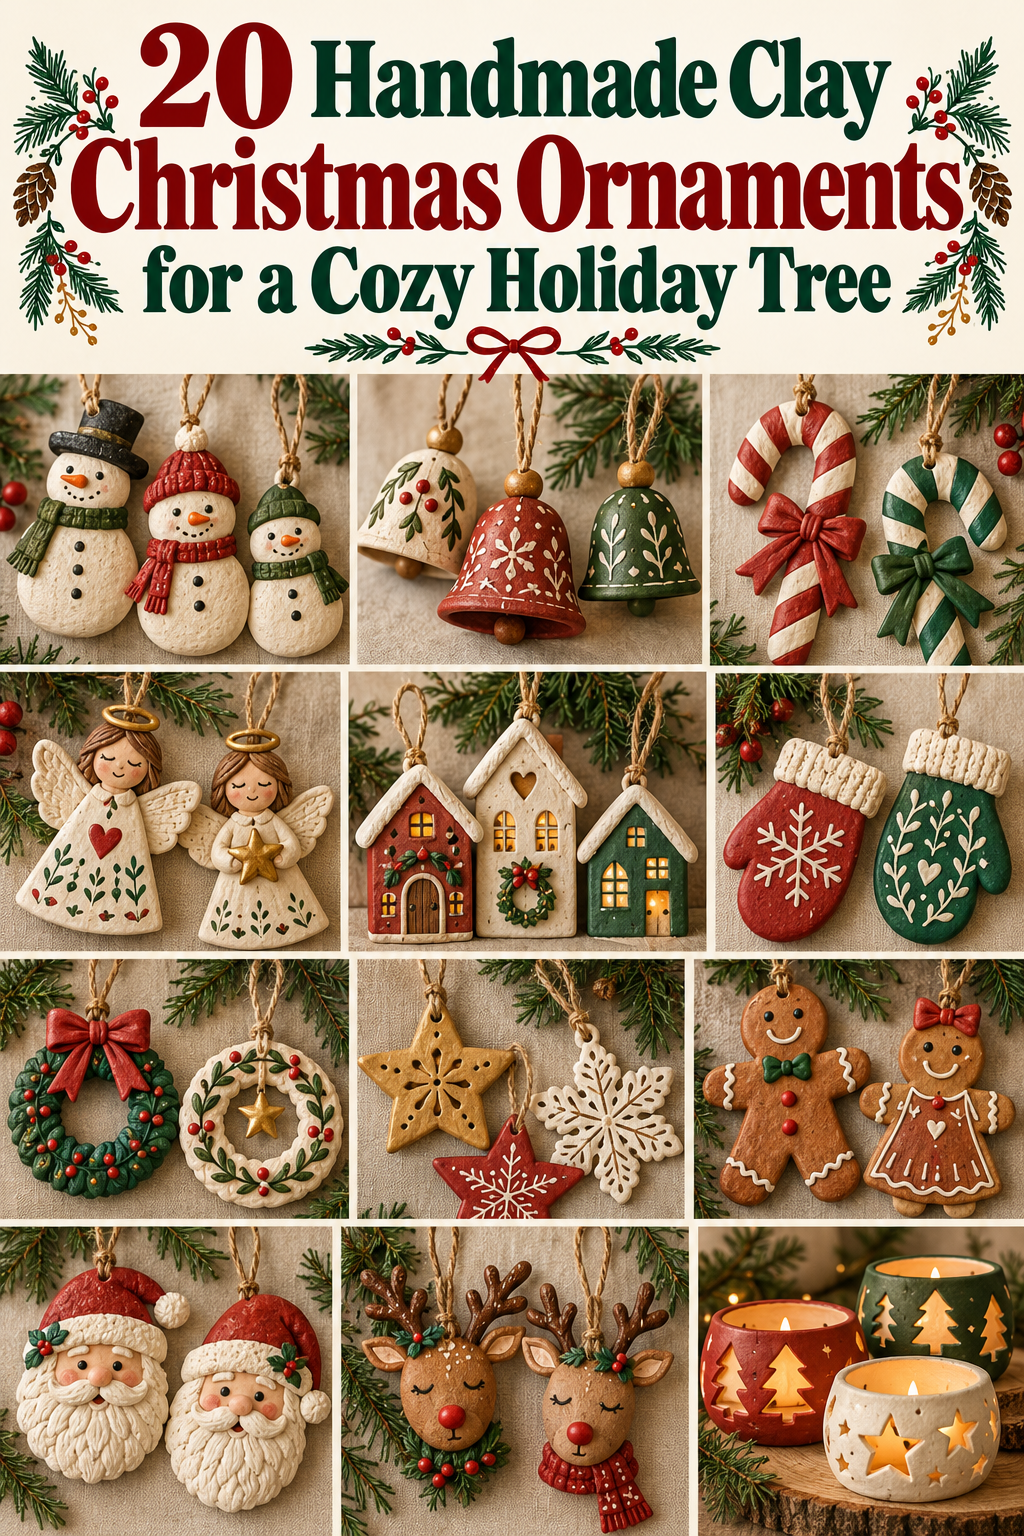

There is something genuinely special about hanging ornaments on a Christmas tree that you made yourself. Handmade clay Christmas ornaments carry warmth, personality, and memories that no store-bought decoration can replicate. They can be shaped around your family’s style, personalized with names and dates, and passed down for years. Whether you use polymer clay, air-dry clay, or salt dough, the process is approachable and affordable. This guide walks you through 25 creative clay ornament designs — each one practical enough to make at home, beautiful enough to display proudly, and budget-friendly enough to make in batches for gifting.

1. Classic White Snowflake Ornament
Snowflakes are one of the most iconic Christmas ornament shapes — and they’re simpler to make than they look.
Roll a flat white clay slab about 4mm thick. Use a snowflake cutter if you have one. If not, cut a six-pointed star shape and add thin clay strips radiating from each point using a needle tool or thin log of clay.
Press fine line details into each arm of the snowflake using a needle tool. Work from the center outward. Even simple straight lines create a realistic snowflake effect.
Press a hanging hole through one point before baking or drying. Use a toothpick or straw to make a clean circular hole.
Once baked and cooled, dust lightly with fine silver glitter while the surface is still slightly warm from baking. The residual warmth helps glitter adhere without extra glue.
Thread with a thin red or white ribbon.
Budget Tip
White polymer clay is one of the least expensive colors available. Snowflake cutters are sold in holiday baking sets at most supermarkets for just a few dollars — and they work perfectly on clay.
A full set of a dozen snowflake ornaments costs very little to make and looks stunning grouped together on a tree.
2. Salt Dough Textured Star Ornaments
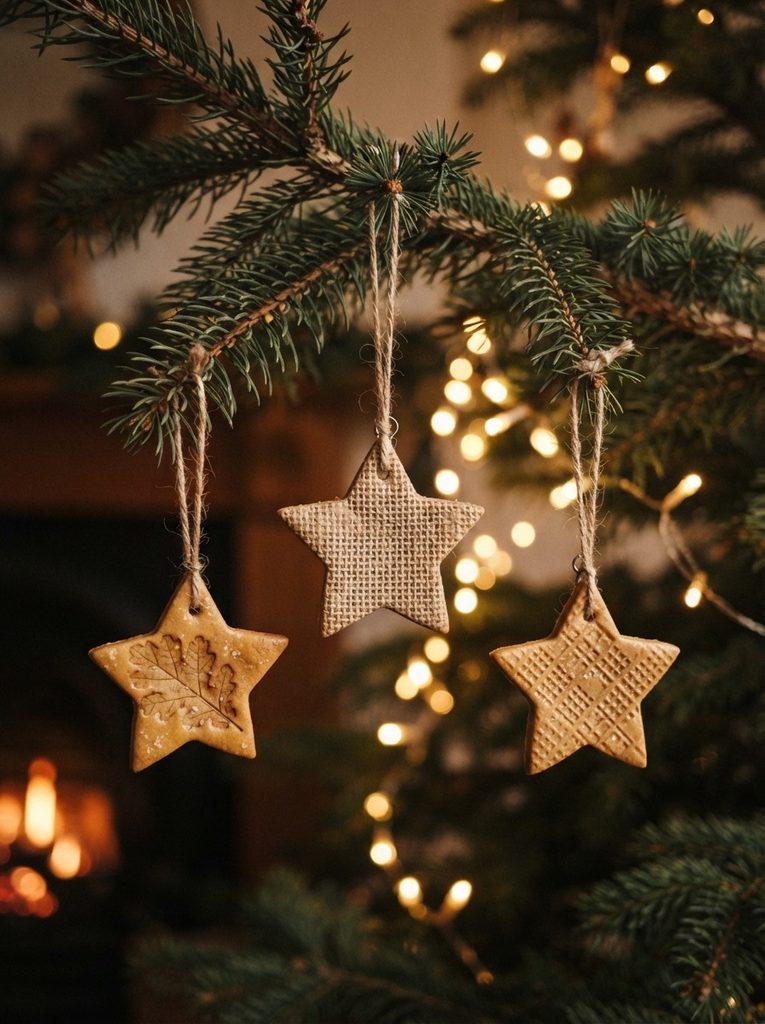
Salt dough stars are a Christmas tradition for good reason — they’re made from pantry staples and last for years.
Mix one cup flour, half a cup salt, and half a cup water. Knead until smooth and pliable. Roll to about 8mm thickness. Cut star shapes with a cookie cutter.
Press different textures into each star before baking. Fabric, leaves, old lace, and mesh all transfer interesting patterns into the surface. Each star becomes one-of-a-kind.
Press a hanging hole through one point using a straw. Bake at 200°F (95°C) for two to three hours until completely hard.
Once cooled, paint in warm golden tones. Dry-brush a lighter gold or cream over the raised texture to make it stand out.
Thread with natural twine or jute rope for a rustic look.
Budget Tip
Salt dough costs almost nothing — flour, salt, and water are already in your kitchen. A full batch makes 20 or more ornaments. These are the most affordable Christmas ornaments on this list by a significant margin.
They make wonderful handmade gifts tucked into Christmas cards or wrapped in kraft paper with a sprig of rosemary.
3. Mini Christmas Tree Ornament
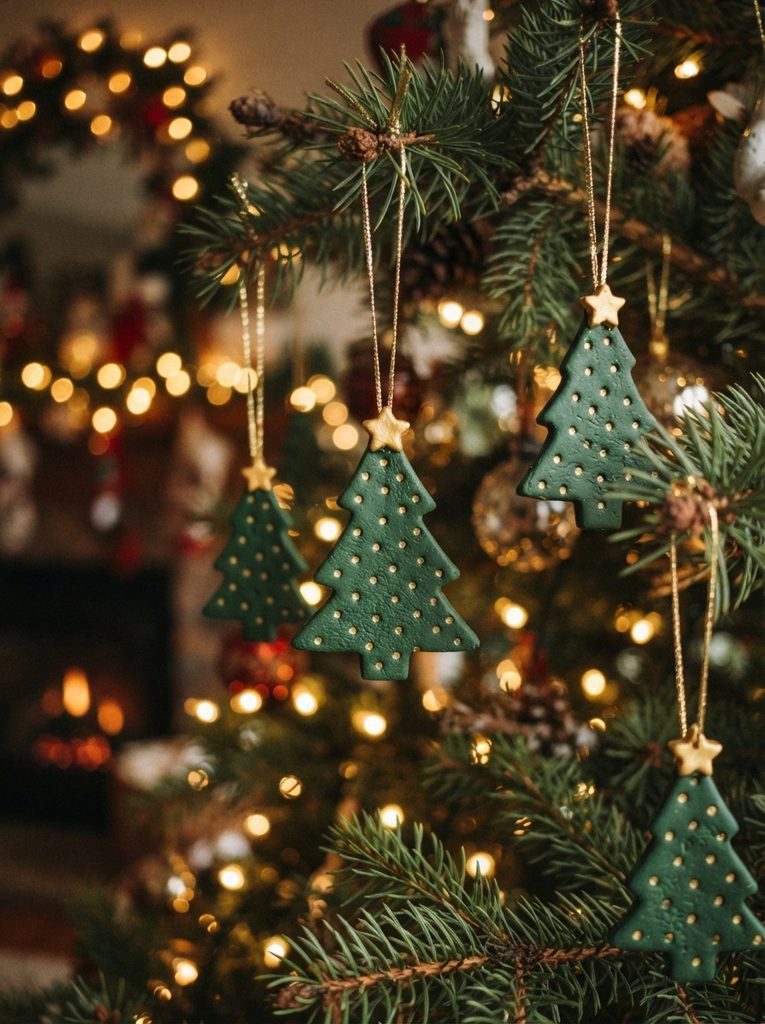
A clay ornament shaped like a miniature Christmas tree is a sweet, self-referential decoration that works on any holiday tree.
Cut a triangle from a flat green clay slab. Layer two or three increasingly wider triangle tiers to suggest branches. Add a small rectangle at the base as the trunk.
Use a needle tool to press short diagonal lines across each tier — these suggest individual branch layers.
Press tiny dot indentations across the surface using a ball stylus. These become gold dot decorations when painted.
Add a small five-point star to the very tip. A tiny flat star shape pinched from yellow clay and pressed on before baking looks wonderful once painted gold.
Press a hanging hole through the star at the top.
Bake and cool. Paint the body in forest green and dry-brush lighter green highlights over the branch lines. Paint the dots and star tip gold.
Budget Tip
Green clay is a standard color in nearly every polymer clay starter pack. This ornament uses very little material per piece and bakes quickly given its thin profile.
Make a set of different sized tree ornaments — small, medium, and large — and hang them in a cluster on the tree for a layered effect.
4. Pressed Botanical Bauble
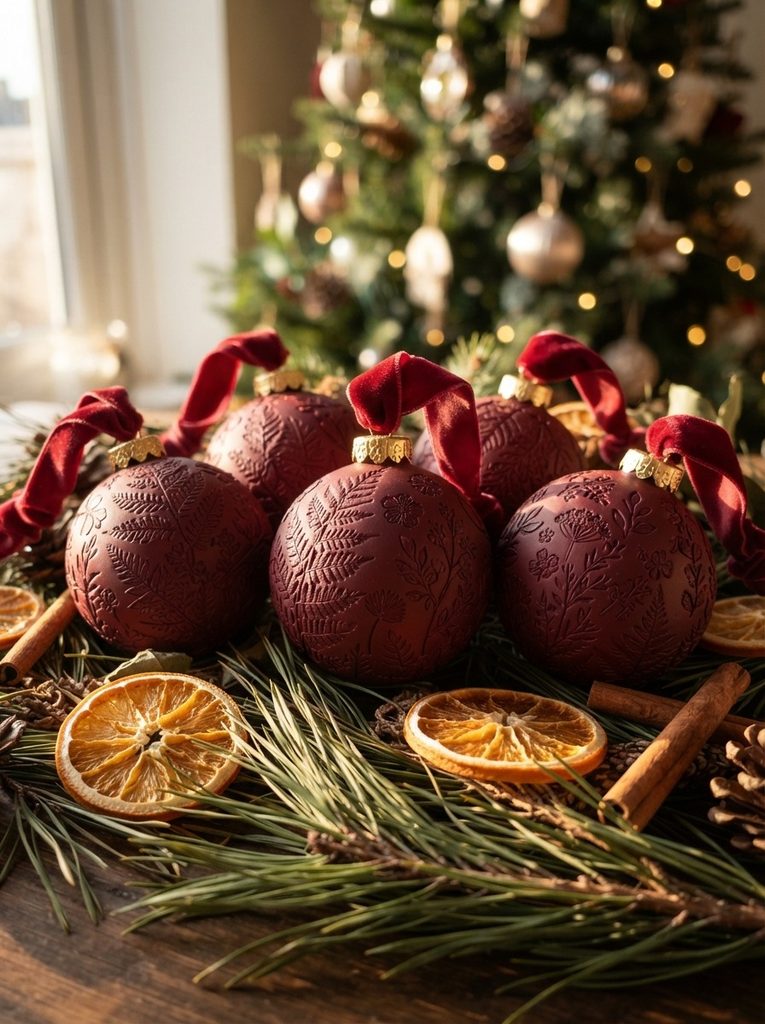
Round baubles with botanical impressions look like high-end ceramic decorations — but they’re made at home with clay and real plants.
Roll clay into a smooth ball. Flatten the bottom very slightly so it sits stable while you work on it.
Press a real leaf, fern, or small flower firmly into the surface. Roll lightly to press the full texture in. Peel the plant away carefully.
Work around the full surface, pressing botanical impressions in a wrapping pattern. Overlap slightly for a full-coverage botanical design.
Press a hanging hole through the top using a straw before baking. Push the straw through cleanly and remove it.
Bake. Once cooled, paint in deep burgundy, forest green, or midnight blue. Dry-brush gold paint lightly over the raised botanical impressions to highlight the texture.
Add a small gold bead cap at the top and thread with velvet ribbon.
Budget Tip
Plant material from your garden is completely free. One clay ball uses minimal material. Deep jewel-tone paint colors make inexpensive clay look like expensive ceramic.
These ornaments are so beautiful they consistently look more costly than they are — a real advantage if you plan to give them as gifts.

5. Gingerbread Man Ornament
A clay gingerbread man is a charming, universally loved Christmas ornament that suits any tree style.
Roll brown-toned clay into a flat slab. Use a gingerbread man cookie cutter to cut the shape. If you don’t have one, cut freehand — a round head, rectangular body, two arm stubs, and two leg stubs.
Add white clay details directly onto the surface while the clay is still unbaked. Roll tiny white logs for the icing trim outline. Press small white balls for buttons. Curve a thin white strip for the smile.
Pressing white details into unbaked clay fuses them permanently during baking. No glue required.
Add two small dot eyes and a tiny bow tie using colored clay.
Press a hanging hole through the top of the head.
Bake. Once cooled, add any extra painted details with a fine brush.
Budget Tip
Brown clay can be mixed from orange and black or leftover clay scraps — you don’t need to buy a dedicated brown. Gingerbread men use very little clay per piece. Make a set of six with variations — different bow ties, button colors, or expressions — for a playful matched set.

6. Hand-Painted Vintage Bauble
A smooth clay ball painted with hand-painted botanical motifs mimics the look of antique glass ornaments beautifully.
Roll polymer clay into a very smooth, even ball. Take your time smoothing — any surface irregularities will show through paint.
Bake the smooth ball. Once cooled, apply a white or cream base coat of acrylic paint. Let dry fully.
Using a fine brush, paint simple botanical motifs — holly leaves, berries, small stars, and thin curved lines. Keep the motifs simple and spaced evenly around the ornament’s surface.
You don’t need to be a skilled painter. Simple leaf shapes, small dots for berries, and thin branch lines are all the design requires. The vintage aesthetic actually suits slightly imperfect brushwork.
Paint in red, gold, and forest green for a traditional palette. Add gold dot accents between motifs.
Seal with a gentle gloss varnish. Add a gold bead cap and wire hanger.
Budget Tip
One set of fine brushes, red and green acrylic paint, and gold paint covers this entire project. These materials cost very little and can be used across many other ornament designs in this list.
7. Marbled Gold and Navy Star
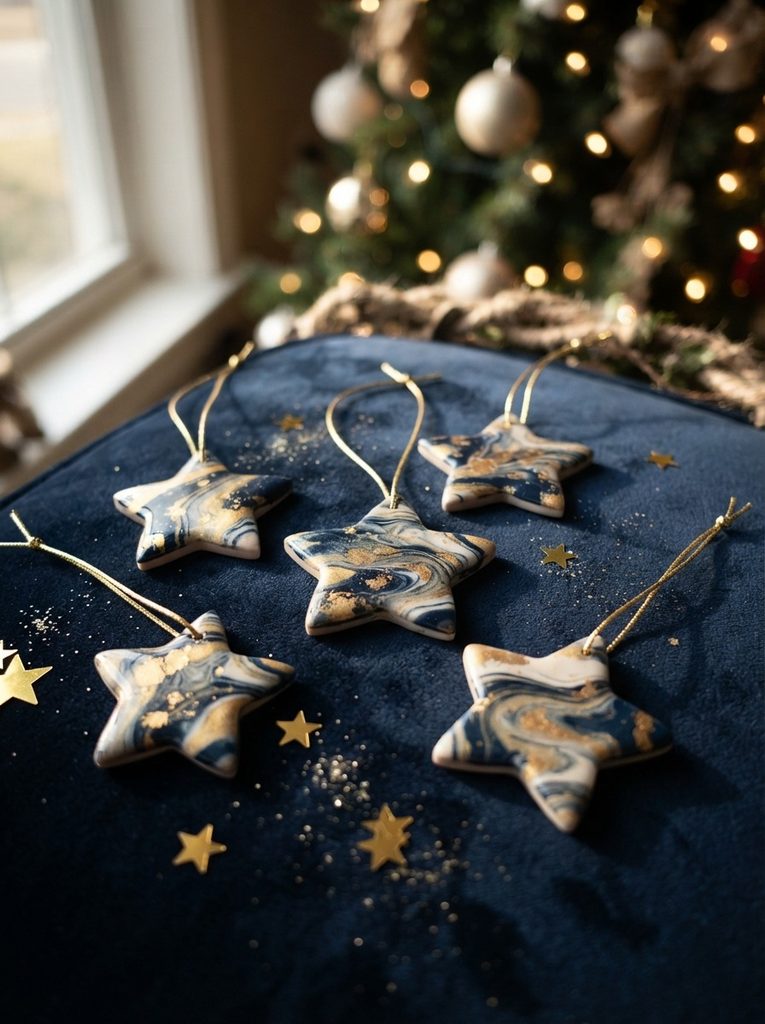
Marbled clay stars have a luxurious, modern look that suits contemporary Christmas tree styles perfectly.
Take navy blue and gold clay. Roll each into a log. Twist them together loosely. Fold once. Stop before the colors fully merge — the distinct swirl pattern is what makes marbled clay so striking.
Roll flat and cut a five-pointed star shape. The marbled pattern will be different on every star you cut — each one completely unique.
Smooth the edges lightly. Press a hanging hole through one point.
Bake flat. Once cooled, seal with a gloss varnish to make the marble swirls look deep and vivid.
Thread with thin gold cord.
Budget Tip
Gold clay mixed into navy clay creates a rich, expensive-looking result from two affordable standard clay colors. Marbled ornaments always look higher-end than their material cost suggests. These are excellent ornaments to make for gifting — the visual impact is strong and the cost per piece is minimal.
Make a matching set of stars in different sizes — large, medium, and small — and hang them in a cluster for a dramatic tree decoration.

8. Simple Clay Angel Ornament
Angels are a classic Christmas ornament, and a simple clay version requires only basic shaping skills.
Roll a cone shape from white clay — this is the body. Add a small round head ball on top. Press two flattened teardrop shapes onto the back for wings.
Use a needle tool to press feather lines across the wings. Work from the base of each wing upward in short curved strokes.
Roll a very thin gold clay log and form it into a small circle above the head — the halo. Press it gently into position.
Add small facial details — two dot eyes and a curved smile — using a needle tool.
Press a hanging hole through the top of the halo or attach a wire loop through the back before baking.
Bake carefully. Angels have delicate parts — handle gently while still warm.
Once cooled, dry-brush pearl mica powder across the wings for a luminous finish.
Budget Tip
White clay is standard in every starter pack. The angel requires minimal clay — one small figure uses barely a tablespoon of material. Make a tree-full of angels from a single block of white clay. Add variety with different hair colors or wing sizes.

9. Nordic Folk Art Bird Ornament
Scandinavian-style folk art birds have a clean, graphic quality that suits both traditional and minimalist Christmas trees.
Cut a simple bird silhouette from flat clay — a teardrop-shaped body with a small triangular beak and a fan-shaped tail.
Flat profile ornaments are the easiest clay ornament shape to make consistently. There’s no three-dimensional shaping required — just clean cutting and surface decoration.
Once baked, paint a base coat in a single color — red, white, or deep blue. Let dry fully.
Paint geometric folk art patterns across the body using a fine brush — small triangles, zigzag lines, dot borders, and diamond shapes. Keep the pattern symmetrical.
Use two or three contrasting colors maximum. Scandinavian folk art gets its appeal from limited, bold color contrast.
Press a hanging hole near the top of the back before baking.
Budget Tip
Folk art bird ornaments use very little clay per piece given their flat profile. A full set of six birds in coordinating colors uses one small polymer clay pack. These ornaments look so striking that buyers at holiday markets consistently stop for them. They make excellent handmade Christmas gifts for anyone who appreciates Nordic design.

10. Terracotta Texture Sphere Ornament
Terracotta-toned ornaments with fabric and natural textures give a Christmas tree a warm, earthy, bohemian quality.
Roll clay balls and flatten the bottoms slightly for stability while working. Press different textures into each ball — linen fabric for a grid pattern, a real leaf for vein texture, a piece of rope pressed and rolled across the surface for a coil pattern.
Work quickly once a texture is pressed — the clay starts to firm up with handling heat and textures become harder to impress cleanly.
Use air-dry clay in natural cream tones, or mix polymer clay to a warm terracotta shade.
Press a hanging hole through the top. Dry or bake fully. No paint is needed — the natural clay color suits the earthy aesthetic perfectly.
Thread with thick natural jute twine for a rustic look.
A coat of matte varnish seals and slightly deepens the natural clay color.
Budget Tip
Texture tools are free — fabric scraps, leaves, and rope from your home all work. Natural, uncolored clay in cream or terracotta tones needs no paint, which reduces material costs further. These ornaments suit a very specific aesthetic strongly, making them excellent sellers at artisan holiday markets.

11. Personalized Name Initial Stocking Ornament
A tiny clay stocking with a personalized initial in the cuff is one of the most meaningful ornaments you can make.
Cut a stocking shape from flat red clay — a foot shape with a straight upper edge. Press a strip of white clay along the top edge to create the cuff.
Press an initial letter into the white cuff while the clay is still soft. Use a letter stamp for a clean, sharp impression. Hand-engraving with a needle tool also works and has a more artisan quality.
Press a hanging hole through the top right corner of the cuff.
Bake. Once cooled, seal with a gloss varnish. The red clay looks deeper and more vivid under gloss.
Thread with thin gold cord or a small loop of red velvet ribbon.
Budget Tip
Letter stamps are an inexpensive one-time purchase that gets used across many projects. A full set of alphabet stamps covers every initial you’ll ever need for personalized ornaments, tiles, plaques, and more.
These stockings make the most personal tree ornament possible — every member of the family gets one with their initial. They also make beautiful gift tags attached to Christmas presents.
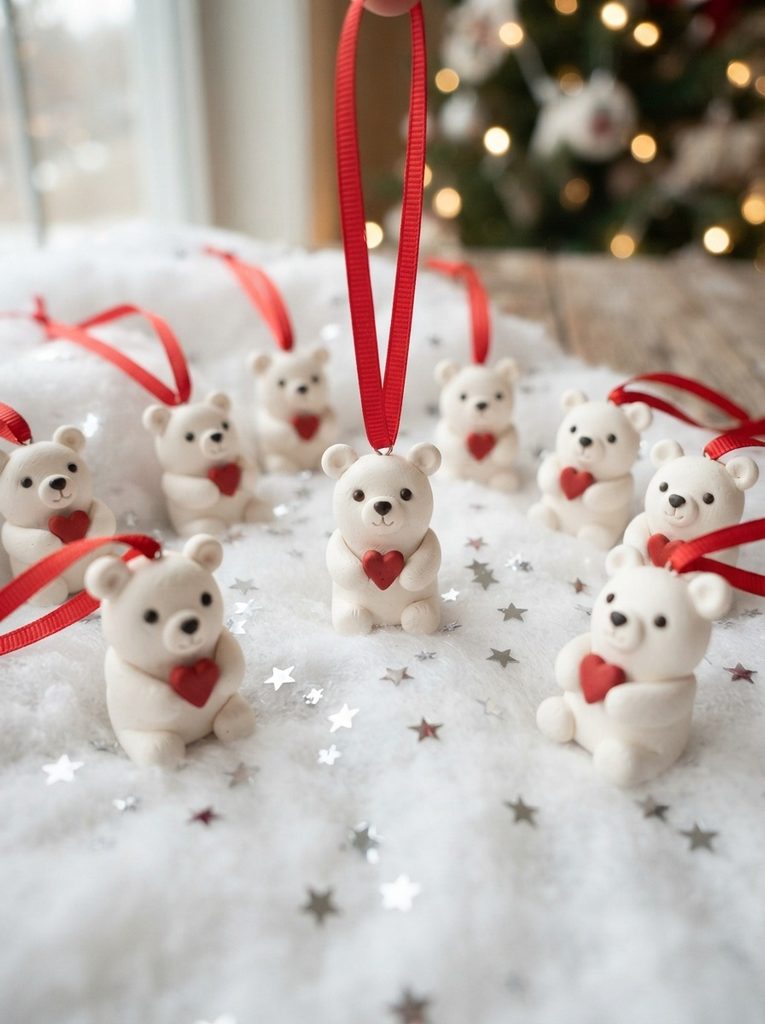
12. Polar Bear Holding a Heart Ornament
Polar bear ornaments are sweet, simple to make, and universally loved — especially by children.
Roll a round white ball for the body. Add a smaller ball for the head. Press two tiny ball ears on top of the head. Attach a small black nose using a tiny black clay ball.
Add two tiny dot eyes with black clay or black paint after baking.
Roll a flat red heart shape from red clay. Press it between two small arm stubs positioned on the front of the bear body.
Press a loop of wire into the back of the head before baking. This becomes the hanging loop. Wire embedded in clay during baking holds permanently.
Bake carefully — small round parts can roll. Nest in a small piece of crumpled foil during baking to prevent rolling.
Budget Tip
White and red clay are standard in most clay packs. Polar bear ornaments are small and use minimal material. Make them in batches — six bears take about an hour once you have the process flowing.
These ornaments sell particularly well at family-oriented holiday markets and make wonderful tree ornaments for children’s bedrooms.
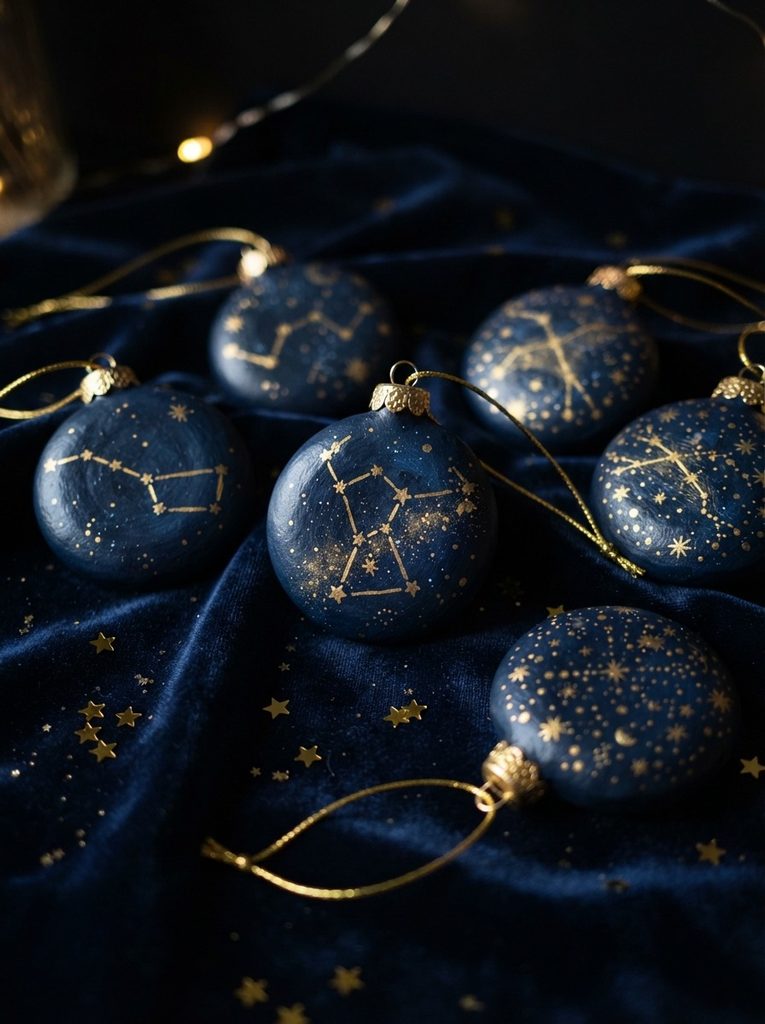
13. Celestial Constellation Bauble
Constellation ornaments have a beautiful, contemplative quality that suits adults and older children who love astronomy.
Roll smooth polymer clay balls. Bake and cool. Apply a deep midnight blue or navy base coat. Let dry completely.
Using a fine detail brush and gold acrylic paint, paint small dot stars across the surface. Connect specific constellation patterns — Orion’s belt, the Big Dipper, Cassiopeia — with thin gold lines between the dots.
Use a printed star map as reference while painting. You don’t need to memorize constellation shapes.
Add a wash of slightly lighter blue across the surface before the stars dry to suggest the Milky Way. Apply this loosely and unevenly for a natural nebula effect.
Seal with a gloss varnish. The deep blue looks spectacular under gloss.
Add a gold bead cap and gold cord hanger.
Budget Tip
The most expensive material here is a fine detail brush. One quality fine brush handles all the constellation dot work and line work cleanly. Keep it only for fine detail painting and it lasts for years.
These ornaments appeal to adults who want sophisticated tree decorations. They sell well at premium holiday markets and make excellent gifts for science and astronomy enthusiasts.
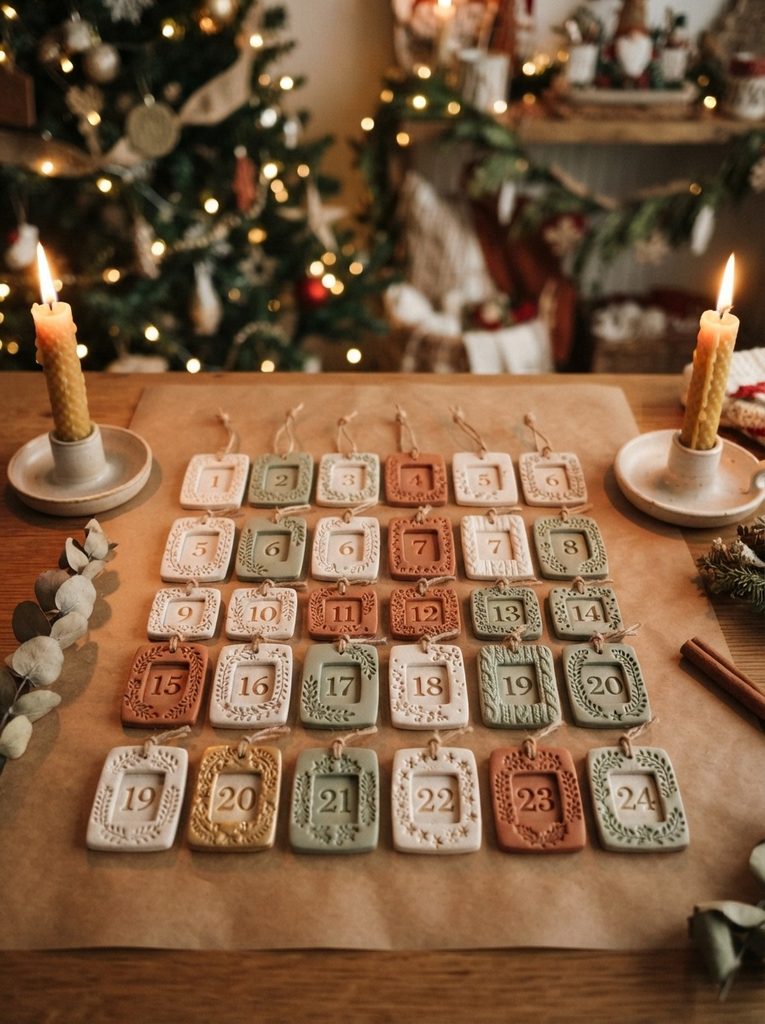
14. Numbered Advent Countdown Ornament Set
A set of numbered clay ornaments hung on the tree each day of Advent turns your Christmas tree into a living countdown calendar.
Make 24 small flat ornaments — rectangles, circles, or star shapes all work. Press a number (1 through 24) clearly into each piece while the clay is still soft.
Add a decorative border around each number — dots, lines, small stars — pressed in with a needle tool. Each ornament can have a slightly different border for variety.
Press hanging holes through each piece before baking. These will be hung one by one starting December 1st.
Bake all 24 pieces at once. Once cooled, paint each in a different festive color — reds, greens, golds, creams — so no two are identical.
Seal with varnish. Store in a small box or bag until December 1st.
Budget Tip
Making your own Advent ornament set costs far less than buying a dedicated Advent calendar. The clay for 24 small ornaments is minimal. The activity of hunting for and hanging the correct numbered ornament each morning becomes a cherished daily December ritual for children.
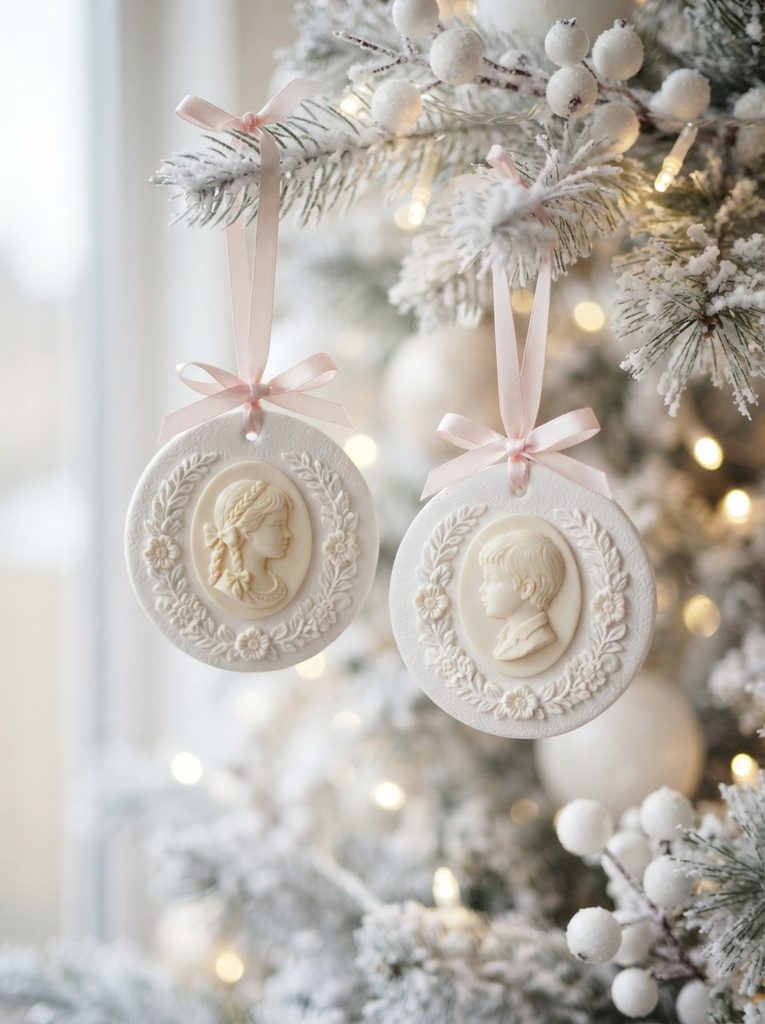
15. Cameo Portrait Keepsake Ornament
Cameo-style ornaments are among the most elegant clay Christmas decorations you can make — and they double as keepsake gifts.
Make a smooth oval clay base. Sculpt a simple profile silhouette from a slightly different clay shade. Press the profile onto the center of the oval base.
Add a raised border of small clay rope pressed around the edge of the oval. Press small flower or dot impressions into the border for decoration.
The contrast between the profile color and the background color is what creates the cameo effect. Cream profile on white base, or white profile on pale blue base, both work beautifully.
Press a hanging hole through the top. Bake carefully.
Once cooled, seal with matte varnish for a refined, antique look.
Thread with satin ribbon in pale pink or ivory.
Budget Tip
Cameo ornaments use minimal clay — the raised profile is tiny. The visual impact comes entirely from the contrast and clean shaping, not from volume of material.
These make deeply personal keepsake gifts. A cameo profile of a child’s silhouette made into an ornament is the kind of gift a parent keeps and treasures for decades. Add a year and initials on the back for extra meaning.

16. Snowflake Mandala Ornament
Snowflake mandalas combine the geometry of snowflakes with the meditative symmetry of mandalas — the result is stunning.
Roll a flat white clay circle. Work from the center outward, pressing symmetrical patterns using a needle tool, ball stylus, and small stamps.
Press six evenly spaced radial lines from the center to the edge. Between each line, add repeating patterns — small petal shapes, diamond impressions, and dot clusters.
Symmetry is what makes mandala designs work. Rotate the piece as you work to check all six sections match. It doesn’t need to be mathematically perfect — close symmetry looks beautiful.
Add pearl mica powder across the entire surface before baking. The shimmer effect highlights every pressed detail after baking.
Press a hanging hole through one outer point. Bake flat.
Seal with matte varnish to preserve the pearl shimmer without making it look plasticky.
Budget Tip
Pearl mica powder is inexpensive and one small jar covers dozens of ornaments. It elevates the finish of even simple pressed designs dramatically. These ornaments look extremely detailed and artisan despite requiring only basic tools.
17. Miniature Wreath Ornament
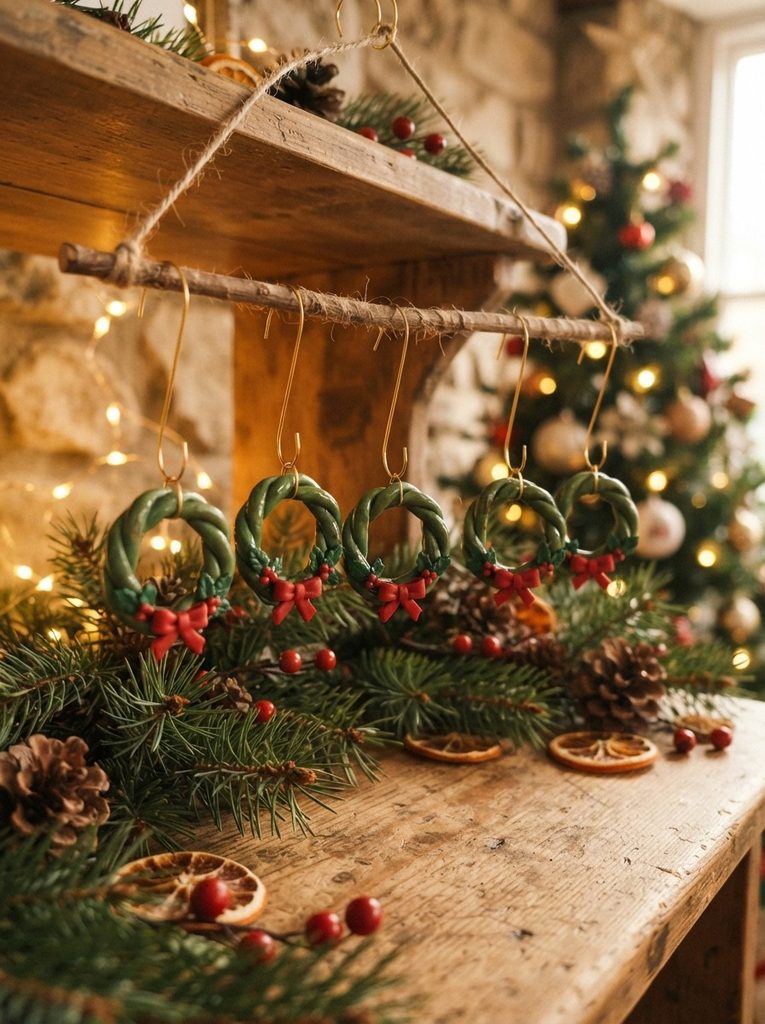
A miniature clay wreath ornament captures the look of a full-sized door wreath in a tiny, tree-ready form.
Roll a green clay log and twist it loosely on itself to create a textured rope. Form the rope into a ring and press the ends together firmly.
Add tiny red berry clusters — small red clay balls grouped in threes — pressed onto the wreath at intervals.
Make small holly leaves from flat green clay. Press a central vein line on each leaf. Attach two or three leaf pairs between berry clusters.
Roll a tiny flat red bow from two small rectangular clay pieces folded at the center. Attach at the bottom of the wreath.
Press a hanging wire into the top of the wreath before baking. Wire in the top of a ring shape holds more securely than a pressed hole.
Bake. Seal with a satin varnish.
Budget Tip
Green and red clay are included in almost every holiday clay or polymer clay starter pack. Miniature wreaths use very little clay per piece despite looking detailed. Make a dozen in a single session once you have the technique flowing — they go faster with each one.
18. Succulent Pot Ornament
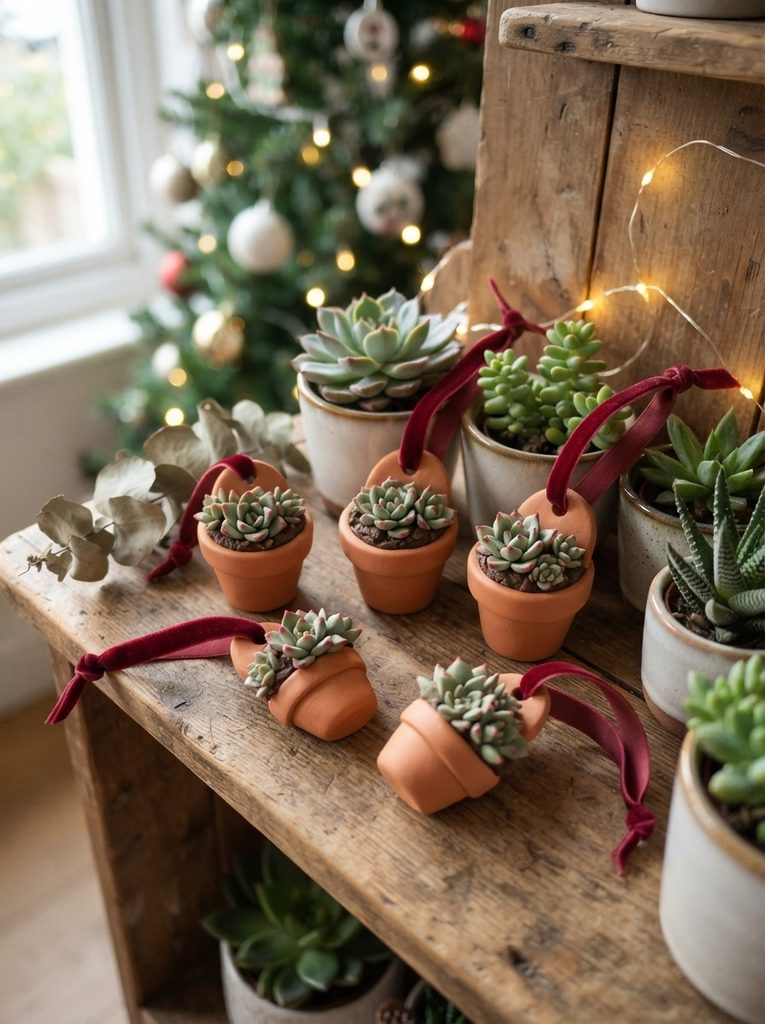
For plant lovers, a tiny clay succulent pot ornament is the perfect addition to a Christmas tree.
Make a small terracotta-colored cylinder — this is the pot. Flatten the base. Add a thin clay rim around the top edge.
Build a succulent rosette by stacking progressively smaller flattened petal shapes from the outside in. Use sage green with slightly reddish-tipped outer leaves for a realistic echeveria look.
Press the succulent into the top of the pot, positioned centrally.
The pot needs a flat, stable base so it can sit on a branch rather than hanging only. Make the base thick enough to balance the weight of the succulent on top.
Alternatively, press a hanging loop into the back of the pot and hang it tilted on the tree, succulent facing outward.
Seal the succulent with a satin varnish. Seal the pot with a matte varnish for a realistic terracotta finish.
Budget Tip
Green clay in two or three shades makes the succulent realistic. Mix olive and sage together for natural variety. These ornaments are a strong gift option for plant-obsessed friends who appreciate the humor of a plant on a Christmas tree.
19. Vintage Letter Envelope Ornament
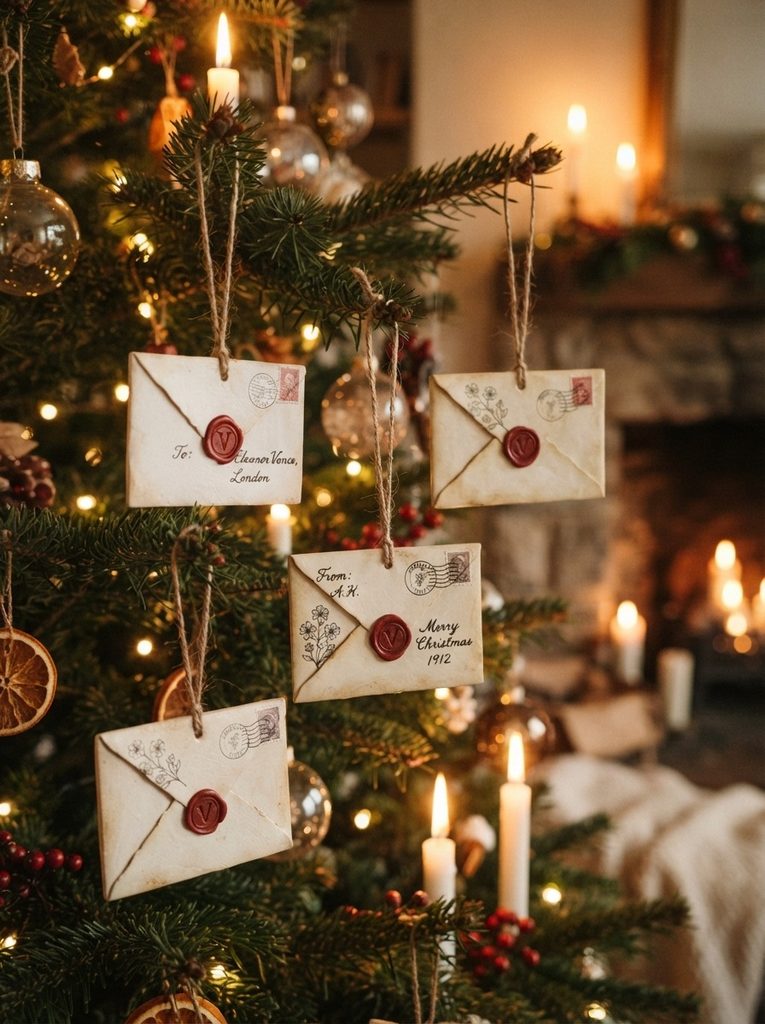
Vintage envelope ornaments with pressed wax seal details have a romantic, nostalgic quality perfect for a literary or cottagecore-styled tree.
Cut a small flat rectangle from cream-colored clay. Score fold lines diagonally from each corner to the center to suggest a folded envelope flap.
Press a small circle into the center back flap area. This represents the wax seal. Add a small initial or simple monogram impression inside the circle.
Use a slightly darker clay for the wax seal circle to create contrast against the cream envelope body.
Add faint parallel lines on the front face with a needle tool to suggest handwritten address lines.
Press a hanging hole through the top corner. Bake flat.
Once cooled, age the surface with a diluted brown paint wash wiped over the cream base and then wiped back — this settles into the impressed lines and creates an aged, vintage look.
Thread with natural twine.
Budget Tip
Cream clay is standard and inexpensive. The aged brown wash technique uses a tiny amount of brown paint diluted heavily in water — essentially free. These ornaments look complex but the aging technique does most of the visual work in just a few minutes.

20. Luminary Cut-Out Ornament
A luminary ornament with cut-out shapes lets light through and casts beautiful shadow patterns on walls when placed near a lamp or fairy light.
Roll clay into a ball. While still soft, use small shape cutters or a craft knife to cut star, moon, and tree shapes through the surface of the ball — all the way through.
Work quickly while the clay is still soft. Cutting clean holes in firming clay tears the edges rather than cutting them cleanly.
Keep the clay walls thick enough to hold their shape with multiple holes cut into them. Too many holes too close together weakens the structure.
Bake with a crumpled foil ball inside to maintain the round shape during baking.
Once cooled, place near a fairy light or LED tealight. The light shines through the cut-out shapes and casts pattern shadows outward.
Thread with gold cord for hanging.
Budget Tip
This ornament uses minimal clay and no paint at all. The visual effect comes entirely from the light-through-holes technique. Natural clay color works beautifully — the focus is the light interaction, not the surface decoration.
These are the most visually dramatic ornaments on this list when photographed near a light source. They make striking product photos for online holiday listings.
Conclusion
Handmade clay Christmas ornaments do something that store-bought decorations cannot — they carry the story of the person who made them. Every pressed texture, painted detail, and careful shape is a small act of care that shows when the ornament hangs on the tree. The 25 designs in this guide cover every style, from rustic salt dough stars and earthy botanical baubles to elegant constellation spheres and personal keepsake cameos. Start with the designs that feel most achievable with your current skill level and work up to the more detailed pieces as the season progresses. Most of these projects take under an hour, cost just a few dollars in materials, and produce ornaments that last for many Christmas seasons to come. Make a batch for your own tree, wrap a few for gifts, or sell them at a holiday market. Whatever you do with them, the process of making something with your hands for Christmas is its own reward. Pick up a block of clay, clear off the kitchen table, and start making your handmade holiday collection today.