 Skip to content

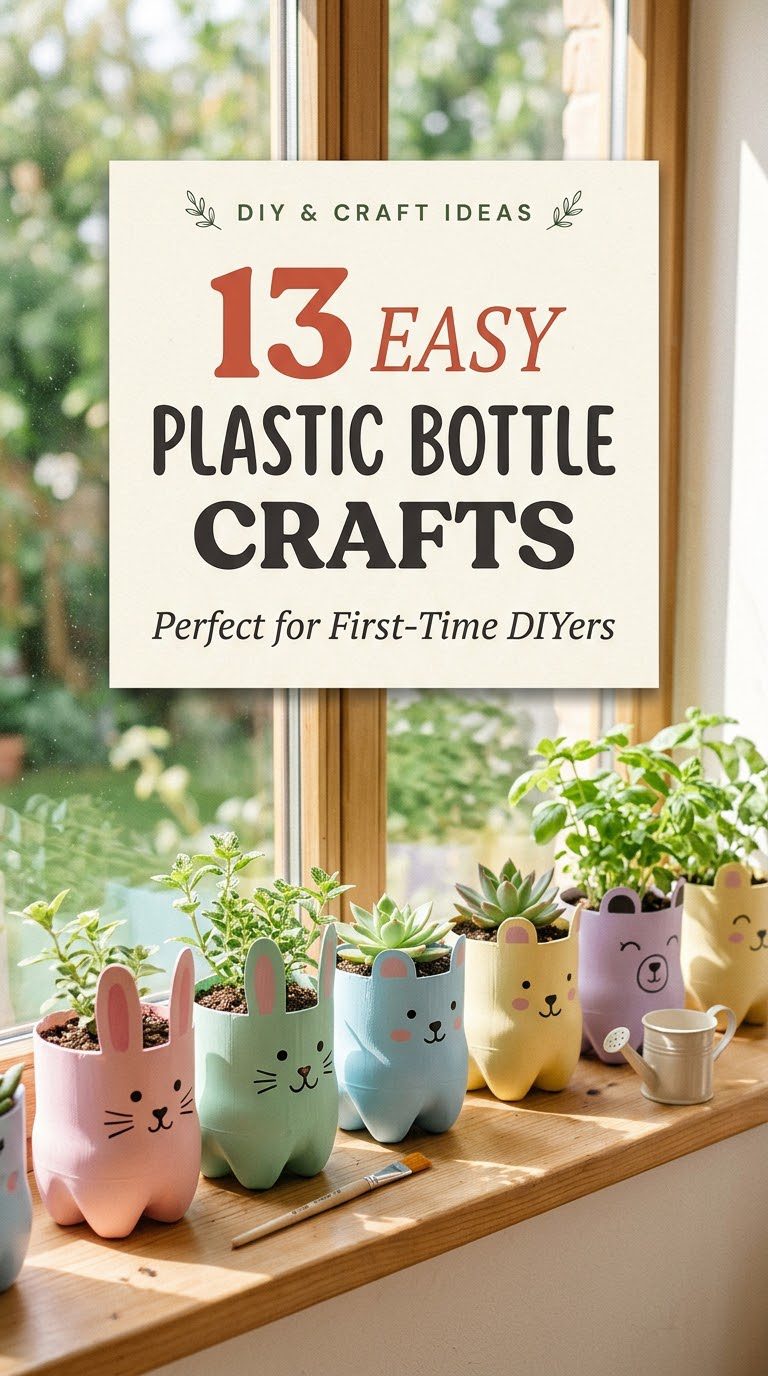

Plastic bottles pile up fast, and most of them end up in the bin after one use. With a pair of scissors, some paint, and a little glue, they can become planters, organizers, and decor. You do not need special skills or a big budget. If you are searching for easy plastic bottle crafts for beginners, this list gives you 20 projects to try. Each one uses bottles from your recycling bin and supplies you likely own. Each one takes less than an hour. Pick one, rinse a few bottles, and start making.
1. Hanging Bottle Planter
A hanging planter is the easiest bottle project to start with. It takes about fifteen minutes.
Rinse a two-liter bottle and peel off the label. Cut it in half with sharp scissors or a craft knife. An adult should handle the first cut. Keep the bottom half.
Poke four small holes near the rim, spaced evenly. Poke a few holes in the base for drainage. Use a nail or a hot skewer, and take care.

Paint the outside with spray paint or acrylic paint. Do this outside. Sage, white, and terracotta look neat. Let it dry for an hour.
Thread jute rope through each hole and knot the ends. Gather the four ropes at the top and tie them together in one loop.
Fill with potting soil and a small plant such as pothos or spider plant.
Save money by growing a cutting from a friend’s plant. It costs nothing.
Hang the planter on a hook near a bright window.
2. Bottle Bottom Flower Decor
The base of a bottle already looks like a flower. A few cuts and some paint finish the job.
Cut the bottom two inches off a clear soda bottle. The petal ridges are built in. Smooth any rough edge with sandpaper.
Paint the outside with acrylic paint in bright colors. Coral, yellow, and blue stand out. Let the first coat dry, then add a second coat for a solid color.

Glue a button or a clay bead in the center. Make a clay bead in five minutes. Roll a small ball of air-dry clay, flatten it, and paint it.
Attach a wooden skewer or a green straw to the back as a stem. Use hot glue and hold it for thirty seconds.
Poke the stems into a plant pot or a vase of pebbles.
Save money by using bottles from your own recycling. Different brands have different petal shapes.
Make a small bunch of five. Use mixed sizes for a natural look.
3. Pencil and Brush Holder
Pens and brushes roll off desks. A bottle holder keeps them upright.
Pick a bottle with a straight body, such as a juice or sports bottle. Cut it about five inches from the base. Sand the cut edge until it feels smooth.
Draw a wavy or scalloped line before you cut if you want a fancy rim. Use a pencil and cut slowly.

Paint the bottle in a base color. Let it dry fully. Add dots, stripes, or small flowers with a thin brush.
Wrap twine or washi tape around the middle for a neat look.
Seal with a clear spray if you want a glossy finish. Do this outside.
For a soft look, glue felt or fabric around the bottle. Trim the edges and glue them inside the rim.
Save money by using leftover paint from earlier projects.
Make two holders in different heights. Use one for pens and one for paintbrushes. Place both near your workspace.
4. Bottle Cap Magnets
Bottle caps are tiny canvases. They make fun fridge magnets in minutes.
Collect plastic caps in different colors. Wash them and let them dry. Paint the top of each cap with a base coat. Let it dry.
Add a design with a fine brush or a toothpick. Dots, hearts, and small flowers are easy. Try a smiley face too.

Glue a small round magnet to the back with strong craft glue. Let it cure overnight.
Fill the inside of the cap with a mini clay shape. Roll a pea-sized ball of clay, press a little pattern, dry it, and glue it in.
Seal the top with a thin layer of clear nail polish. It makes a hard, shiny finish.
Save money by buying magnets in a bulk bag. A pack of fifty costs about the price of a coffee.
Make a set of six and tie them with ribbon. They make a nice small gift.
Stick them on a fridge, a locker, or a metal baking sheet.
5. Watering Can From a Milk Jug
A jug already has a handle, so it makes a great watering can. This one is quick and cheap.
Rinse a gallon milk jug well. Keep the cap. Ask an adult to poke ten to fifteen holes in the lid with a hot nail. Use a block of wood under the lid and wear gloves.
Screw the lid back on. Fill the jug with water and tilt it to test the flow. The water should rain out in small streams.

Decorate the jug with acrylic paint. Paint flowers or stripes. Let it dry, and seal with a clear spray outside.
For better control, poke fewer holes. Seedlings like a soft sprinkle.
Save money by using a juice jug or a detergent bottle. Rinse them well first to remove all soap.
Keep the can by the back door or near your plants.
Label the can for plants only. Never use it for drinking after it has held soap or other products.
6. Bird Feeder From a Bottle
A bottle bird feeder is a fun project that brings wildlife to your yard. It costs almost nothing.
Rinse a clean two-liter bottle and remove the label. Cut two small holes on opposite sides, about three inches from the bottom. Make each hole slightly larger than a wooden spoon handle.
Slide a spoon through both holes so the bowl of each spoon sits outside. Birds perch there and pick seeds from the opening.

Cut a small opening just above each spoon. Make it big enough for seeds to spill into the spoon bowl.
Paint the bottle in a dull green or brown. Birds prefer calm colors.
Tie twine around the neck of the bottle and hang it from a branch. Fill the bottle with birdseed through the top.
Save money by using old wooden spoons from a thrift store.
Hang the feeder where you can watch from a window. Keep it away from cats.
Clean the feeder every few weeks with warm water. Dry it before refilling.
7. Bottle Piggy Bank
A piggy bank is a fun starter project. Kids and adults both enjoy it.
Take a small, round plastic bottle. A juice bottle with a flat side works well. Rinse it and let it dry.
Cut a coin slot in the top with a craft knife. An adult should do this step. Make the slot about an inch long and a quarter inch wide. Sand the edges.
Paint the bottle pink with acrylic paint. Add a second coat once the first dries.

Glue four bottle caps to the bottom as feet. Hold each one for thirty seconds.
Make ears and a snout from air-dry clay. Roll two small triangles for ears and a flat oval for the snout. Press two dots for nostrils. Dry them for a day, paint them, and glue them on.
Draw two eyes with a marker or paint. Add a curly tail from a pipe cleaner.
Save money by using scrap clay and leftover paint.
Keep the bottle cap on the bottom if you want to open it later.
8. Mini Greenhouse for Seedlings
A mini greenhouse warms the soil and helps seeds sprout. It costs nothing and takes ten minutes.
Rinse a clear two-liter bottle and remove the label. Cut it in half around the middle. The top half becomes a dome. The bottom half becomes a tray.
Fill a small pot with seed-starting mix. Plant your seeds as the packet says. Water gently.
Place the pot in the bottom half of the bottle. Slide the top half over the pot like a lid. Leave the cap off for air or on for more heat.

Set the greenhouse on a bright windowsill. The plastic traps warmth and moisture.
Check each day. Water lightly if the soil looks dry. Remove the dome on hot days so seedlings do not cook.
Save money by using seeds from your kitchen, such as tomato or pepper seeds, or buy a cheap packet.
When seedlings grow tall, remove the dome and move them to a bigger pot.
Wash the bottle and reuse it next season.
9. Bottle Vase With Painted Pattern
A painted bottle looks like a ceramic vase from a distance. It costs almost nothing to make.
Pick a tall bottle with a slim neck. Rinse it and peel off the label. Clean off any sticky residue with a bit of cooking oil and a cloth.
Fill the bottom with sand or small stones so the bottle does not tip. Fill about a third of the way.
Paint the bottle with matte acrylic paint in cream, white, or terracotta. Add a second coat once the first one dries. Let it dry overnight.

Add a pattern with a thin brush or a sponge. Dots, stripes, and wavy lines look charming.
Seal the paint with a clear matte spray. Do this outside.
Use the vase for dried grass, wheat stalks, or paper flowers. Plastic bottles do not hold water well for fresh flowers because paint can peel.
Save money by picking up dried stems from a field or a roadside.
Group three bottles in different heights on a shelf for a neat look.
10. Bottle Garden Edging
Bottles make a bright border around a garden bed. The work is simple and cheap.
Collect ten to twenty bottles of the same size. Rinse them and remove the labels. Fill each bottle with soil or sand and screw the cap on. This gives them weight.
Dig a shallow trench along the edge of your bed, about four inches deep. Place each bottle upside down with the neck in the soil. Line them up side by side.

Press the soil back around them to hold them in place. Check each one for stability.
Paint the bottoms in bright colors before you plant them. Use outdoor paint. Let it dry fully.
Alternate colors for a fun pattern. Try blue, white, and green.
Save money by asking friends and neighbors for their empties. A bin collects fast.
Keep the edging at a low height. Tall edges can trip children.
Check after storms and press back any loose bottles.
11. Bottle Wind Spinner
A wind spinner adds color and motion to a yard. The shape comes from a single bottle.
Cut a clear plastic bottle in half. Keep the bottom half. Cut from the open edge toward the base in strips about an inch wide. Stop about two inches from the base.
Bend each strip outward and twist it slightly. Work around the bottle until all strips are twisted in the same direction. Each strip becomes a blade.

Paint the strips in bright colors with outdoor paint. Use rainbow colors. Let them dry.
Poke a hole in the center of the base. Thread fishing line or thin wire through the hole and tie a knot inside. Add a bead for weight and style.
Hang the spinner from a branch, a hook, or a porch rail. A gentle breeze starts the spin.
Save money by using leftover paint and any thin string.
Make several spinners in different colors and hang them together for a bigger show.
12. Sprinkler From a Bottle
A bottle sprinkler cools off a hot day. It also waters plants in a small bed.
Rinse a two-liter bottle. Ask an adult to poke small holes along one side with a nail. Space them an inch apart. Keep them in a single line.
Cut off the bottom of the bottle. Slide the cut end over the end of a garden hose. Wrap it tightly with duct tape to hold it. Make sure the tape seals the gap so water does not leak out.

Place the bottle on the ground with the holes pointing up. Turn on the water slowly. A gentle spray rains over the area.
Move the bottle around the yard to cover more space.
Save money by using duct tape you already own. A roll lasts through many projects.
Wear shoes with grip. Wet grass gets slippery.
Turn the water off when you finish and drain the bottle.
13. Bottle Organizer for Small Items
Small items need a spot. A wall organizer from bottles keeps tape, scissors, and ribbon in view.
Cut four bottles at an angle, so each one looks like a scoop. Sand the edges until they feel smooth. Paint them in soft colors. Pastels look neat on a wall.
Cut a piece of cardboard or a thin wooden board about 12 inches wide. Paint it white or cream.
Glue each bottle onto the board with strong craft glue or hot glue. Arrange them in a staggered pattern. Let the glue set for a day.
Add a hanging loop of twine on the back with tape or staples.
Fill the scoops with scissors, markers, and small tools. Place lighter items in the upper pockets and heavier ones lower down.
Save money by using leftover wood scraps or a flat piece of cardboard from a box.
Make a clay label for each pocket. Cut small rectangles, dry them, and paint them in a color for each item.
Hang the organizer in a craft nook, a kitchen, or a kid’s room.
Conclusion
Plastic bottles can become planters, feeders, holders, and spinners with a pair of scissors and a bit of paint. Each project here costs little, finishes fast, and keeps a bottle out of the bin. Start with a hanging planter or a pencil holder, then try the garden projects once you feel comfortable with the cuts. Keep a box of clean bottles and caps near your craft supplies so you can start any time. Pick your first project today, rinse a bottle, and start making.



