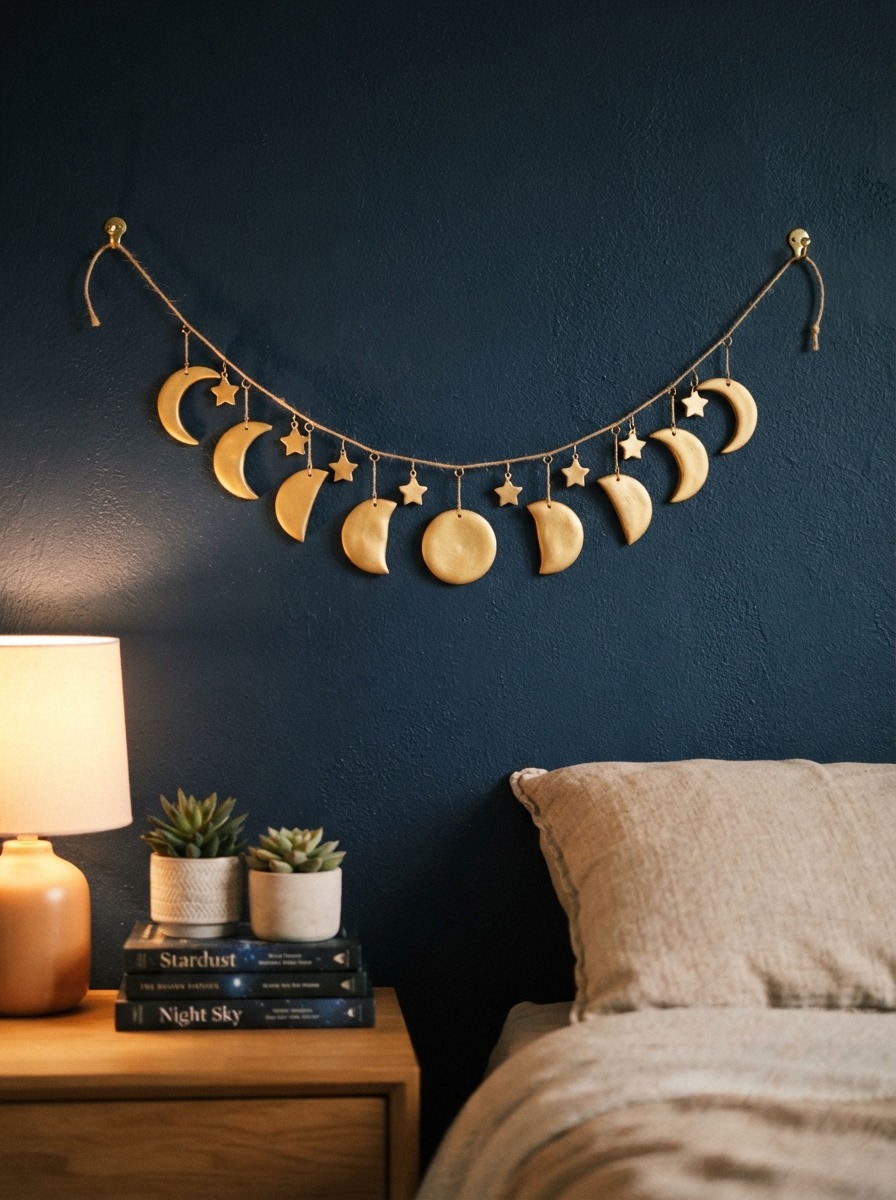
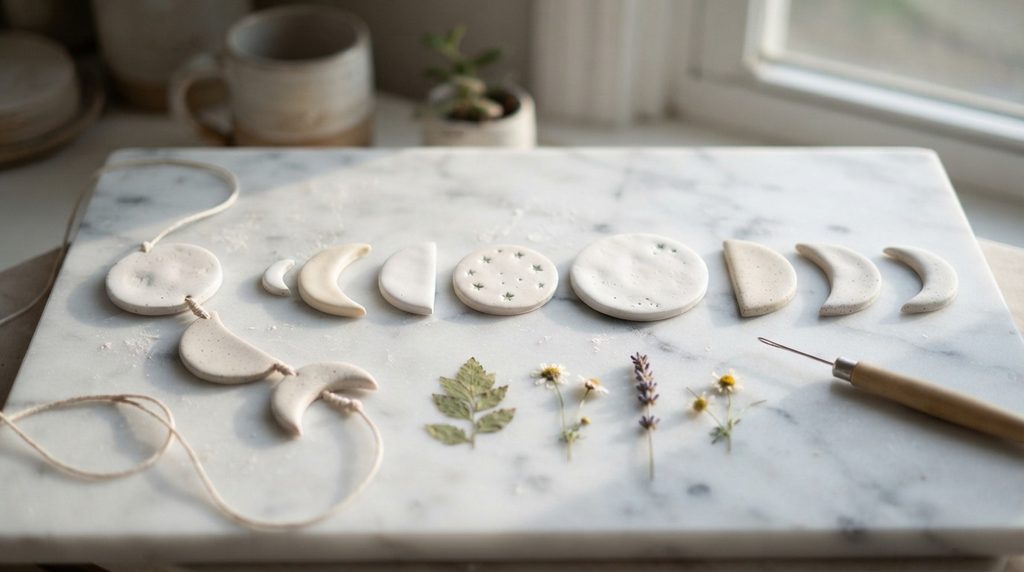
A moon phase garland does something that most bedroom decor can’t — it adds a quiet, intentional atmosphere without overwhelming the space. Hang one above a bed, along a window, or across a plain wall and the room feels different immediately. Calmer. More personal. The best part is that these garlands are genuinely easy to make from clay at home, cost very little in materials, and can be customized to match any bedroom color palette or style. Whether you lean toward minimalist white, boho earth tones, or something with a celestial gold edge, there’s a moon phase garland design that fits. This guide covers 20 creative moon phase clay garland ideas — from complete beginner projects to more detailed designs — with practical steps, material costs, and honest tips for making something beautiful on a small budget.
1. Classic White Moon Phase Garland

The classic white moon phase garland is the most requested version for good reason — it suits almost any bedroom style.
You need eight clay pieces to show the full lunar cycle:
- New moon (small dark disc)
- Waxing crescent
- First quarter half moon
- Waxing gibbous
- Full moon (complete circle)
- Waning gibbous
- Last quarter half moon
- Waning crescent
Roll white air-dry clay to about a quarter inch thick. Cut each moon shape using a craft knife and paper templates printed from a free online moon phase reference.
Use a straw or skewer to poke a hole near the top of each piece before drying. This is where the cord threads through.
Dry flat for 24–48 hours. Sand any rough edges lightly.
Leave them unpainted for a pure white look. Or seal with matte Mod Podge to protect the surface.
Thread onto natural cotton cord or thin jute twine. Space the pieces evenly — about 2–3 inches apart.
Cost breakdown:
- Air-dry clay: $5–$8
- Cotton cord: $3–$4
- Mod Podge: $4 (makes dozens of projects)
Total cost: Under $12 for a full garland.
2. Gold-Painted Celestial Garland
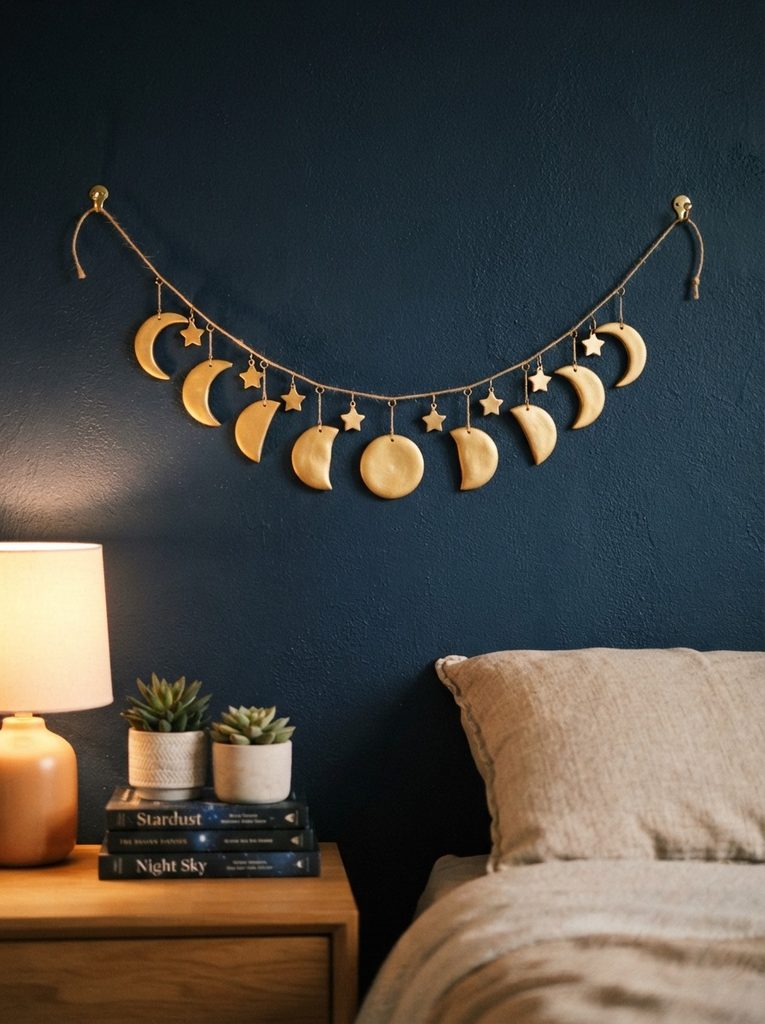
Gold moon garlands look luxurious and work especially well against dark or navy bedroom walls.
Make your moon phase pieces using white polymer clay. Bake and cool them fully before painting.
Use gold acrylic paint and a soft flat brush. Apply two thin coats rather than one thick coat — thin layers dry faster and look smoother.
For a richer metallic finish, apply a coat of gold craft paint first, let it dry, then add a light dry-brush of champagne or pale gold over the raised surfaces. This two-tone technique gives the pieces dimension.
Between the moon shapes on the cord, add small clay star shapes. Cut them with a small star punch or craft knife. Bake and paint in the same gold tone.
Stars fill the visual gaps between moon phases and make the garland feel more like a night sky than a sequence of shapes.
Thread everything on black waxed cord or dark velvet ribbon for a contrast that makes the gold stand out.
Finishing tip: Seal all painted pieces with clear gloss varnish. Gloss suits metallic paint far better than matte — it enhances the shine rather than dulling it.
Cost: Around $12–$16 for a full garland with stars.
3. Terracotta Moon Garland with Boho Tassels
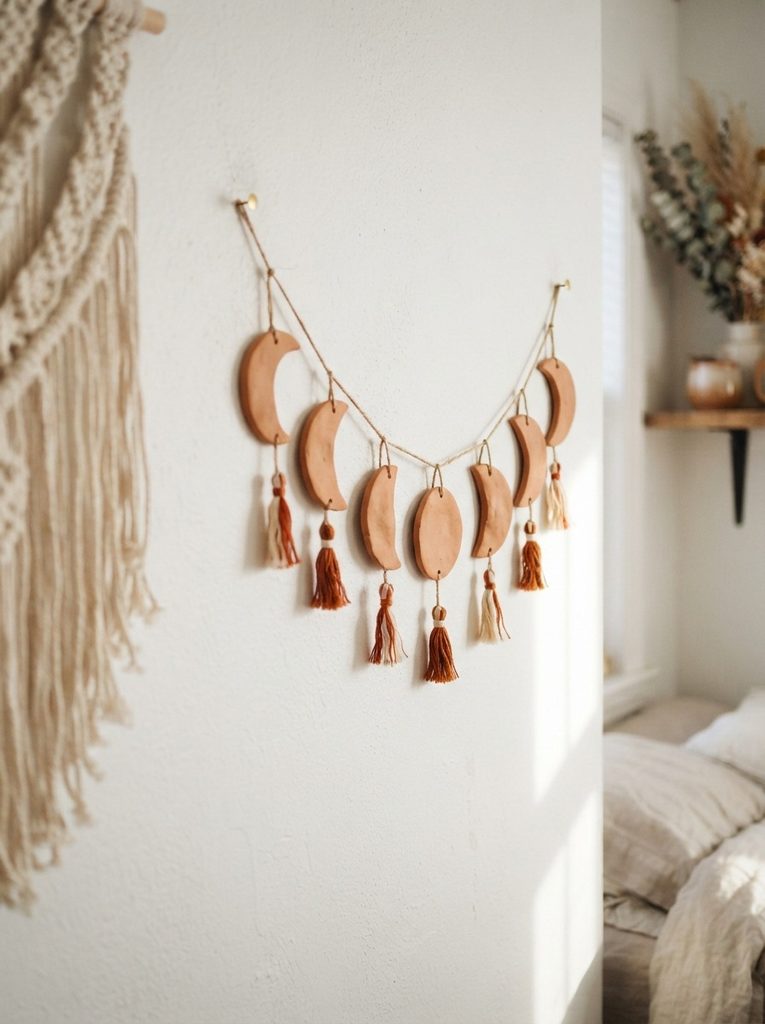
Terracotta moon garlands suit boho, earthy, and desert-inspired bedrooms perfectly.
Use air-dry clay mixed with a small amount of rust-orange acrylic paint before shaping. Knead the paint into the clay until you get a consistent warm terracotta tone throughout.
Shape your moon phases as usual. The color runs all the way through the clay, so even if the surface chips slightly, the terracotta tone remains visible underneath.
Dry flat for 24–48 hours. Seal with matte varnish.
String on natural jute twine — the rough texture of jute suits the earthy terracotta tone far better than smooth cotton cord.
Add thread tassels below alternating moon pieces. Cut 8–10 lengths of rust, cream, and burnt orange embroidery thread, fold them in half, and tie them to the cord just below a moon piece. Trim the ends evenly.
Tassels add movement and a handmade textile quality that makes the garland feel more layered.
Budget tip: Embroidery thread costs around $1 per skein at a craft store. One skein makes 6–8 small tassels easily.
Total cost: Around $10–$14 for the full garland with tassels.
4. Black and White Minimal Moon Garland
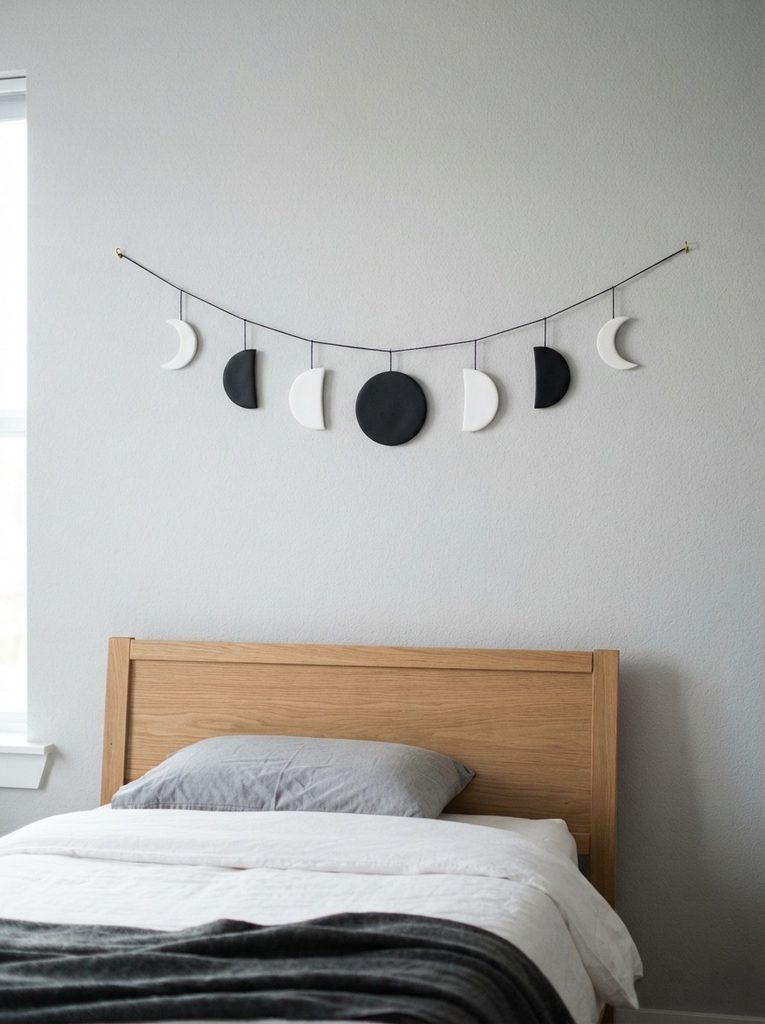
A black and white moon garland suits minimalist and modern bedrooms where subtle contrast does the decorative work.
Make two sets of moon phase pieces — one set in white clay, one set in black or very dark grey clay.
You can achieve black clay by kneading black acrylic paint into white air-dry clay, or by buying black polymer clay directly.
Alternate the colors along the cord — white full moon, black waning gibbous, white last quarter, black crescent, and so on. The alternating pattern creates a graphic, rhythmic look across the garland.
Keep the surfaces completely smooth and matte. Sand any rough texture away after drying. This garland relies on clean shapes and stark contrast rather than texture or decoration.
String on thin black waxed cord for a line that disappears against the dark pieces and creates the illusion that the white moons are floating.
Hanging tip: Use two small matte black command hooks to hang the garland. Matte black hooks disappear against most wall colors and don’t detract from the garland itself.
This garland looks intentionally designed and works in spaces that favor restraint over decoration.
Cost: Around $8–$12 for the full garland.
5. Pastel Rainbow Moon Phase Garland
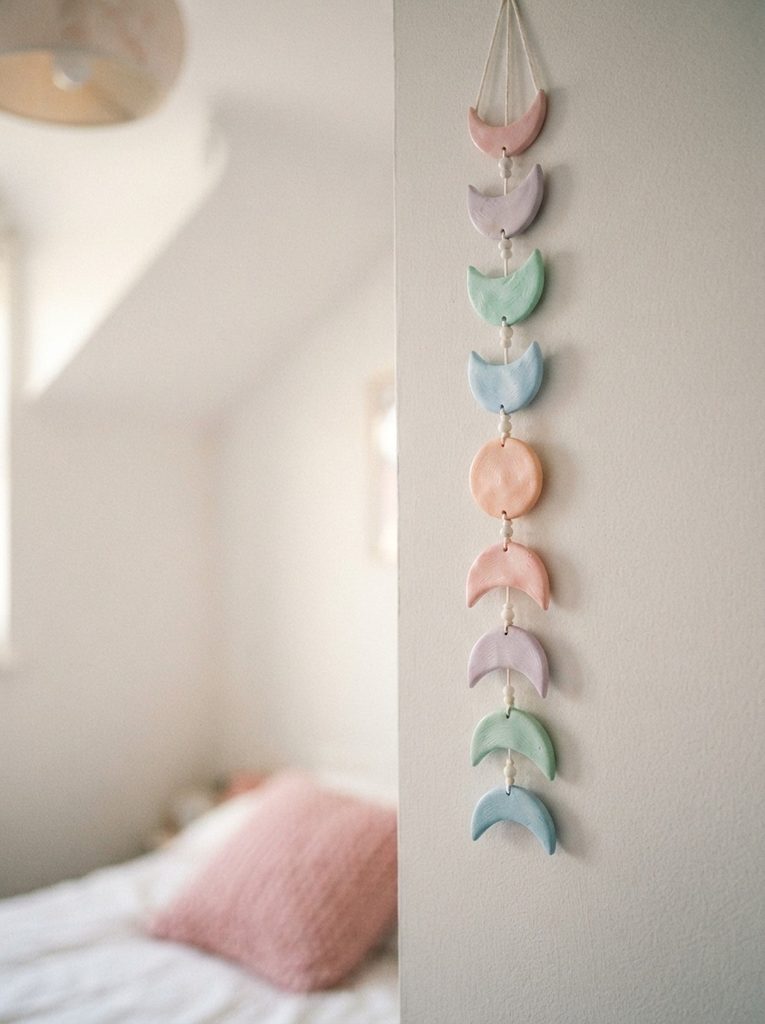
A pastel moon garland works beautifully in a child’s bedroom, a creative studio, or any space that leans toward soft, playful color.
Make all eight moon phase pieces from white clay. Bake or dry fully before painting.
Use soft pastel acrylic paint to color each moon phase a different tone. A suggested sequence:
- Waxing crescent: blush pink
- First quarter: pale lavender
- Waxing gibbous: soft peach
- Full moon: warm white or pale yellow
- Waning gibbous: mint green
- Last quarter: baby blue
- Waning crescent: lilac
This rainbow-across-the-lunar-cycle approach looks intentional and playful at the same time.
Apply two thin coats of each color. Let each coat dry fully before applying the next.
String on white cotton cord — white keeps the color palette clean without adding another competing tone.
Seal each piece with clear matte varnish to protect the paint.
Tip: Add small painted polka dots or star shapes to the moon surfaces before sealing for extra detail that suits a playful bedroom.
Cost: Around $10–$14 for a full pastel garland.
6. Dried Flower Embedded Moon Garland
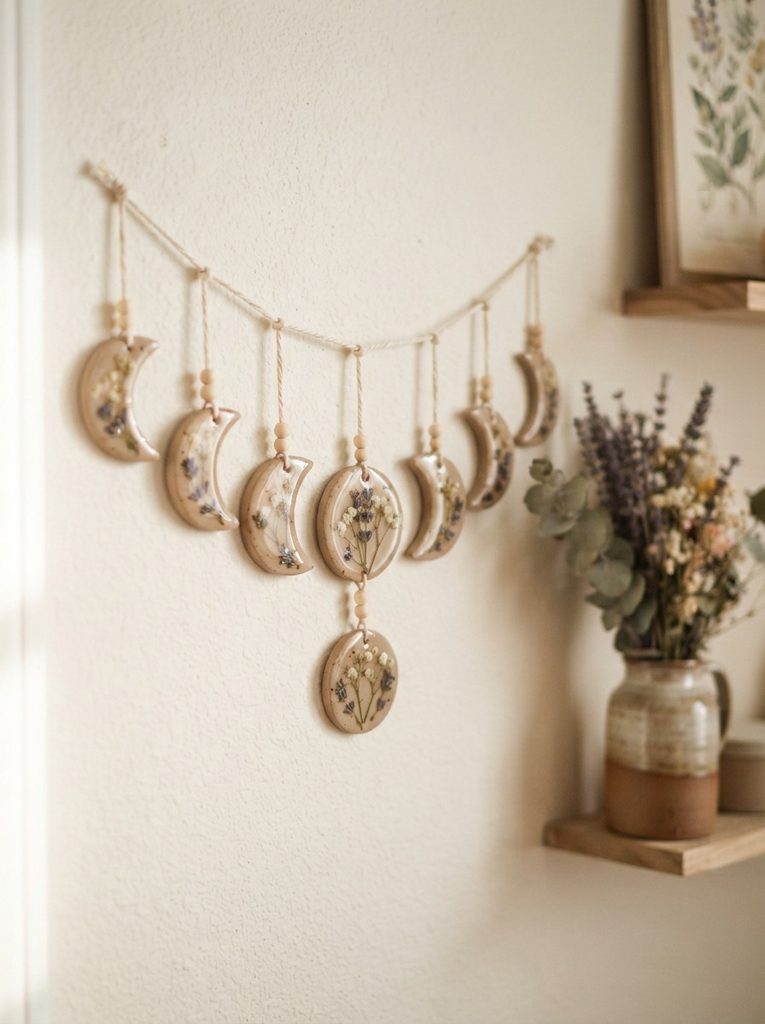
Pressed flowers embedded in clay moon pieces create something that looks hand-crafted and genuinely one of a kind.
Roll white polymer clay to a quarter inch thick. Cut your moon shapes.
While the clay is still raw, press small dried flowers gently into the surface. Good options include:
- Lavender buds — small enough to press flat without distorting the clay
- Baby’s breath — delicate and widely available
- Small pressed chamomile flowers — add a yellow detail to white clay
Press each flower gently so it sits partially embedded in the surface. Don’t push too deep — you want the flower visible on top.
Bake the polymer clay pieces with the flowers in place. The low baking temperature won’t burn small dried flowers.
Once cooled, apply a thin coat of clear resin or gloss varnish over the surface. This seals the flowers and gives the whole piece a finished, professional look.
Thread on natural cotton cord.
Budget tip: Dried lavender from a grocery store or farmer’s market costs around $3–$5 and provides more than enough buds for a full garland.
Cost: Around $14–$18 for a full garland with flowers.
7. Ombre Dipped Moon Garland
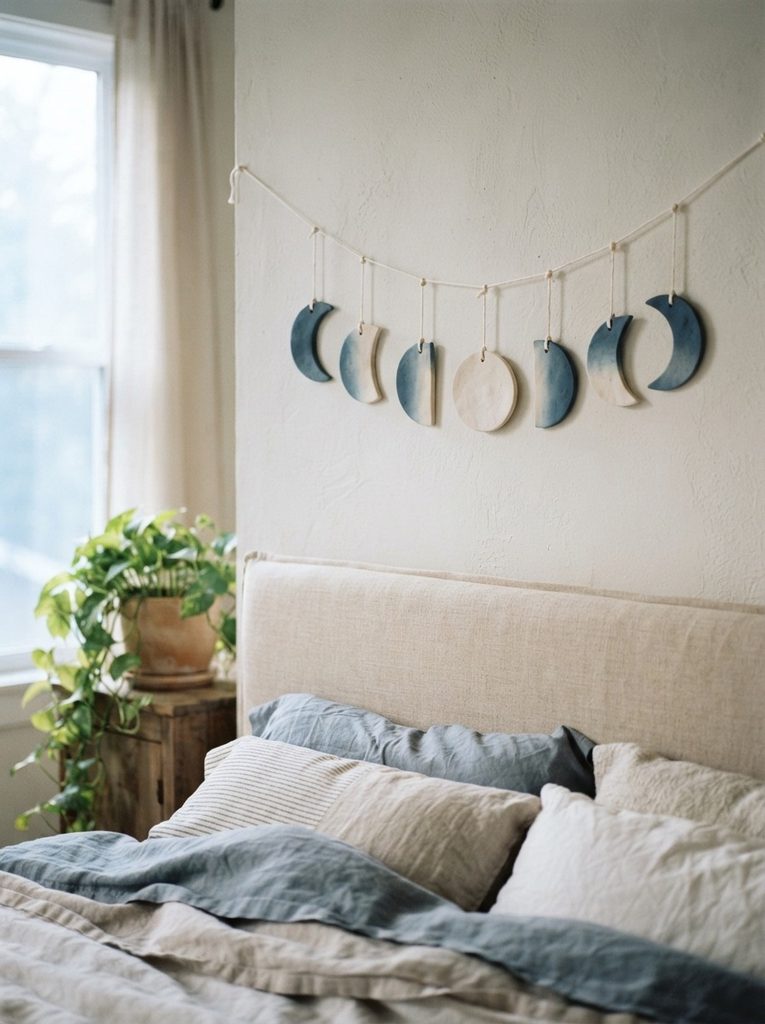
An ombre dipped effect makes plain white clay moon pieces look like they were dipped in watercolor.
Make and dry all eight moon pieces from white air-dry clay.
Mix your chosen paint color with water to create a thin, translucent wash. Dusty blue, soft purple, sage green, and blush pink all look beautiful as ombre tones against white clay.
Dip the tips and outer edges of each moon piece into the diluted paint. For a crescent, dip the pointed tips. For a full moon, dip the lower half.
Let the paint settle at the edges, then blend upward with a damp brush while it’s still wet. The paint fades from the dipped edge toward the center naturally.
Apply a second dip for deeper color at the edges once the first coat dries.
The full moon piece can be dipped along the bottom half only, creating a gradient from colored base to white top.
Seal with clear matte varnish.
String on white cotton cord so the cord doesn’t compete with the color gradient.
Tip: Practice the dipping technique on a spare piece of dried clay before doing all eight pieces.
Cost: Around $9–$13 for a full garland.
8. Stamped Texture Moon Garland
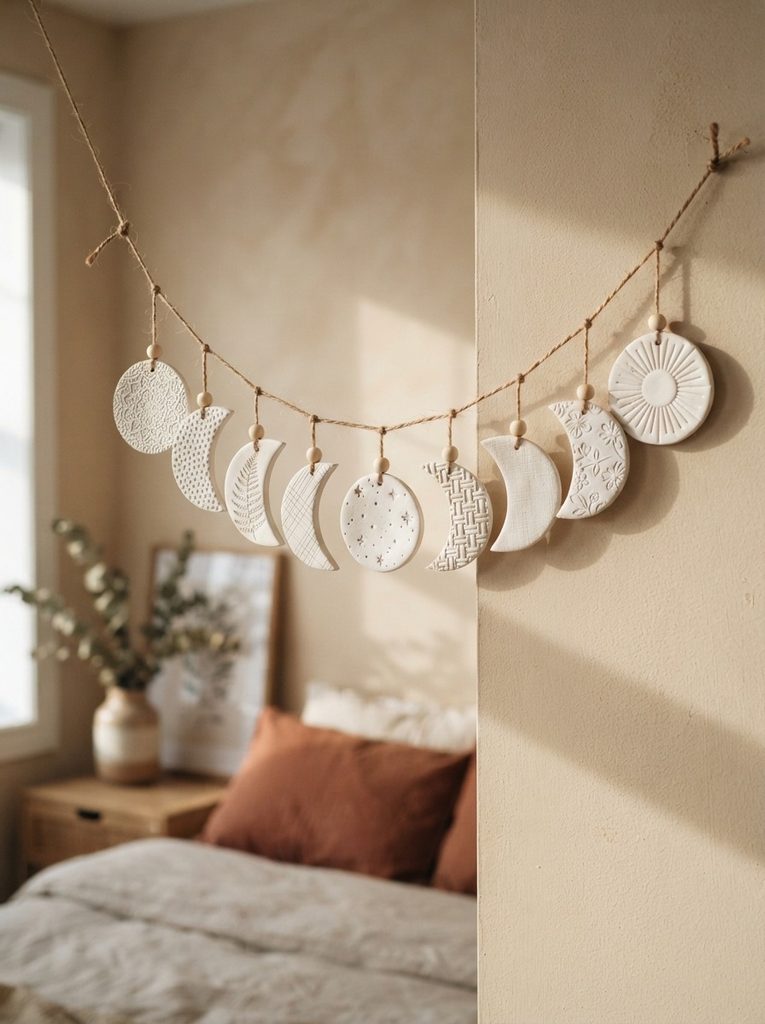
A texture-stamped garland gives each moon phase its own unique surface pattern — making every piece feel individual even within a coordinated set.
Make all eight moon pieces from white clay. While still soft, press a different texture into each one:
- Full moon: small dot grid pressed with a pen tip
- Gibbous moons: crosshatch lines with a ruler edge
- Half moons: parallel horizontal lines with a toothpick
- Crescents: a leaf vein texture using a real leaf
Use a different pattern for each moon phase to create variety across the garland. Keep all pieces in the same base color — white or off-white — so the set reads as cohesive despite the varied textures.
Dry or bake with the textures facing up and undisturbed.
Once cured, paint in matte white or cream. The paint settles into the recessed texture lines, making the pattern more visible rather than covering it.
Seal with matte varnish.
String on natural jute twine — the texture of the twine ties into the handmade, tactile quality of the garland.
Cost: Around $8–$12 for a full textured garland.
Conclusion
A handmade moon phase clay garland is one of those bedroom additions that genuinely changes how a space feels. It adds a handmade quality, a personal touch, and a visual focal point that store-bought decor rarely achieves — and it costs a fraction of what you’d pay for something similar at a home goods retailer. Every design in this list is achievable with basic clay, simple tools, and an afternoon of time. Whether you make a classic white garland to hang above your bed or a gold-stamped version with crystal beads and dried flowers, the result will be something your bedroom has been missing. Pick the design that fits your style, gather your materials this week, and start shaping. Your walls are ready for something made by hand.