 Skip to content

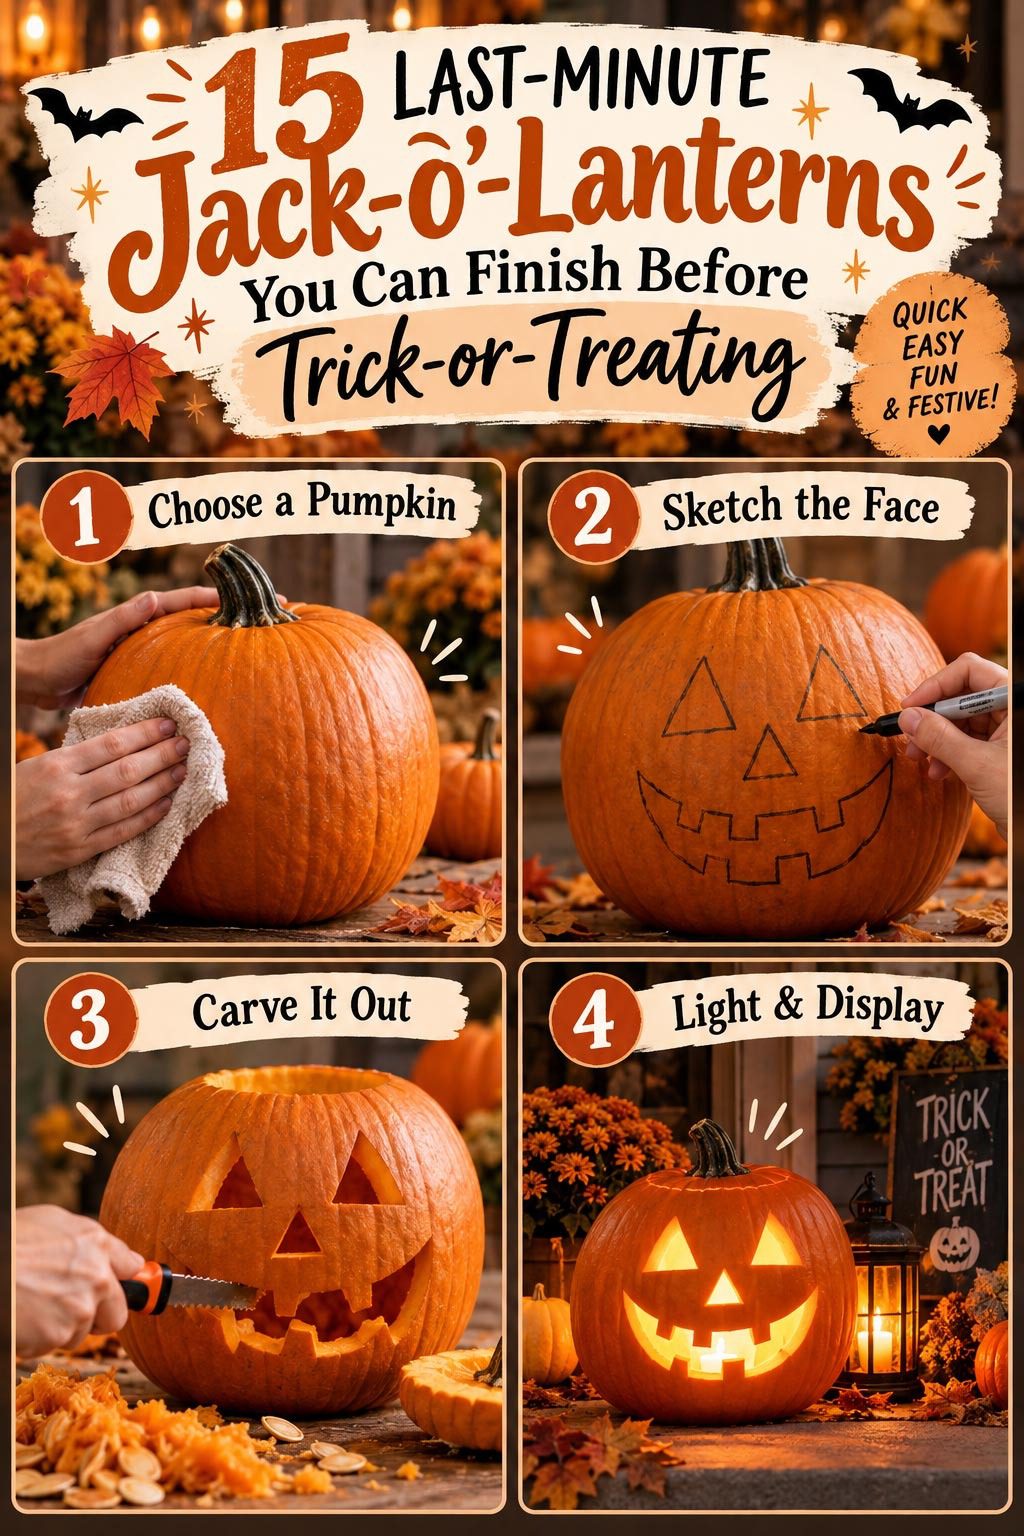

Halloween has a way of arriving faster than anyone plans for — and suddenly it is October 31st, trick-or-treating starts in three hours, and the pumpkin on your doorstep is still a plain orange sphere with no personality whatsoever. The good news is that a great-looking jack-o’-lantern does not require advanced carving skills, specialist tools, or hours of work. Some of the most striking pumpkin designs take under 20 minutes. This guide covers 15 last-minute jack-o’-lantern ideas — each one fast, achievable with basic household tools, and genuinely impressive when lit up on a porch after dark.
1. The Classic Triangle Face
The classic triangle-eyed jack-o’-lantern exists for a reason — it is immediately recognizable, genuinely spooky when lit, and takes about 15 minutes from first cut to front porch.
Cut the lid first. Angle your knife inward at about 45 degrees as you cut the circle — this bevel prevents the lid from falling through the hole when you replace it.

Scoop out the interior with a large spoon. Scrape the interior walls where you plan to carve until the flesh is about 2–3cm thick. Thinner walls carve more easily and let light through more effectively.
Draw two triangles for the eyes and one for the nose with a marker or pen. Add a wide mouth with a jagged line for the teeth — the more irregular the teeth, the more character the face has.
Cut along your drawn lines with a sharp paring knife using gentle push-cuts rather than sawing. Sawing tears the pumpkin flesh.
Push the cut pieces inward and remove from the inside of the pumpkin.
Budget Tip
A standard kitchen paring knife handles classic triangle carving perfectly — no specialty tools required. A battery LED tealight inside instead of a real candle eliminates fire risk and wind-out problems on a breezy October evening. The classic face works on any sized pumpkin from tiny to enormous.
2. The Surprised Circle Face
A surprised face made entirely from circular cuts looks completely different from the classic triangular jack-o’-lantern and requires only one cutting technique — circles.
Draw two large circles for the eyes and one large circle for the open shocked mouth. The eyes can be the same size for a wide-eyed look, or one slightly larger than the other for an unhinged expression.

Use a sharp round cookie cutter pressed firmly into the pumpkin surface to score the circle outlines before cutting — this gives you a clean guide line. Or draw freehand circles with a pen.
Cut carefully around each circle using a short-bladed knife with a rocking push motion. Circles are harder to cut than straight lines — work slowly around the curve.
Push the circular pieces inward and remove them. The three holes create a face that reads immediately as surprised or frightened.
Add a carved unibrow above both eye circles using a shallow carving technique — cut only through the outer skin without removing the full flesh piece. This creates a darker area without a cut-through hole.
Budget Tip
A small linoleum carving tool handles the shallow unibrow carve without risk of cutting through entirely. If you only have a kitchen knife, skip the unibrow — the three circles alone are fully effective. This design takes under 15 minutes.
3. Painted No-Carve Ghost Pumpkin
A painted pumpkin requires no knife at all — making it the fastest option on this list and the safest for young children who want to participate.
Paint the entire pumpkin matte black using acrylic or chalk paint. Apply one coat, let it dry for 20 minutes, apply a second coat for full coverage.

Once the black base coat is dry, paint a white ghost face on the front. Two wide oval eyes and a wavy open mouth are all you need. Use a medium flat brush for the white shapes.
The contrast between the matte black pumpkin and the bright white painted face is striking even in daylight. At night, place a battery LED inside — the white paint picks up the interior light and appears to glow through the pumpkin wall.
Use glow-in-the-dark paint instead of standard white for a face that genuinely glows in the dark without any internal light source.
Budget Tip
Matte black chalk paint and white acrylic are both inexpensive. The painted version lasts longer than a carved pumpkin because the flesh is not exposed — a painted pumpkin stays decoration-worthy for two to three weeks rather than the one week typical of a carved pumpkin in mild weather.
4. Simple Bat Silhouette Carve
A bat silhouette carved into a pumpkin creates a bold, graphic design that looks far more planned and deliberate than a face carving — and it is genuinely fast to execute.
Print a simple bat silhouette template from any free Halloween printable site. Cut out the template and tape it to the front of the pumpkin.

Trace around the template edges with a pen or a pin — push small pin pricks along the outline to transfer the bat shape onto the pumpkin surface. Remove the paper template.
Connect the pin prick dots with a drawn line. Cut along this line carefully with a sharp paring knife.
The bat shape — two curved wing sections meeting at a small body with ear points at the top — creates a clean graphic when the interior light shines through.
The thinner the wing sections, the more dramatic the glowing effect. Cut the wing outline as close to the pumpkin surface edge as practical.
Budget Tip
Free bat silhouette templates are available from any Halloween craft resource website — print and use immediately. The template transfer method works for any silhouette design and takes less skill than freehand drawing on a curved pumpkin surface. Print two or three different templates and choose the clearest one.
5. Drilled Dot Pattern Pumpkin
A drill and a standard drill bit turns a plain pumpkin into a lantern covered with small points of light — no carving required, and the pattern takes about 20 minutes to complete.
Mark a spiral, star cluster, constellation, or random scatter pattern on the pumpkin surface using a pen. Each pen mark becomes one drilled hole.

Use a 6mm or 8mm drill bit for holes that let enough light through to be clearly visible. Smaller bits create more delicate light points. Larger bits give brighter individual spots.
Drill each marked point. Keep the drill perpendicular to the pumpkin surface at each drilling point to prevent the bit from skating across the curved surface.
Wipe away pumpkin juice from around each hole with a paper towel as you work — it pools around the holes and obscures your remaining pen marks.
A spiral pattern radiating from the stem looks like a galaxy. A cluster of holes in a circular pattern suggests a star or sun.
Budget Tip
A standard cordless drill handles pumpkin drilling easily. This technique produces no large cut sections to remove — cleanup is faster than carving. Drill multiple pumpkins in sequence for a doorstep display where each glowing dot pattern looks different from the others.
6. Googly Eye No-Carve Pumpkin
The fastest pumpkin decoration on this list — two large googly eyes from a craft store and a painted mouth take under five minutes and are accessible for the youngest children.
Press two large self-adhesive googly eyes onto the front face of the pumpkin. Position them about one-third down from the stem for the most natural face proportion.

Draw or paint a mouth below the eyes with a black paint pen or black acrylic on a brush. A wavy line, a zigzag, or a wide curved grin all work.
The googly eyes add genuine humor — they catch the light and appear to move when the pumpkin is tilted or when a breeze moves it slightly. Children find this endlessly entertaining.
Add pipe cleaner eyebrows bent into surprised or angry shapes and pushed into the pumpkin flesh just above each eye. The flexible pipe cleaners hold their bent shape throughout the evening.
Add a few craft foam teeth below the mouth for extra character.
Budget Tip
Large self-adhesive googly eyes are sold in craft stores in multi-packs for very little. This decoration is designed for toddler participation — they apply the eyes, they paint the mouth, they own the finished pumpkin completely. A googly eye pumpkin requires no adult intervention at any step.
7. Spiderweb Carved Pumpkin
A carved spiderweb is more graphic and geometric than a face design — it suits people who want something different from the standard jack-o’-lantern expression.
Draw the web structure on the pumpkin surface before cutting. Start with a central point — a small circle. Draw six or eight straight lines radiating outward from the center circle across the pumpkin face.

Add curved arc lines connecting the radiating lines at regular intervals from the center outward. Each arc connects adjacent radiating lines at the same distance from the center. These arcs create the web structure.
The challenge is cutting the thin radiating lines without the sections between them breaking away. Keep the sections between web lines at least 1.5cm wide for structural integrity.
Carve a small spider in one corner of the web — a small oval body with eight short curved leg stubs extending from the sides.
Cut through the full web pattern for a glowing web effect, or use shallow relief carving to remove only the outer skin for a subtler lit effect.
Budget Tip
Drawing the geometric web structure on paper first and then transferring it to the pumpkin with a pin-prick template method gives much cleaner lines than drawing freehand on the curved surface. The web design suits medium-sized pumpkins with a relatively flat face section best.
8. Stacked Pumpkin Totem Tower
Three pumpkins stacked into a totem tower look like a serious display piece but take the same carving time as one pumpkin — you simply divide the face elements across three gourds.
Buy one large, one medium, and one small pumpkin. Carve only the mouth into the bottom pumpkin — a wide, slightly sinister grin. Carve only the eyes into the middle pumpkin. Carve only a nose or a raised eyebrow expression into the top pumpkin.

Stack the three carved pumpkins directly on top of each other — the stem of the middle pumpkin sits in the lid opening of the large bottom pumpkin, and the small pumpkin sits on top of the middle one.
When lit individually with a separate LED in each pumpkin, the stacked tower glows as a single continuous three-story face.
The three-part face reads as a complete expression from a distance even though no single pumpkin contains a complete face.
Budget Tip
Three small to medium pumpkins in descending sizes are often sold as a set at farm stores and grocery stores in late October at reduced prices. The stacking construction requires no hardware or adhesive — the weight of each pumpkin and the lid hole connection holds the tower stable on a flat surface.
9. Witch Hat Silhouette Scene
A witch hat silhouette carved across the center of a pumpkin creates a classic Halloween scene without requiring any facial features — the graphic scene image is the design.
Print a witch hat silhouette template — available free from any Halloween craft resource site. The template should include the hat, a broom, and optionally a small moon circle.

Transfer the template to the pumpkin face using the pin-prick method. Connect the dots with a drawn line.
Carve the hat outline, the broom, and the moon as separate cut-through sections. Leave the background pumpkin flesh intact between elements — the uncut flesh is what makes each element read as a distinct shape.
The hat, broom, and moon all glow orange when the interior LED illuminates them. The surrounding uncut flesh remains dark, framing each lit element.
Add a small star cut near the hat tip for an extra detail that catches light beautifully.
Budget Tip
A witch hat scene template produces a more sophisticated finished result than a hand-drawn attempt on a curved surface. Print two sizes of the same template and choose which scale suits your pumpkin’s face area before committing to the transfer. The same template works on squash and white pumpkins for a dramatically different color effect.
10. Washi Tape Geometric Pumpkin
A washi tape pumpkin requires no knife, no paint, and no drying time — apply the tape directly to a clean dry pumpkin surface and it is ready to display immediately.
Use Halloween-themed washi tape in orange, black, and purple — or use any geometric patterned tape in coordinating colors. Apply strips in horizontal bands around the pumpkin, following the natural rib lines.

Apply tape while the pumpkin is completely dry. Tape does not adhere to damp or freshly washed pumpkin skin. Wipe the pumpkin surface with a dry cloth and wait 10 minutes before applying.
Create geometric patterns by applying tape at angles across the ribs rather than following them. Overlapping two tape colors at different angles creates a plaid or crosshatch pattern.
Cut tape ends cleanly with scissors for crisp edges at the pumpkin base and stem.
Add small circle punch-outs from black tape as polka dots scattered between the geometric stripes.
Budget Tip
Washi tape is removed cleanly from a pumpkin surface when you want to reuse the pumpkin for cooking after Halloween — or to change the design entirely the next day. This is the only reversible decoration on this list. A washi tape pumpkin takes under five minutes from start to display.
11. White Pumpkin Black Paint Design
A white pumpkin with black painted designs has a completely different aesthetic from an orange carved pumpkin — more elegant, more graphic, and suitable for interiors as much as doorsteps.
White pumpkins — technically called ghost pumpkins or Lumina pumpkins — are widely available in late October alongside orange varieties. Their pale surface makes painted designs far more visible than on orange flesh.

Use a fine black paint pen for line designs — a spider web, a bat outline, a skeleton hand, or a delicate floral skull. Paint pens give better line control than brushes on a curved surface.
For a web design: start from a central point near the stem, draw radiating lines outward, then connect them with gently curved arcs.
For a skull design: draw two large circles for the eye sockets, a small triangle below for the nasal cavity, and a row of rectangular teeth below that.
The design dries in under 10 minutes with no additional sealing required for a one-night display.
Budget Tip
Black paint pens are inexpensive and available at most craft and stationery stores. One pen covers many pumpkins. White pumpkins are sometimes priced higher than orange ones — but one white pumpkin creates a display impact equivalent to several orange ones because of the visual contrast.
12. Black Cat Face Carved Pumpkin
A cat face carve is a step up from the classic triangle face but still achievable in under 25 minutes — the almond-shaped eyes and fang-heavy mouth give the pumpkin a distinctly different character.
Draw almond-shaped eyes — oval but with a pointed inner corner and a pointed outer corner. The pointed corners give the eyes their feline quality. Cut carefully along the pointed corners rather than pushing straight through.

Cut the pupils as narrow vertical slits within each eye. Leave the flesh of the pupil slit attached — the narrow dark slit against the glowing eye background creates the classic cat eye effect.
Draw an inverted V nose — like an upside-down Y. Three cuts meet at a central point to create the small triangular cat nose.
Add two prominent fang points at the bottom of the mouth opening for a fierce expression.
Carve two small triangular ear shapes into the flat top surface of the pumpkin on either side of the stem. These raised ears add the final cat silhouette detail.
Budget Tip
The pupil slit technique — cutting through but leaving the flesh attached — is one of the most effective carving details for minimal effort. Practice the almond eye shape on paper first to build confidence with the pointed corner cut before attempting it on the pumpkin.
13. Moon and Stars Carved Pumpkin
A moon and stars design produces a celestial, slightly mysterious jack-o’-lantern that suits a wider range of home styles than the classic face design.
Cut a crescent moon shape from the pumpkin center. The cleanest crescent is made by cutting a large circle, then cutting a second slightly smaller circle overlapping the first — removing the overlapping section leaves a clean crescent.

The crescent needs structural support — the two points of the crescent are the most fragile sections. Keep the horn tips at least 2cm thick and taper them gently rather than cutting to a sharp point.
Cut three stars of different sizes around the crescent. Use a star-shaped cookie cutter pressed into the surface as a cutting guide for clean star points.
The combination of the large glowing crescent and three smaller glowing stars creates a complete celestial composition that looks considered and designed.
Budget Tip
Small metal star cookie cutters work extremely well as carving guides on pumpkins — press the cutter firmly into the pumpkin surface to score the outline, remove the cutter, then cut along the scored line with a knife. Cookie cutter-guided stars are perfectly symmetrical in a way that freehand stars rarely are.
14. Haunted House Silhouette Scene
A haunted house silhouette carve transforms a pumpkin into a miniature glowing scene — when lit, it looks like a Halloween illustration printed in orange light.
Print a haunted house silhouette template — a two-story house with a pointed turret, two windows, a front door, and a bare tree beside it. This template is available free from countless Halloween craft resources.

Transfer to the pumpkin using the pin-prick method. Connect the dots with a drawn line before cutting — the haunted house outline has many small connecting sections that are easy to cut incorrectly without a clear continuous guide line.
Cut the house outline as a single connected shape — the house stays as an uncut section of pumpkin flesh surrounded by cut-through areas. The surrounding cut sections glow while the house silhouette remains dark.
Cut the two windows as small rectangles within the house body — these glow individually inside the darker house silhouette for a haunted, inhabited effect.
Budget Tip
The silhouette-in-reverse carving technique — where the design is the dark uncut section surrounded by glowing cut areas — produces designs that look far more sophisticated than the standard cut-through approach. This technique suits any solid silhouette shape: a bat, a cat, a skull, or a witch on a broomstick.
15. Emoji Face Painted Pumpkin
An emoji face pumpkin is immediately recognizable, genuinely funny, and achievable in about seven minutes with a black paint pen and a small pink brush.
Choose your emoji — the classic slight-smile face, the laughing face, the terrified face, the skull emoji, or the jack-o’-lantern emoji itself recreated on a real pumpkin.

Draw the face using a black paint pen directly on the clean dry pumpkin surface. Emoji faces use simple geometric shapes — perfect circles for eyes, clean curved lines for mouths.
Use a small brush and pink or red acrylic paint for the blush circle marks on the cheeks if your chosen emoji has them.
The clean graphic line quality of emoji designs suits a paint pen approach far better than a brush — the pen’s consistent line width matches the flat graphic style of digital emoji.
Add the teardrop bead detail for the laughing-crying emoji by painting a single blue teardrop under one eye.
Budget Tip
A black paint pen handles the entire face in one tool. The emoji design requires no template — the simple geometric shapes are drawn entirely freehand in under five minutes. This is the fastest painted pumpkin design on the list and consistently produces the most social media-ready result when photographed.
Conclusion
A great jack-o’-lantern does not require hours of planning or professional carving skills — it requires a pumpkin, a clear idea, and the willingness to start. The 15 designs in this guide range from a five-minute washi tape application to a 25-minute haunted house carve — every one of them achievable in the hours before trick-or-treating begins. Start with the design that matches your available time and your tool situation. If you have a drill, do the dot pattern. If you have a paint pen, do the white pumpkin design or the emoji face. If you have a kitchen knife and 20 minutes, the classic triangle face or the bat silhouette will look exactly right on any porch after dark. Pick one, make it, put it outside with a light inside, and enjoy the glow. That orange light in the window is what Halloween looks like — and it takes less time to create than most people think.



