Teaching kids the alphabet gets so much better when their hands are involved. Clay alphabet projects give children a tactile, hands-on way to connect with letters — shaping them, decorating them, and displaying them in their own space. Whether you’re a parent looking for an afternoon craft, a teacher building a classroom activity, or someone making personalized décor for a child’s room, clay letters are one of the most rewarding and affordable projects you can try. Air-dry clay, polymer clay, and even salt dough all work beautifully. This guide walks you through 25 creative clay alphabet projects — each one practical, budget-friendly, and genuinely fun to make with kids.
1. Painted Air-Dry Clay Letter Tiles
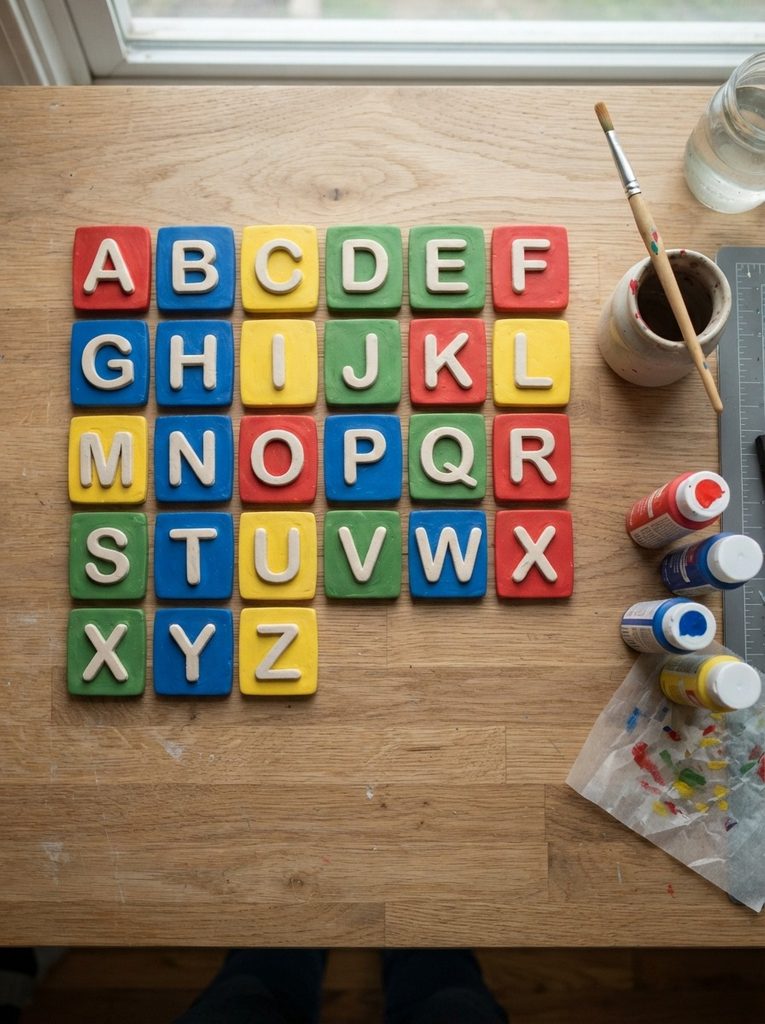
Letter tiles are flat, simple, and easy for kids of all ages to make and paint.
Roll air-dry clay into a flat slab about 1cm thick. Cut into equal squares using a ruler and craft knife. Press a letter stamp or a pre-cut stencil into each square while the clay is still soft.
Press firmly and evenly so the letter impression is deep and clean. Shallow impressions disappear under paint.
Let the tiles dry completely — usually 24 to 48 hours for air-dry clay. Once dry, sand the edges lightly with fine sandpaper.
Paint each tile in a bright base color. Once dry, dry-brush white paint over the raised letter to make it pop.
Budget tip: Air-dry clay is one of the most affordable crafting materials available. A large block costs just a few dollars and makes a full set of 26 tiles with clay to spare. Alphabet stamps are sold in sets at most craft stores for very little.
These tiles work as bedroom wall displays, learning tools, or even a name plaque for a child’s door. Arrange them in alphabetical order on a small shelf, or spell out a child’s name.
2. Name Letters for Kids’ Room Walls
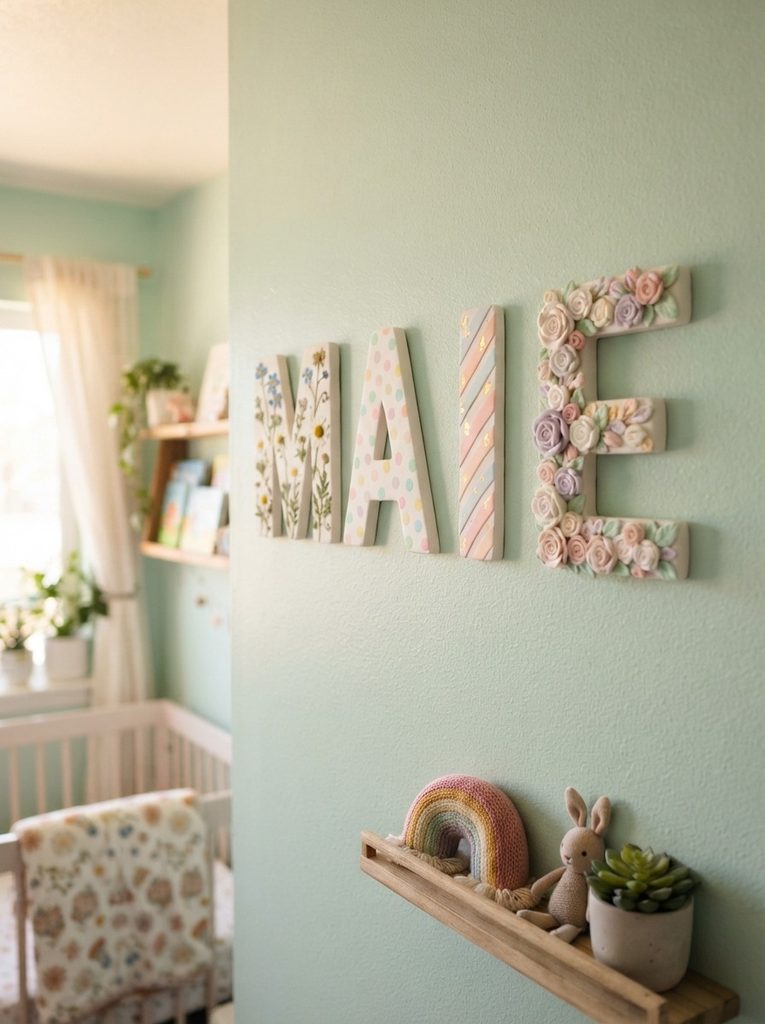
Personalized name letters make a child’s bedroom feel truly theirs.
Roll thick, sturdy clay logs and bend them into letter shapes. For each letter, keep the clay log thickness consistent throughout the shape. Thicker letters are sturdier and easier to mount.
Decorate each letter differently. One letter gets polka dots pressed in with a ball stylus. Another gets small flower imprints. A third gets stripe texture from a comb or fork.
Let each child decorate their own initial. Even toddlers can press simple textures into soft clay with minimal guidance.
Bake polymer clay according to instructions. For air-dry clay, dry slowly to reduce cracking.
Once dry, add a small adhesive hanging strip or pin mount to the back of each letter.
Budget tip: You only need letters for the child’s name — usually four to six letters. This uses much less clay than a full alphabet project. A single polymer clay multipack covers most short names easily.
These letters become room décor the child helped make. That personal connection makes them far more meaningful than store-bought wooden letters. They last for years when sealed with a protective varnish coat.
3. ABC Sensory Tiles for Toddlers
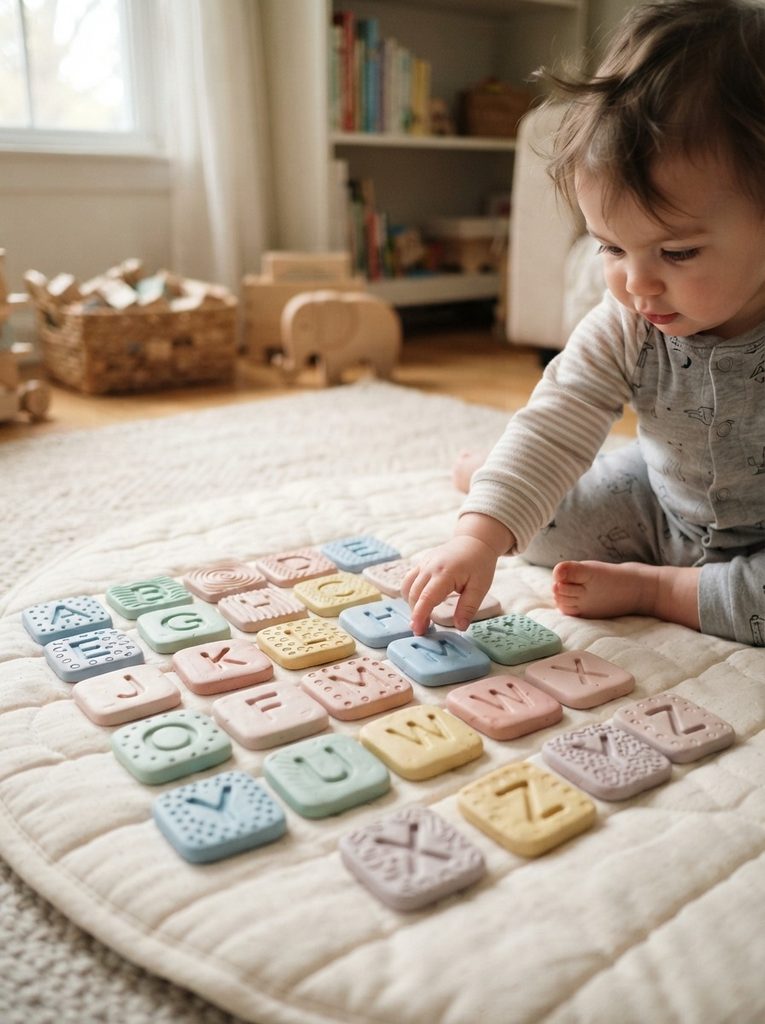
Sensory tiles combine letter recognition with tactile exploration — perfect for toddlers.
Make thick, chunky clay squares — at least 1.5cm thick. Round all four corners and edges so there are no sharp points. Safety matters most with projects for young children.
Press a large, clear letter into the center of each tile. Surround the letter with a different texture — bumpy dots on the A tile, wavy ridges on the B tile, smooth circles on the C tile.
Each tile should feel different when touched with eyes closed. This adds a sensory learning layer beyond just visual recognition.
Use air-dry clay for this project. Once fully dry, seal with a child-safe, non-toxic varnish. Make sure all paints used are non-toxic.
Budget tip: Sensory tiles don’t need to be painted in complex designs. Simple solid colors with strong textural contrast are more educational for toddlers than decorative painting. Plain natural clay with stamped letters works perfectly well.
Store the set in a small fabric bag or wooden box. Pull them out for counting games, letter hunts, or simple tracing activities. They’re an excellent quiet activity for toddlers during independent play time.
4. Clay Alphabet Animals
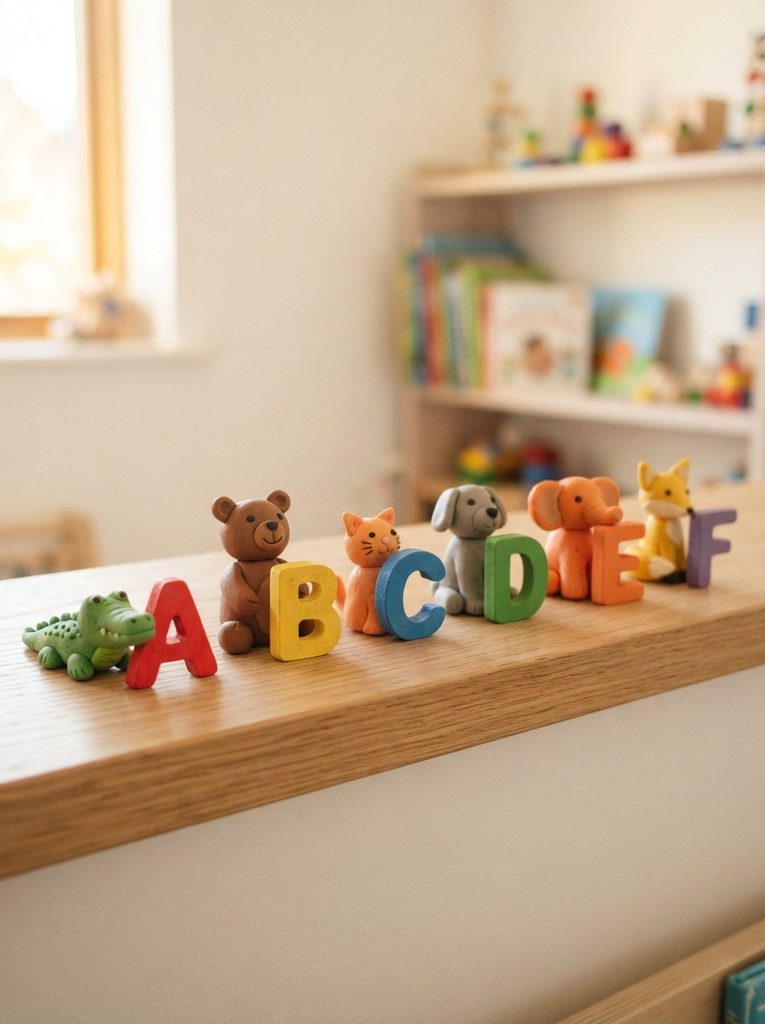
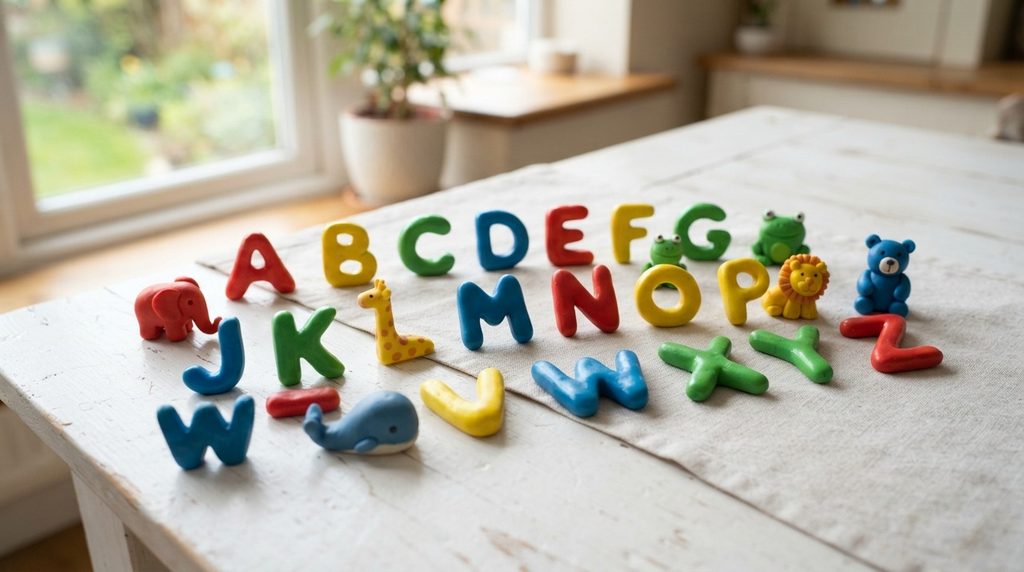
One animal per letter makes a complete alphabet set that teaches letters and animal names simultaneously.
Start simple. An alligator for A is just a green log with four small leg stubs, a long flat tail, and two dot eyes. A bear for B is three brown spheres — body, head, and a small snout. Keep the designs minimal.
Pair each animal with its letter. Make the letter flat and the animal three-dimensional, sitting beside or on top of the letter.
Choose animals kids already know well for the trickier letters. U for unicorn, X for fox (yes, the X sound in fox counts), Z for zebra.
Paint with bright, non-toxic acrylic paint once baked or dried. Add simple features — eyes, stripes, spots — with a fine brush.
Budget tip: Make the animals small — about 3–5cm each. Small sizes use minimal clay and dry or bake faster. One standard polymer clay multipack contains enough clay to make all 26 animals if you keep the sizes manageable.
Display the full set on a low bedroom shelf where children can handle and rearrange them during play. The physical interaction reinforces letter-to-animal memory connections.
5. Alphabet Magnets for the Fridge
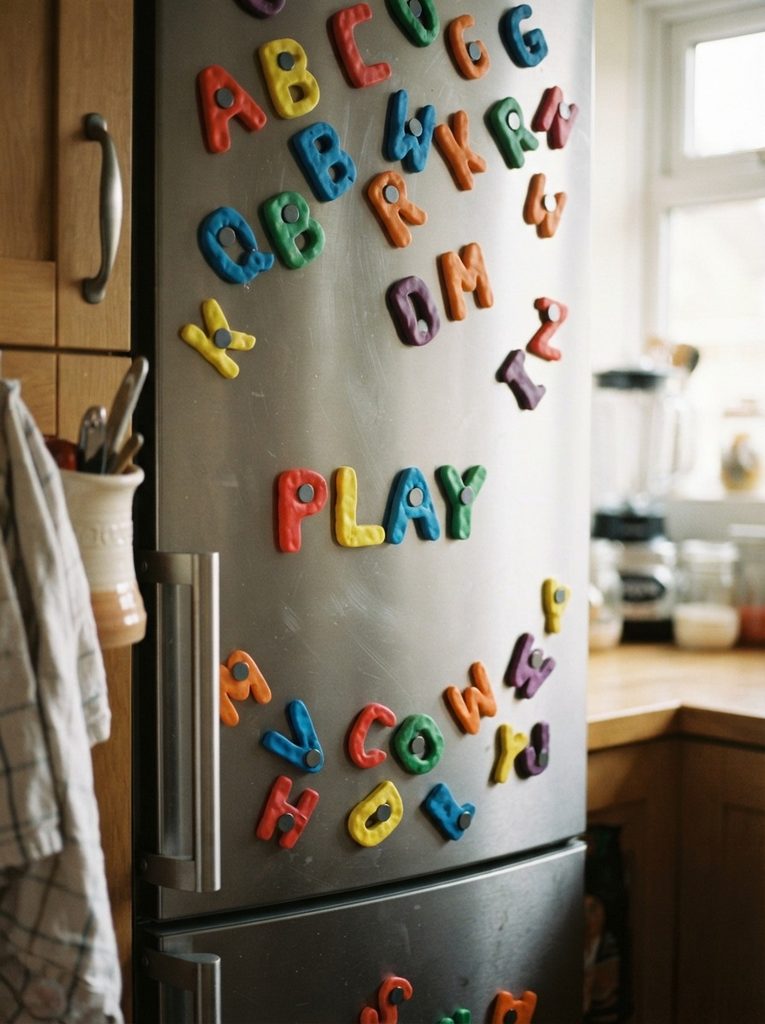
Fridge magnets are a classic learning tool — and homemade clay ones are far more charming than plastic sets.
Shape each letter from polymer clay. Keep them about 4cm tall and 5mm thick for durability. Smooth all surfaces carefully.
Bake fully. Once cooled, press a small circular magnet into the back of each letter using strong adhesive. Neodymium magnets are small, powerful, and inexpensive.
Test each magnet holds firmly before giving the set to a child. A magnet that comes loose is a choking hazard for young children. Use an appropriate magnet strength and enough adhesive.
Paint in bright colors once magnets are fixed. Seal with non-toxic, child-safe varnish.
Budget tip: Small neodymium magnets are sold in packs of 50 or 100 for just a few dollars online. The cost per letter is tiny. Combined with affordable polymer clay, a full set of 26 magnets costs very little to make.
Fridge alphabet magnets are a constant learning presence in the kitchen. Kids spell words while breakfast is being made. They rearrange letters during dinner prep. The casual, incidental learning adds up quickly over months of daily interaction.
6. Clay Letter Stamps for Painting
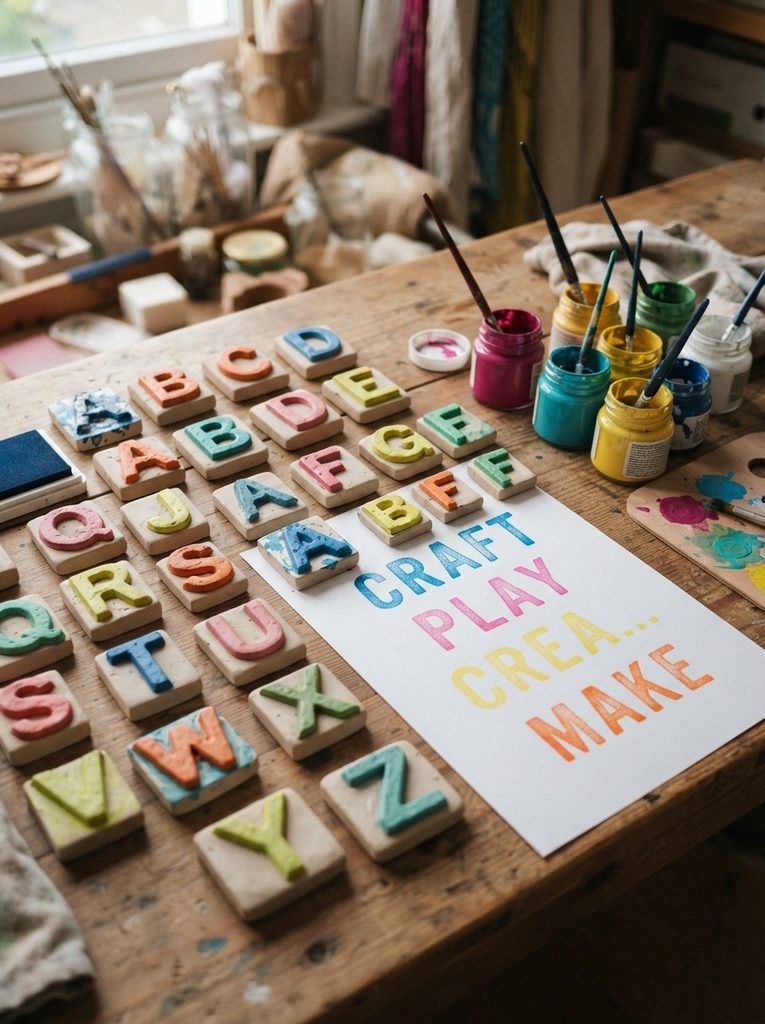
Making clay stamps teaches kids two things — how letters are shaped, and how printing works.
Roll thick polymer clay slabs. Press letter shapes in relief — raised from the surface — by building up extra clay in the letter shape on top of the base slab.
Raised letters stamp cleanly. Pressed-in letters create a reverse image when stamped. Make sure the letter relief goes the right direction for printing.
Bake the stamps firmly so they’re solid enough to press into paint without deforming. Let cool completely before use.
Dip into washable paint and press onto paper. The stamp produces a clean letter print each time.
Budget tip: Kids can help shape the clay letters for each stamp. This preparation step is itself educational — forming each letter shape helps children internalize its visual form. The stamps then become a reusable art tool for months.
Use the stamps to make alphabet posters, personalized birthday cards, gift wrap, and book labels. Store them in a small labeled box. Over time, a full set of 26 stamps becomes a craft supply the whole family uses regularly.
7. Glitter Clay Name Plaque
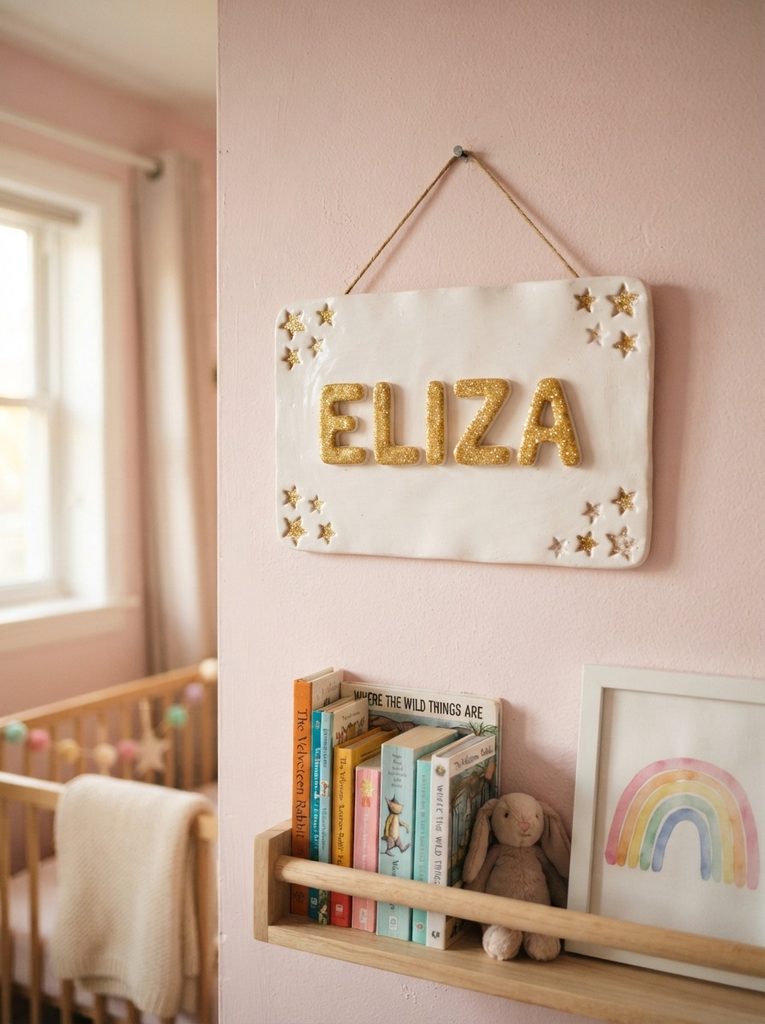
A name plaque with glittery letters is one of the most popular personalized room decorations for kids.
Make a flat rectangular clay base — large enough to hold all the letters of the child’s name with comfortable spacing. Smooth the surface carefully.
Make individual raised letters for each character in the name. Before baking, brush the letters with a thin coat of PVA glue and sprinkle fine glitter over each letter. Press gently so glitter adheres fully.
Apply glitter before baking polymer clay — the bake sets the glue and fixes the glitter permanently. For air-dry clay, apply glitter after the base dries and seal with varnish.
Add small star or heart impressions in the corners of the base for decoration.
Once complete, attach hanging hardware to the back — two small screw eyes and a wire, or adhesive picture-hanging strips.
Budget tip: Fine craft glitter is very inexpensive. Gold and silver glitter catch light beautifully and look premium despite costing very little. A single small glitter pot covers many letters.
This plaque makes an excellent handmade baby shower or birthday gift. Personalized items always photograph well and are deeply appreciated by parents.
8. Alphabet Puzzle Pieces in Clay
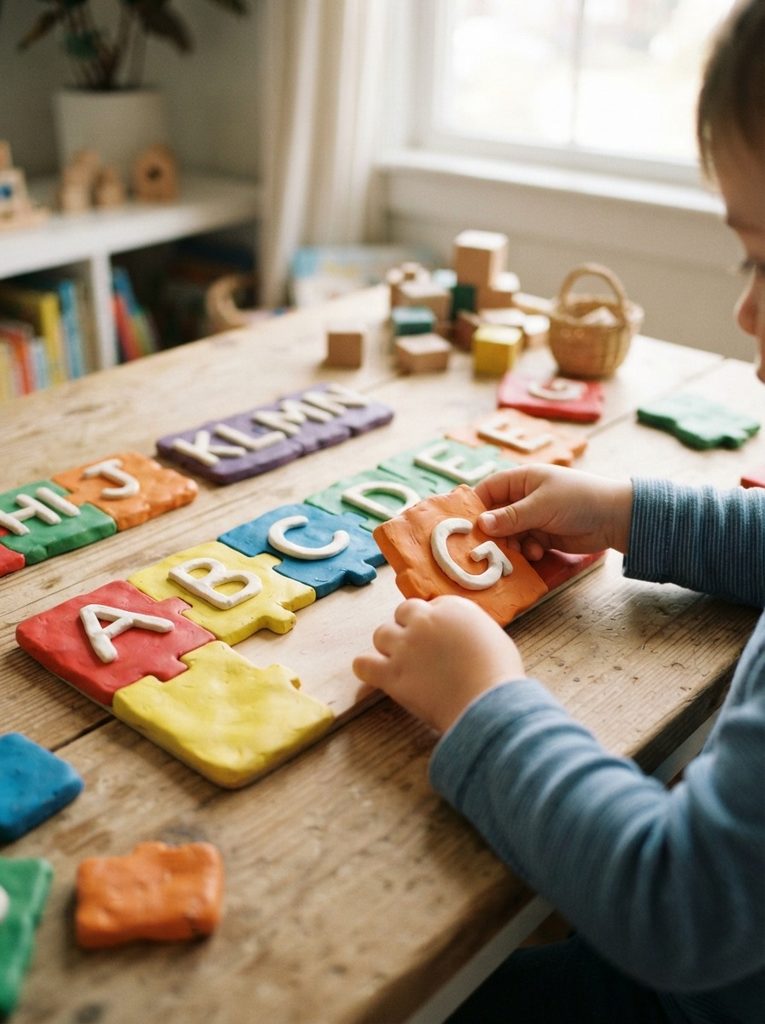
A clay alphabet puzzle combines fine motor practice with letter learning.
Make clay tiles with simple interlocking edges — a bump on one side, a matching indent on the adjacent side. Keep the interlocking shapes simple. A semicircle bump fitting into a semicircle hole is enough.
Press or stamp a letter onto each tile. Keep the tiles consistent in size so they assemble neatly.
Work on a flat, smooth surface while building so all tiles are the same thickness and lie flat when assembled.
Air-dry clay works best for puzzles since it’s slightly flexible when thin. Polymer clay can be brittle at thin puzzle-piece thicknesses.
Paint each tile a different bright color for visual variety. Seal with a durable, child-safe varnish.
Budget tip: Start with a smaller set — maybe the letters of your child’s name plus A, B, and C — rather than a full 26-piece puzzle. A name puzzle is more personally meaningful and takes far less time and clay to complete.
Alphabet puzzles develop letter recognition, fine motor control, and spatial reasoning simultaneously. Keep them at a low height in a play area for independent daily use.
9. Clay ABC Book Weights or Paperweights
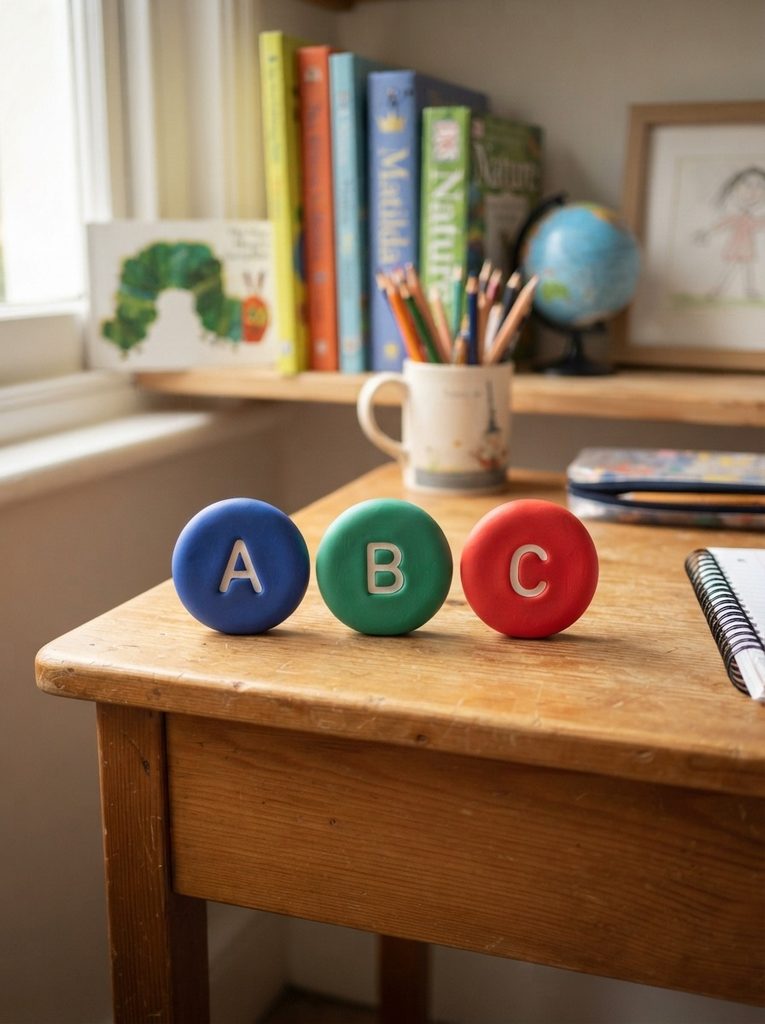
Letter paperweights are practical desk accessories that quietly reinforce alphabet familiarity.
Roll clay into smooth, flat-bottomed oval or round shapes — heavy enough to hold papers in place but not so large they take up too much desk space.
Press a clear letter into the top of each weight before drying or baking. Keep the letter large and clearly visible.
Weigh the base down slightly by pressing the bottom flat on a hard surface before the clay sets. This stops the weight from rocking.
Paint in solid bold colors. A single bright color per letter looks clean and purposeful on a desk.
Seal with a hard-wearing varnish — desk items get handled frequently and need a durable surface.
Budget tip: Paperweights are small and use little clay. They make excellent gifts for back-to-school season. A set of three letters spelling a child’s initials fits perfectly in a small gift box. Materials cost almost nothing for a set this size.
Place initial paperweights on a child’s desk from early primary school age. They become familiar, comforting objects that the child grows up identifying with their own name and letters.
10. Textured Alphabet Wall Art Panel
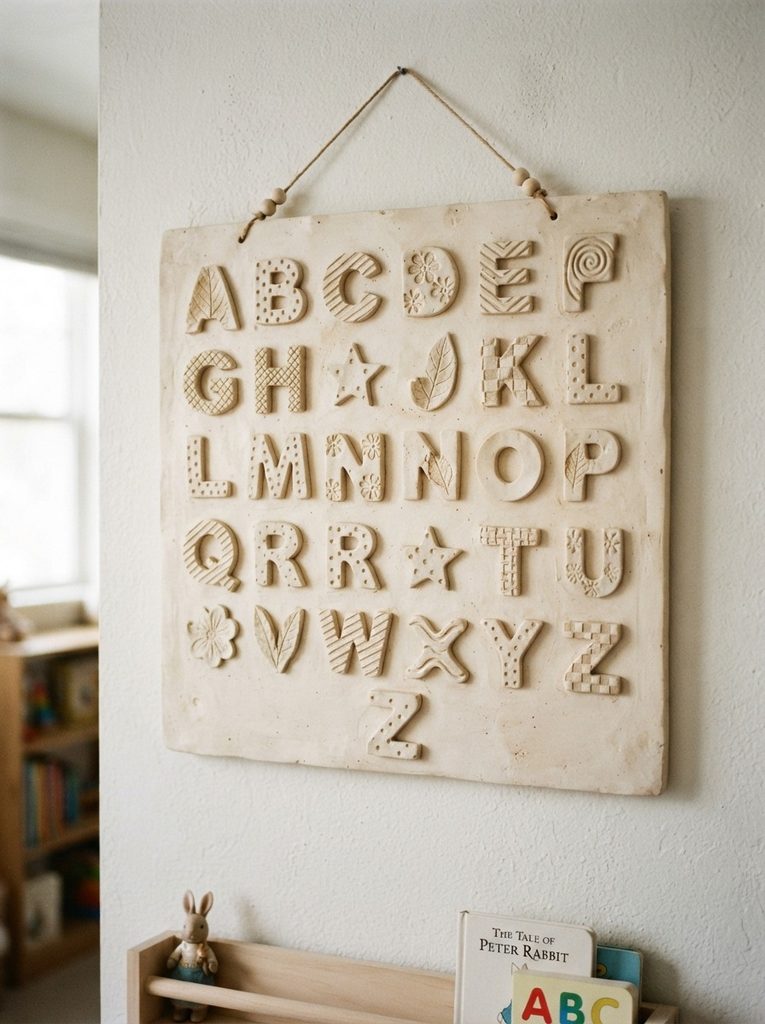
A full alphabet panel with every letter in one framed piece is a striking piece of kids’ room wall art.
Make each letter individually as a small tile. Give each tile a different background texture — press fabric, leaves, stamps, or tools into the surface around each letter.
Once all 26 tiles are made and dried, arrange them in a 5×6 grid (five columns, with the last row having one fewer tile). Mount them onto a painted wooden board or frame.
Vary the textures systematically. Vowels get one kind of texture, consonants get another. This adds a subtle visual pattern to the full panel.
Glue tiles to the backing board with strong craft adhesive. Let cure fully before hanging.
Budget tip: Work on this project in batches — a few letters per day. This spreads the time investment without any single session feeling overwhelming. Air-dry clay is inexpensive enough that even a full 26-tile panel costs very little in materials.
This panel makes an exceptional handmade nursery or bedroom gift. It can be made well in advance and stored flat until gifting. It’s also a wonderful long-term project to work on with a child, making a few letters at a time over several weeks.
11. Salt Dough Alphabet Ornaments
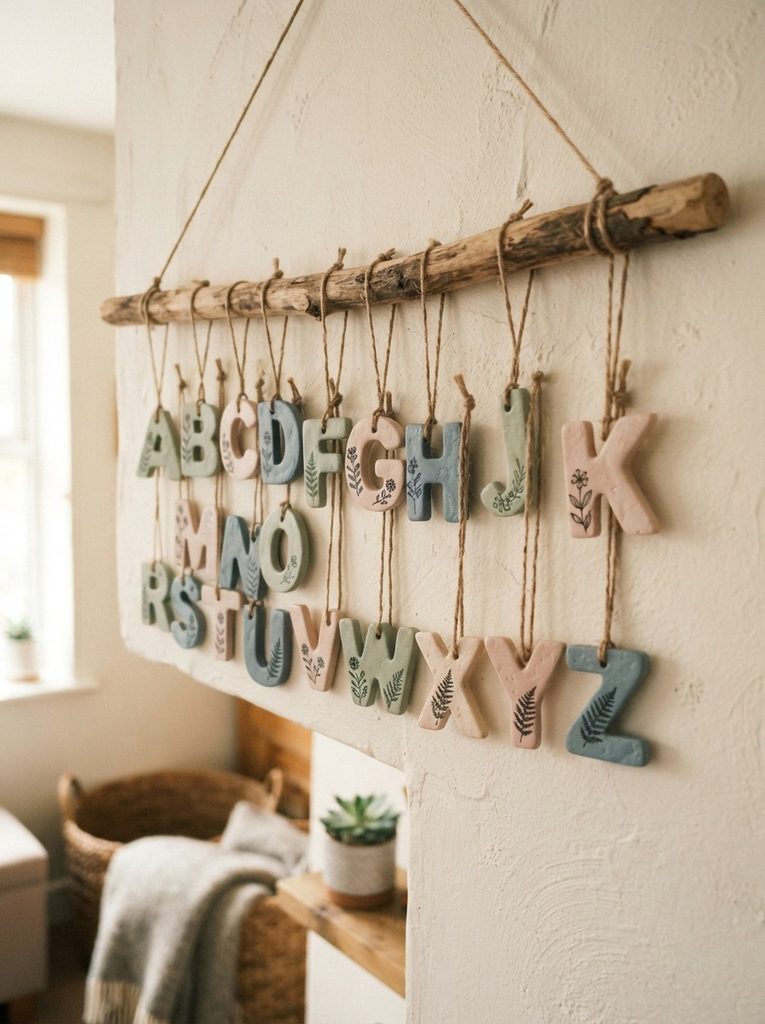
Salt dough is not polymer clay — but it’s a clay-like material worth including because it’s made entirely from pantry staples.
Mix one cup flour, half a cup salt, and half a cup water. Knead until smooth. Roll to 1cm thickness and cut letter shapes with cookie cutters or a craft knife.
Press a small straw or toothpick through the top of each letter before baking to create a hanging hole. This must be done before baking.
Bake at 200°F (95°C) for 2–3 hours until fully hard. Let cool completely.
Paint in soft, muted colors for a natural look. Add simple stamp impressions before baking for extra texture.
Thread twine or ribbon through each hole. Hang on a branch, dowel, or wall hook display.
Budget tip: Salt dough costs almost nothing — it uses flour, salt, and water you already have at home. A full batch makes well over 26 letters. This is the most affordable clay alphabet project on this entire list.
Salt dough ornaments are a wonderful holiday activity with children. They can help mix the dough, cut the letters, and paint them once baked. The whole process is safe for children from about age three upward.
12. Alphabet Coasters for a Child’s Desk
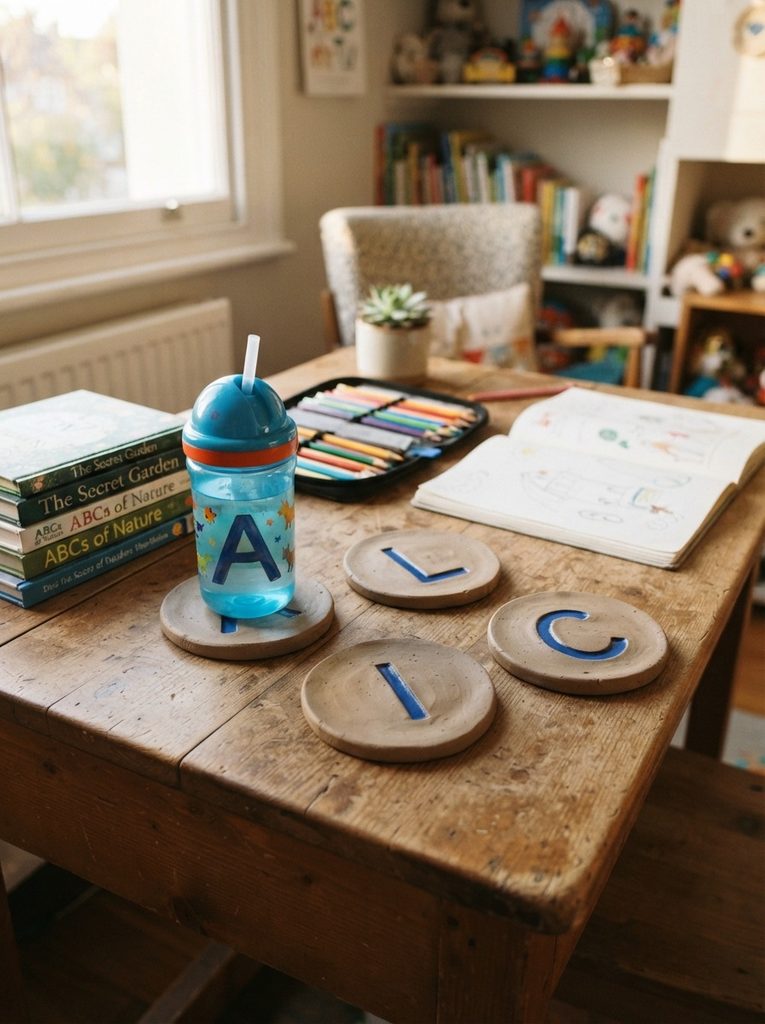
Practical and educational — clay coasters with letters teach the alphabet while protecting furniture.
Roll clay into flat circles about 9–10cm in diameter and 8mm thick. Press a large, clear letter into the center of each one. The letters should take up most of the circle surface.
Round and smooth the edges carefully. A neat edge is what separates a polished finished coaster from a rough DIY piece.
Apply cork to the base after drying. Cut cork sheet to the same circle diameter and glue it underneath. Cork protects table surfaces from scratching.
Paint the letter in one contrasting color. Leave the rest of the coaster in natural clay color for a simple, clean look.
Seal with waterproof varnish — coasters will get wet from condensation on cups.
Budget tip: Cork sheet is sold in large rolls very affordably. One roll provides backing for many coasters across multiple projects. Combine this with inexpensive air-dry clay for a practical, good-looking product made on a tiny budget.
A set of coasters spelling a child’s name makes an excellent, practical personalized gift. A full alphabet set is a beautiful addition to a reading corner or homework desk in a primary school child’s room.
13. Clay Alphabet Garland
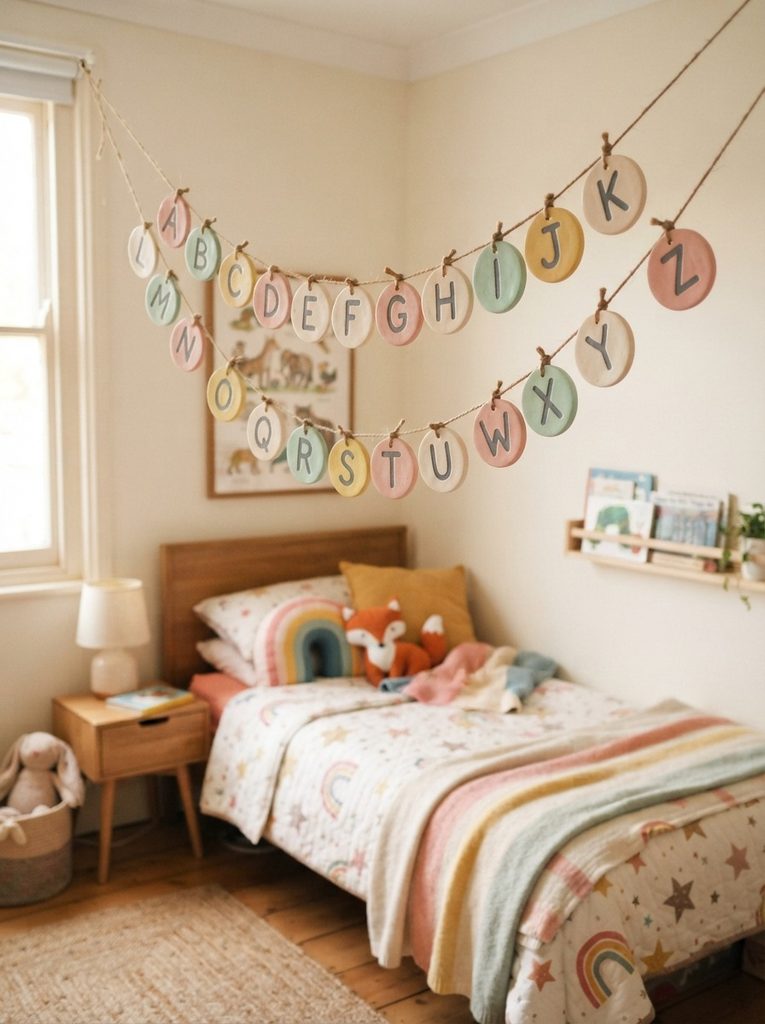
A clay garland is a beautiful, long-lasting alternative to paper banner decorations.
Roll clay into flat circles or small rectangular tiles — one per letter. Press a large letter into each piece. Use a straw to press a hole near the top of each tile before drying. This is the threading hole.
Dry completely. Paint each tile in a different pastel color. Seal with varnish.
Thread all 26 tiles onto a long piece of twine or ribbon in alphabetical order. Tie a small knot between each tile to keep them evenly spaced.
Even spacing is what makes the garland look deliberate rather than random. Cut equal lengths of twine between each tile or use evenly placed knots as spacers.
Hang with small nails or adhesive hooks across a wall or above a bed.
Budget tip: Natural craft twine is very inexpensive. Small pastel acrylic paints are available in mini multipacks for just a few dollars. The entire garland — all 26 letters — uses only one small block of clay.
This garland works as permanent bedroom décor, a party decoration for an ABC-themed birthday, or a classroom display for early years educators. It’s one of the most visually rewarding alphabet clay projects for the effort involved.
14. Clay Alphabet Memory Game Tiles
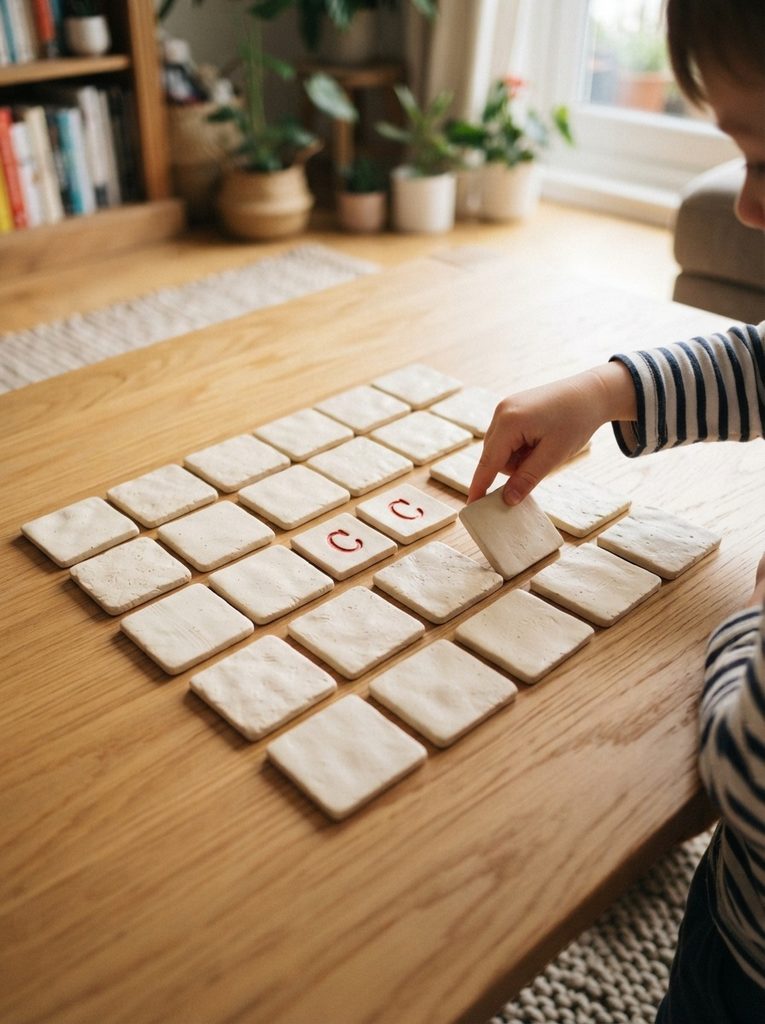
A clay memory game uses letter matching to build both memory skills and alphabet recognition.
Make two identical tiles for each letter — a matching pair. Keep the tile size and shape consistent across the whole set. Round squares or ovals both work well.
Press the same letter into each tile of a pair. The pair should be visually identical so matching works correctly.
Make the letter impression deep and very clear. Memory game tiles get handled constantly by small hands. A shallow impression wears away with repeated use.
Paint the tile backs all the same color — this is the face-down side during gameplay. Paint the letter side with the letter in a contrasting color.
Seal thoroughly with hard-wearing varnish.
Budget tip: Start with 10 pairs — 20 tiles total — rather than the full alphabet. A smaller set is more manageable for young children to play with. Expand the set as kids grow and need more challenge. Ten pairs use very little clay and paint.
Play the game by laying all tiles letter-side down in a grid. Take turns flipping two tiles. If they match, keep the pair. The player with the most pairs wins. This game plays well from about age four upward.
15. Initial Letter Keyrings
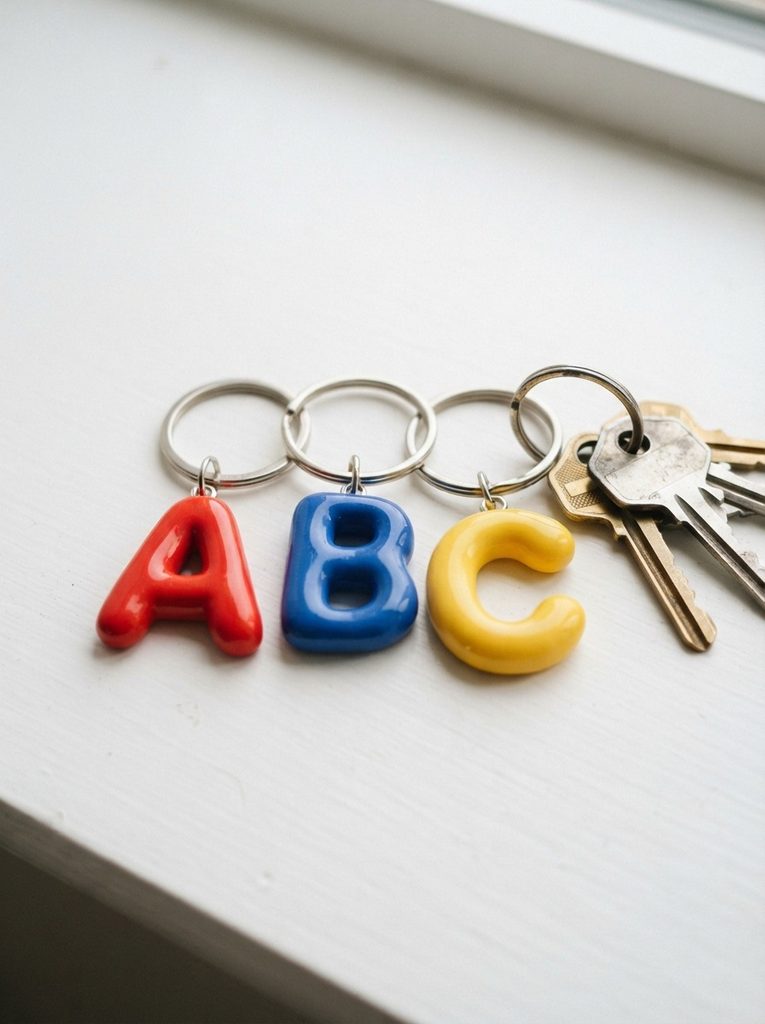
Initial keyrings are small, practical, and make wonderful gifts for children starting school.
Mold polymer clay into a chunky letter shape — thick enough to be durable as a keyring that will be handled daily.
Press a small metal loop into the top of the letter before baking. This loop connects to the keyring hardware after baking.
Bake the metal loop embedded in the clay so it becomes permanently fixed. A loop that is only glued on will eventually pull free under regular use.
Once baked, paint or leave in the natural clay color. Seal with a hard-wearing gloss varnish for a durable, finished surface.
Attach the baked letter to a keyring split-ring using the embedded loop.
Budget tip: Metal split-rings and loop hardware are sold in bulk packs for very little. The clay for one small letter uses barely any material. These keyrings are inexpensive to make in batches and are popular as party favors, stocking stuffers, and back-to-school gifts.
Children love having something personalized to attach to a school bag. Initial keyrings serve a practical purpose while also building that early pride in recognizing and owning one’s own letter.
Conclusion
Clay alphabet projects bring letters off the page and into children’s hands in a way that is genuinely memorable. Whether you’re shaping a simple set of letter tiles for a toddler, building an alphabet garland for a nursery wall, or making a full 26-letter diorama series with an older child, the process of working with clay and letters together creates lasting connections. The 25 projects in this guide cover every age group, skill level, and room in a child’s world — from bedroom wall art to desk accessories to active garden play. Start with the simplest projects that suit your child’s age and gradually try more detailed designs as skills and confidence grow. Most of these projects need only a few dollars of materials, a little time, and a willingness to let children get their hands into the clay. The alphabet has been the foundation of reading for generations — making it tactile, colorful, and handmade makes it feel like something worth exploring.