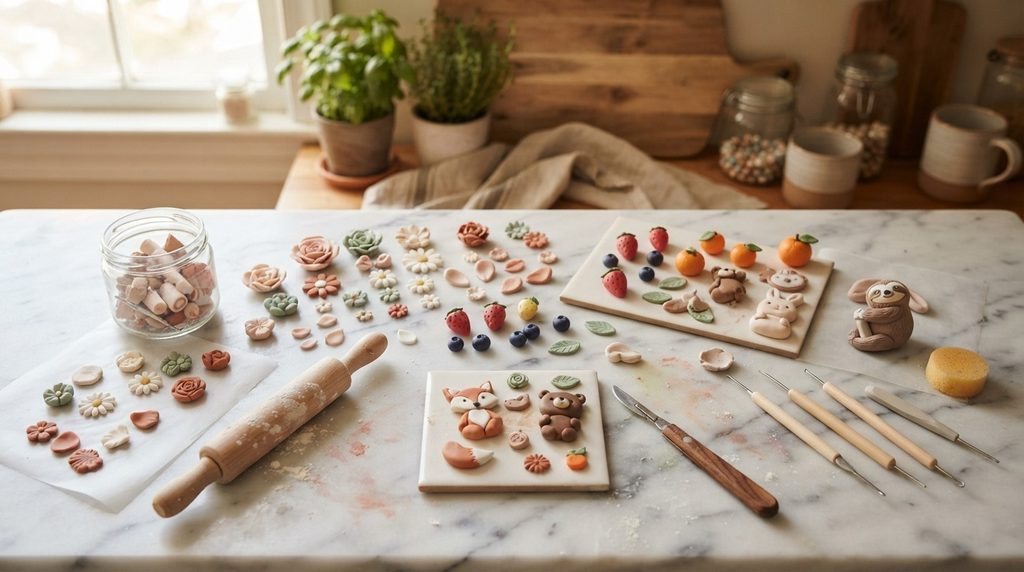
Making clay fridge magnets is one of the most satisfying DIY projects you can start today. You don’t need fancy tools or an art degree. A pack of polymer clay, a few magnets, and a free afternoon are all it takes. These little creations add personality to your kitchen, make thoughtful gifts, and cost almost nothing to produce. Whether you’re a beginner or someone who’s dabbled in clay before, there’s a style here that will click for you. This list covers 12 creative, budget-friendly handmade clay fridge magnet ideas that are easy to make, fun to display, and genuinely useful to know about.
1. Tiny Polymer Clay Sunflowers
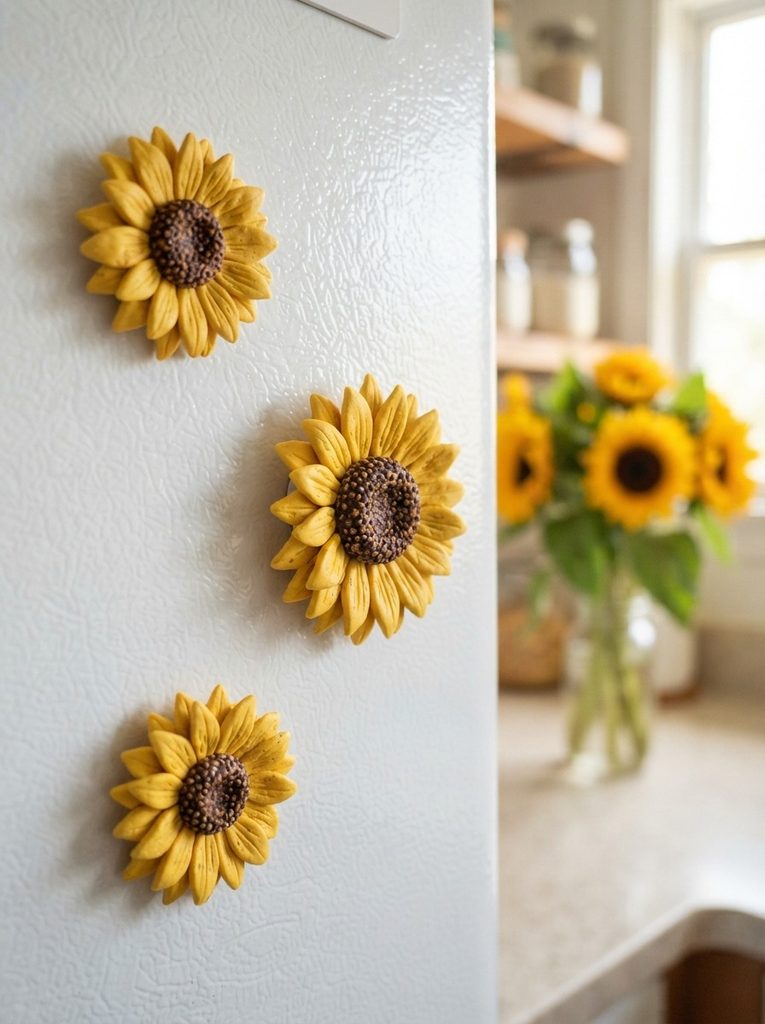
Sunflowers are cheerful, simple to shape, and perfect for beginners.
Start with yellow and brown polymer clay. Roll the yellow into a thin sheet. Cut out small petal shapes using a toothpick or craft knife. Press them around a small brown ball for the center.
Use a toothpick to add texture to the center. Press lightly to mimic seeds.
Bake according to your clay’s instructions — usually around 275°F for 15 minutes. Let them cool completely before gluing on a magnet disc.
Cost breakdown:
- Polymer clay pack: 5–8
- Magnet discs (50-pack): 4–6
- Super glue: $2
You can make 10–15 sunflowers from one small clay pack. That’s less than $1 per magnet.
Group three or four together on your fridge for a mini garden look. They also make great gifts. Drop them in a small kraft box with tissue paper and you have a handmade present for under $5.
Sunflowers are forgiving shapes. Even slightly uneven petals look charming. Don’t overthink the perfection — the handmade quality is what makes them special.
2. Miniature Fruit Slices
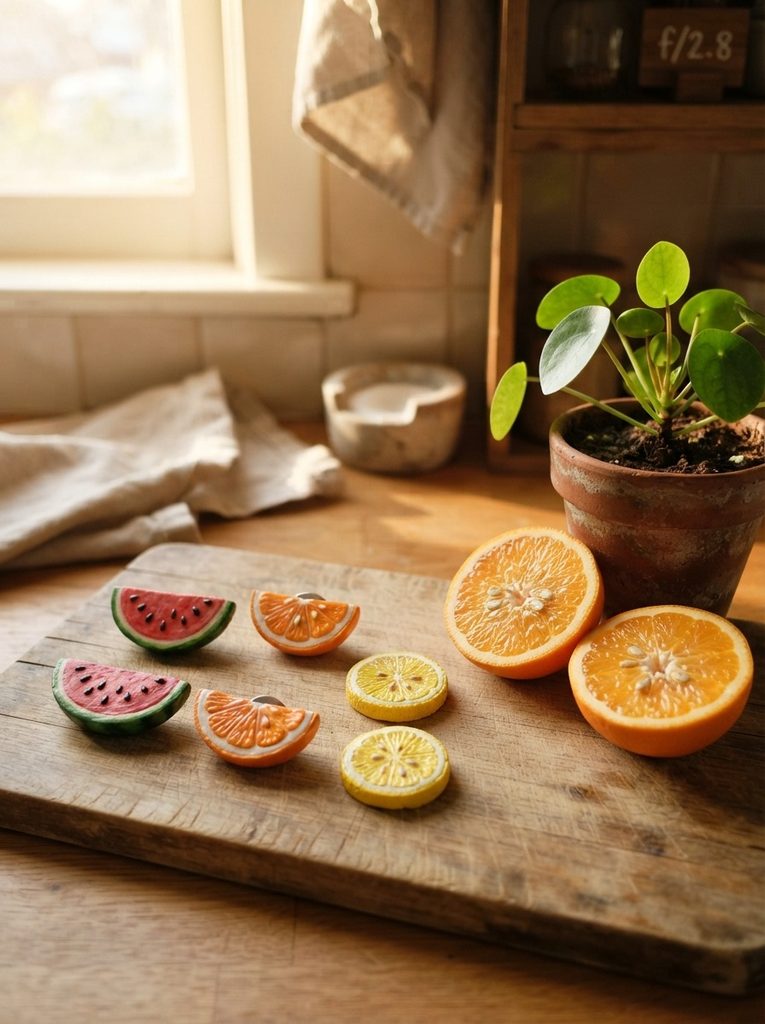
Fruit slice magnets are colorful, fun to make, and look great in a row on the fridge.
Pick your fruit — watermelon, orange, lemon, and kiwi all work beautifully.
For a watermelon slice, use three layers of clay: red for the flesh, white for the rind inner layer, and green for the outer skin. Press them together. Shape into a triangle. Add tiny black seed dots with a toothpick.
For orange slices, roll a circle of orange clay. Press thin lines from center to edge to create the segment look. Add a thin white border around the edge.
Keep each slice about the size of a large coin — roughly 1.5 inches wide. That size sits well on the fridge without crowding.
Bake, cool, and glue your magnet disc to the flat back.
These magnets brighten up a plain white fridge instantly. Kids love them too. Let children help press the clay layers together — it’s a safe and fun activity.
A set of six fruit slices costs under $10 to make and looks like something you’d pay $30 for in a craft shop.
3. Simple Cactus Shapes
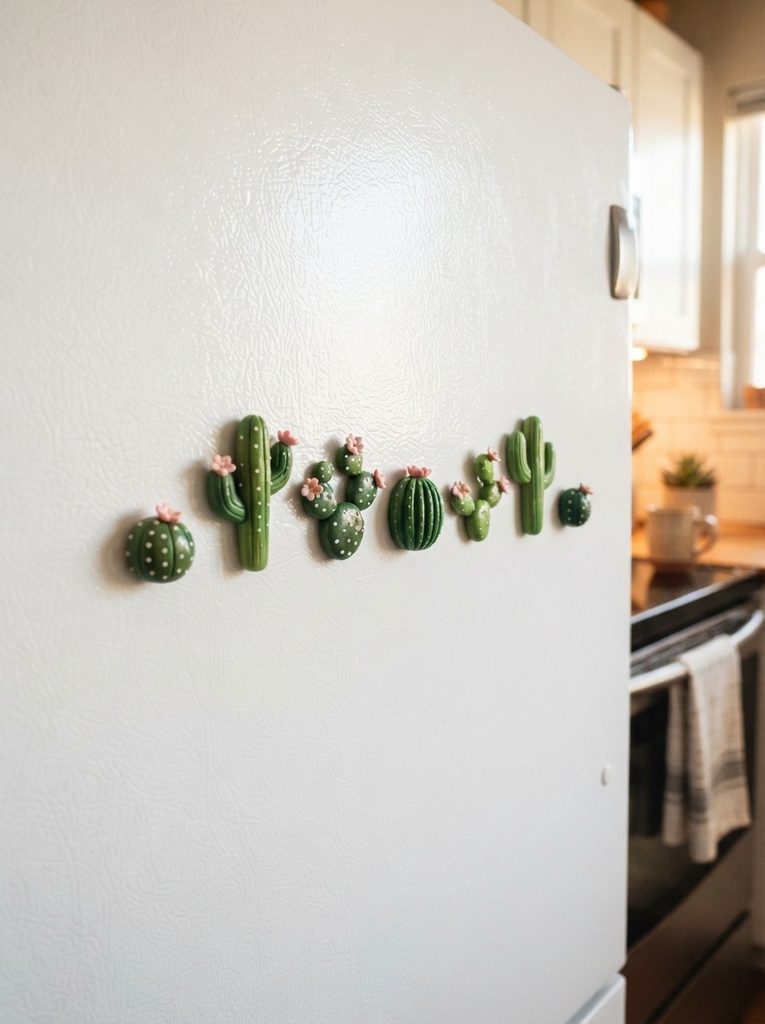
Cactus magnets are trendy, easy to shape, and work for any kitchen style.
Use green polymer clay in two or three shades if you have them. Even one shade of green looks great.
Shape your cactus by rolling a thick sausage for the main body. Add two shorter arms by pressing smaller rolls onto the sides. Use a toothpick to press small dots or short lines across the surface to suggest spines.
For a round cactus, make a ball and flatten it slightly. Add the same dot texture.
Want to add a flower? Roll a tiny pink or red ball. Flatten and press small petal indentations with a toothpick. Attach it to the top of the cactus before baking.
Make a small clay pot in terracotta orange to sit at the base. It’s optional but adds a lovely finishing touch.
Bake, cool, and attach a magnet to the back.
Cacti are low-pressure shapes. They’re supposed to look a little quirky. Crooked arms and lumpy bodies just add character.
A set of four cactus magnets costs around 3–5 in materials and takes about 45 minutes to make.
4. Air-Dry Clay Letter Magnets
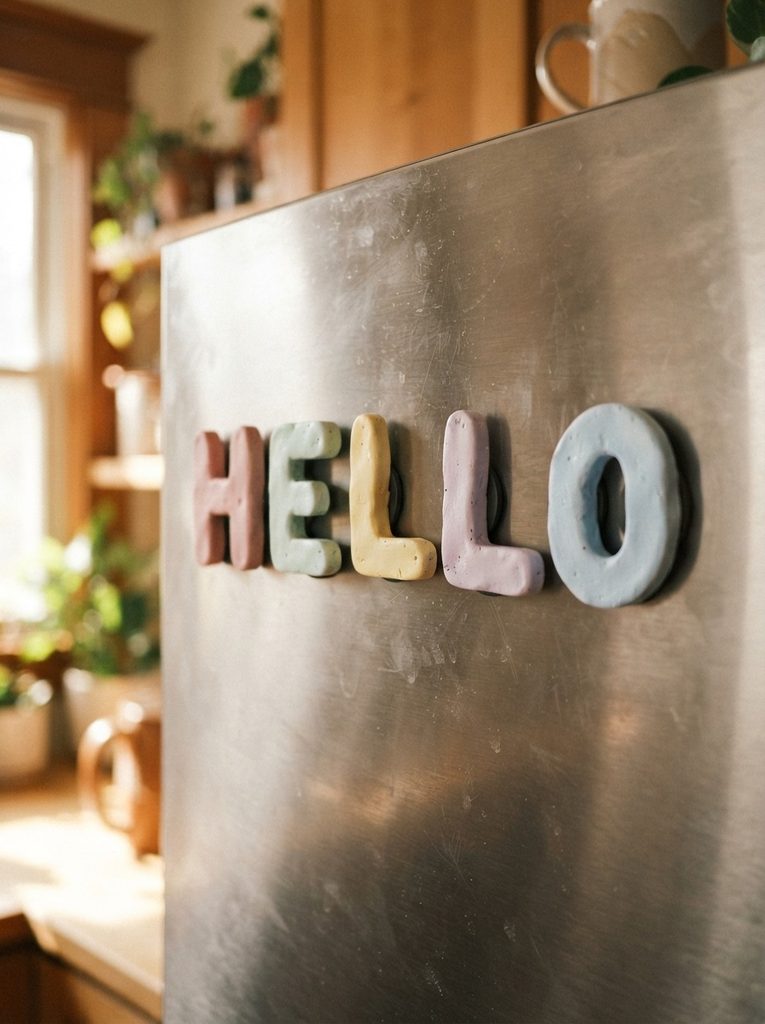
Letter magnets aren’t just for kids. Handmade clay versions look sophisticated and personal.
Use air-dry clay for this project — it’s cheaper than polymer clay and doesn’t need baking. A 2.2 lb block costs around $8 and makes dozens of letters.
Roll the clay to about half an inch thick. Use alphabet cookie cutters to cut out letters. If you don’t have cutters, shape letters by hand — blocky, chunky letters are easiest.
Let them dry for 24–48 hours on a flat surface. Flip them halfway through so both sides dry evenly.
Once dry, paint with acrylic paint. Pastels look beautiful. So does white with a single contrasting color outline.
Seal with a coat of Mod Podge or clear acrylic spray to protect the paint from kitchen moisture.
Glue magnet discs to the back once everything is fully dry.
Spell out your family name, a short word like HOME or LOVE, or just use initials.
Budget tip: Air-dry clay from a dollar store works perfectly fine for this project. You don’t need a premium brand.
These make meaningful, personalized gifts that feel expensive without being expensive.
5. Clay Rainbow Magnets
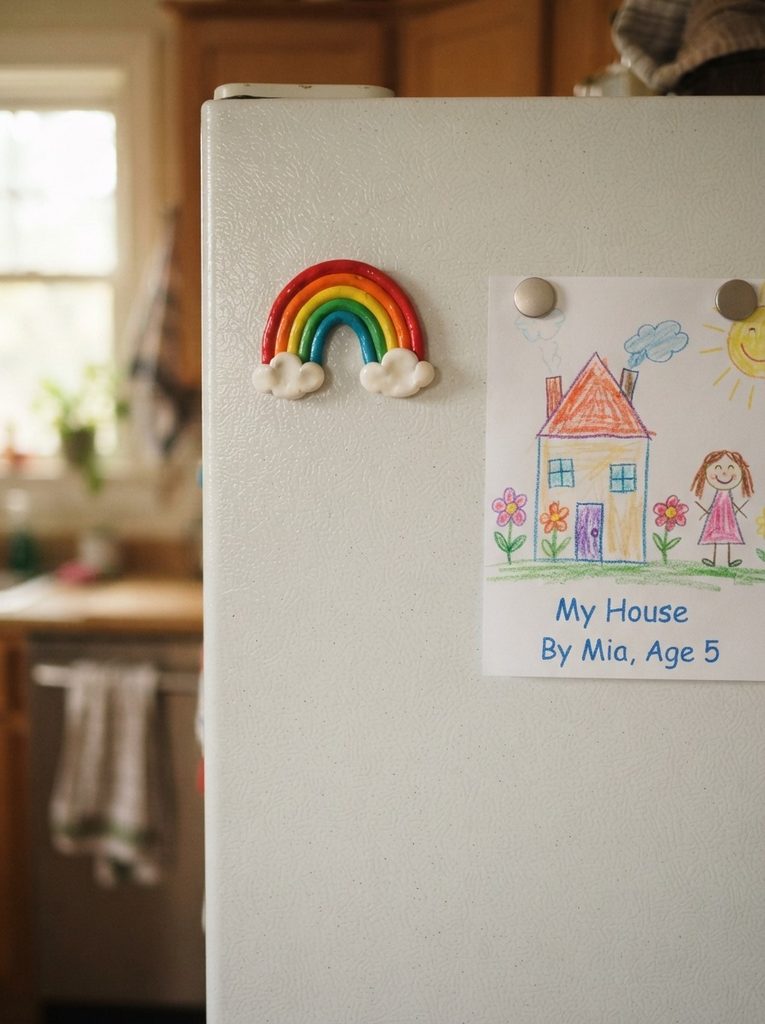
Rainbow magnets are joyful, simple, and take under an hour to make.
Roll thin ropes of clay in red, orange, yellow, green, blue, and purple. Keep each rope about the same thickness — a pencil-width works well.
Curve each rope into an arch. Stack them from the largest (red on the outside) to smallest (purple on the inside). Press gently to join them together.
Roll two small white ovals for clouds. Attach one to each end of the rainbow.
Flatten the back slightly so it sits even against the fridge surface. Bake, cool, and glue on your magnet.
The whole magnet should be about 2 inches wide. That’s a good display size.
Color tip: If you only have a basic clay kit, mix colors. Yellow plus blue gives green. Red plus white gives pink for a softer palette.
These are perfect for kids’ rooms or a playful kitchen corner. They’re also a fantastic project to make with children. Each child can roll their own ropes and assemble their rainbow.
Materials for six rainbow magnets cost around 6–9 total. That’s less than $2 per magnet — a great deal for something this cheerful.
6. Mushroom Magnets with Polka Dots
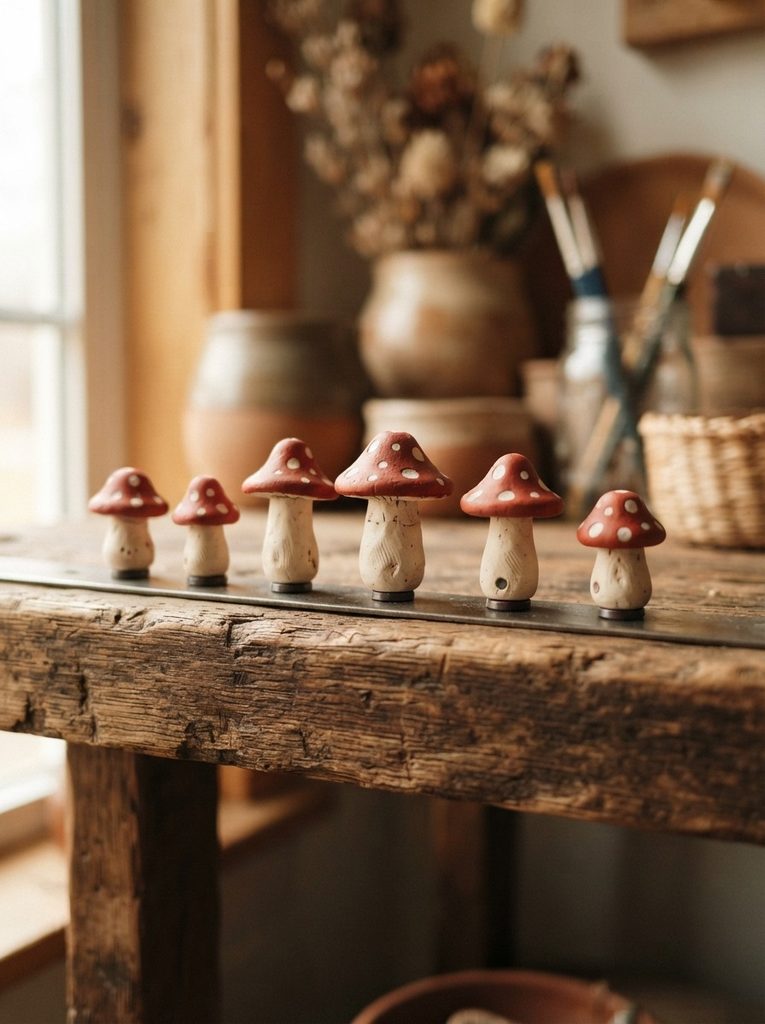
Mushroom magnets are having a major moment in the craft world — and they’re surprisingly easy to shape.
Start with red clay for the cap and off-white or cream clay for the stem.
Shape the stem into a rounded cylinder, slightly wider at the base. Shape the cap into a dome. Press them together firmly so they bond before baking.
Roll tiny white balls and press them gently onto the red cap. These are your polka dots. Don’t flatten them completely — a slight dome on each spot looks more natural.
Use a toothpick to add a few small lines to the stem for texture.
Make several in different sizes. A cluster of three mushrooms in different heights looks lovely grouped together on the fridge.
You can also try blue, purple, or orange caps for a more whimsical look. There are no rules here.
Bake, cool, and attach magnets to the back of each stem.
Helpful tip: Press the dot balls onto the cap before baking. Trying to glue them on afterward is fiddly and less secure.
These magnets cost about 4–7 to make a set of five and take around 40 minutes from start to finish.
7. Heart-Shaped Marble Effect Magnets
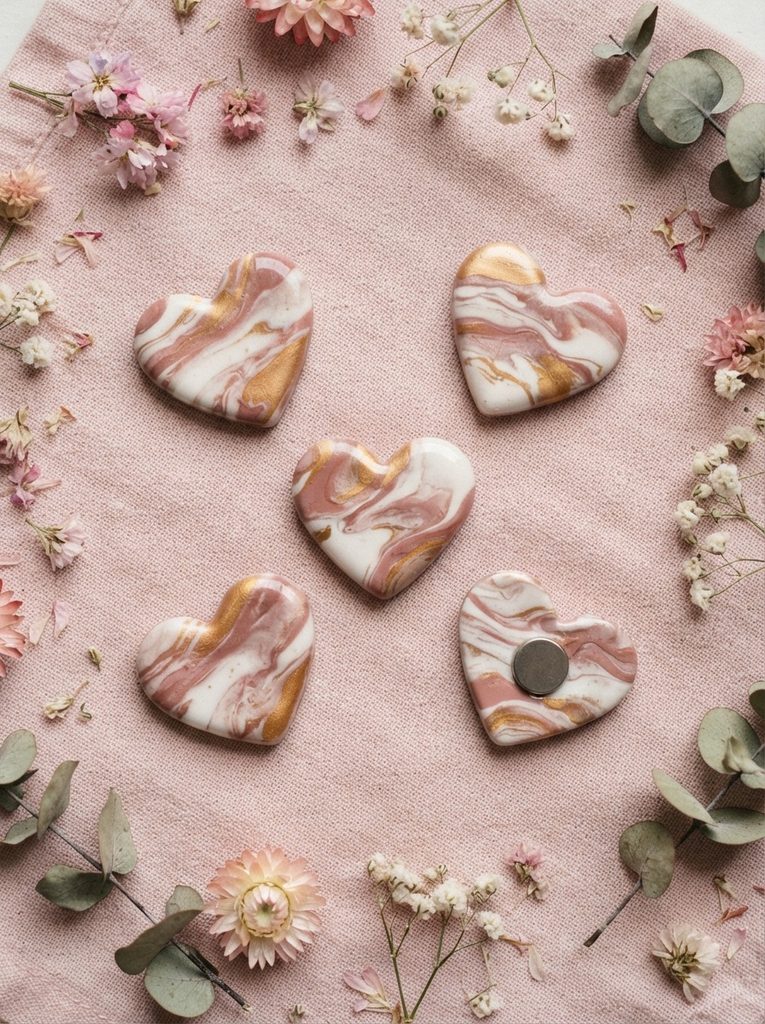
Marble-effect clay looks high-end but the technique is almost accidental — which makes it perfect for beginners.
Take two or three colors of clay. White with a hint of grey looks classic. White with dusty rose feels romantic. White with black is bold and graphic.
Twist the colors together loosely. Don’t over-mix — you want streaks, not a solid blended color. Four or five twists is usually enough.
Roll the twisted clay into a ball. Press it flat to about a quarter inch thick. Use a heart-shaped cookie cutter or cut by hand with a craft knife.
The marble pattern will be unique on every single heart. No two look alike, which is part of the charm.
Bake, cool, and sand the edges lightly with fine-grit sandpaper if they feel rough. Apply a thin coat of clear glaze for a polished look.
Glue your magnet disc to the back.
Gift idea: Make a set of five hearts in the same color palette, tie them in a small organza bag, and you have a beautiful handmade gift that costs under $8 to produce.
These are consistently popular at craft fairs and farmers markets, typically selling for 4–6 each.
8. Tiny Food Magnets — Pizza, Sushi, and Tacos
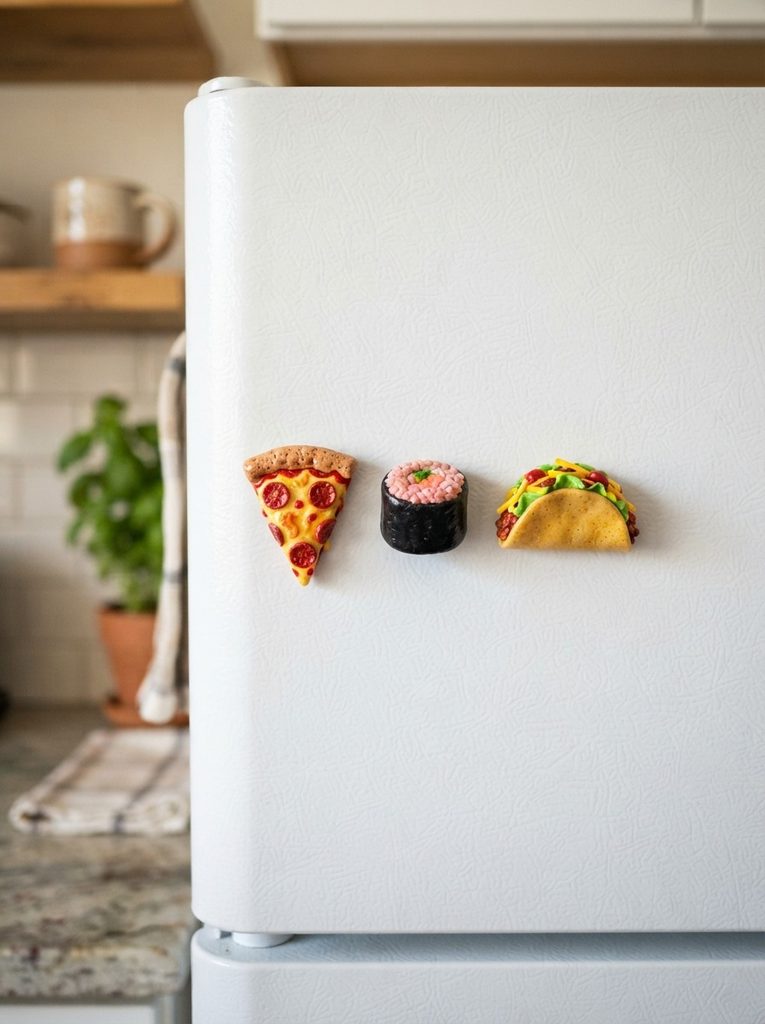
Miniature food magnets are charming, detailed, and always get compliments from guests.
Pick one food to start simple. Pizza slices are the most beginner-friendly.
For a pizza slice: roll a triangle of tan or cream clay for the crust. Add a red layer for sauce. Press small yellow bits for cheese. Roll tiny red dots for pepperoni.
For sushi: roll a white cylinder wrapped in a thin black sheet for the nori. Top with a small oval of pink clay for the salmon.
For a taco: fold a thin tan oval slightly. Layer in small bits of green, red, and yellow clay for the fillings.
Keep each piece small — coin-sized is ideal. Small details look more realistic at that scale.
Bake everything on a flat surface. Use a toothpick to press in fine details before baking.
Budget tip: A basic 10-color polymer clay kit from Amazon costs around 7–10 and gives you everything needed for food magnets.
These make excellent conversation starters in a kitchen. Put a pizza magnet next to your takeout menus. Instant personality.
9. Leaf and Botanical Magnets
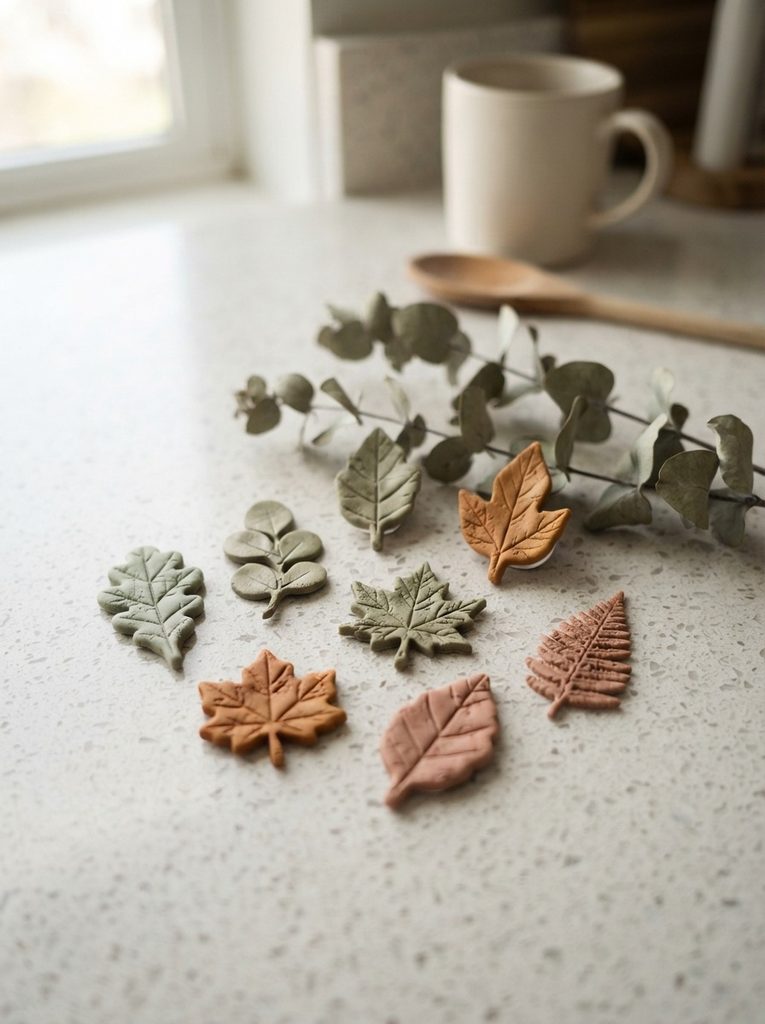
Botanical magnets bring a calm, natural feel to your kitchen without being overly crafty.
Collect a few real leaves from outside. These become your texture tools.
Roll green clay to about an eighth of an inch thick. Press a real leaf firmly into the clay surface, vein-side down. Lift the leaf carefully. The vein texture transfers beautifully.
Cut around the shape of the leaf impression with a craft knife. Trim the edges so they look organic, not perfectly smooth.
Try different clay colors — sage green, rust, olive, and mustard all look beautiful as leaf magnets. Mix a little brown into green for a more natural earthy tone.
Bake flat on parchment paper. Once cooled, optionally brush with a tiny amount of gold or bronze powder for an elegant shimmer on the veins.
Glue magnets to the back.
Cost-saving tip: You don’t need to buy leaf-shaped cutters. Real leaves from your garden or a park are free and create much more realistic textures than any cutter can.
A set of eight leaf magnets costs around 5–8 in clay and magnets. They look like something from a boutique home goods store.
10. Cloud and Raindrop Magnets
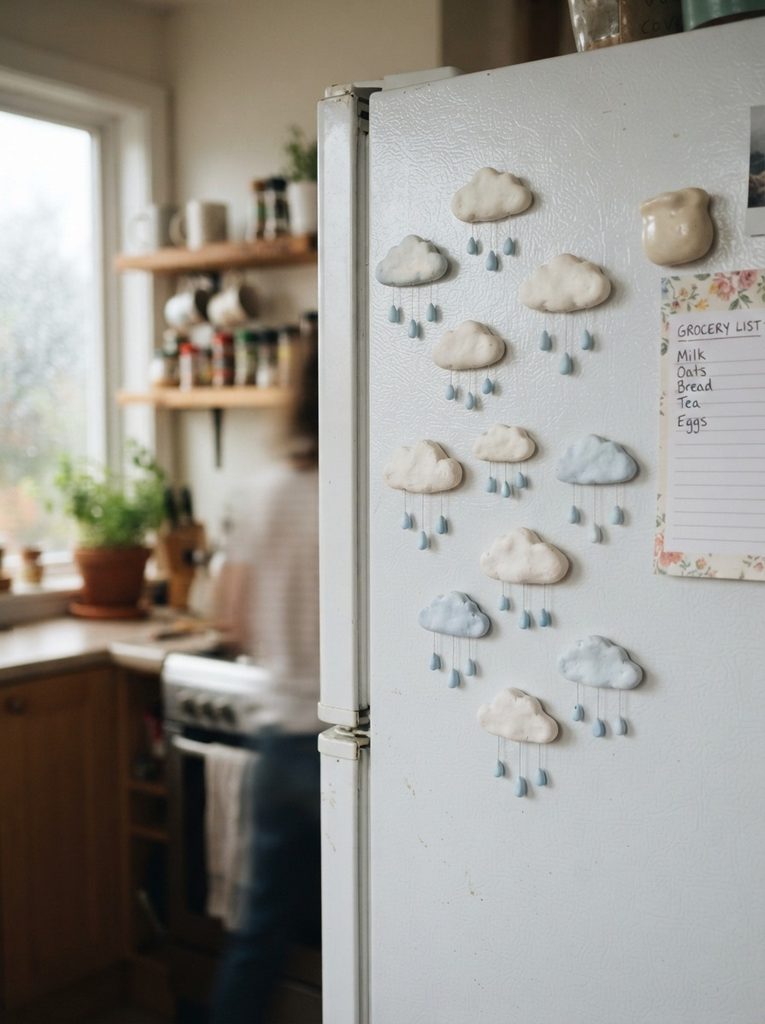
Cloud magnets are soft, whimsical, and suit any kitchen aesthetic from minimalist to cottagecore.
Shape white clay into a cloud by joining three or four small balls together in a row. Smooth the joints with your finger. The slightly lumpy shape is exactly right — clouds aren’t perfectly smooth.
For raindrops, roll small teardrop shapes from pale blue clay. Attach them to the base of the cloud before baking so they stay connected. Or bake them separately and glue on afterward.
Make some clouds with rain. Make others plain. A mix looks great on the fridge.
Try grey clay for storm clouds and yellow for a sun peeking behind a cloud. Small details like that add visual interest to a set.
Keep the cloud magnet about 1.5 to 2 inches wide. Raindrops can hang down about half an inch.
Bake on a flat surface so the bottoms don’t curve.
Display idea: Put cloud magnets along the top edge of your fridge and let the raindrops hang down. It creates a sweet visual effect without taking up too much space.
A set of six costs under $6 in materials and takes about 30 minutes to assemble.
11. Animal Face Magnets — Cats, Bears, and Foxes
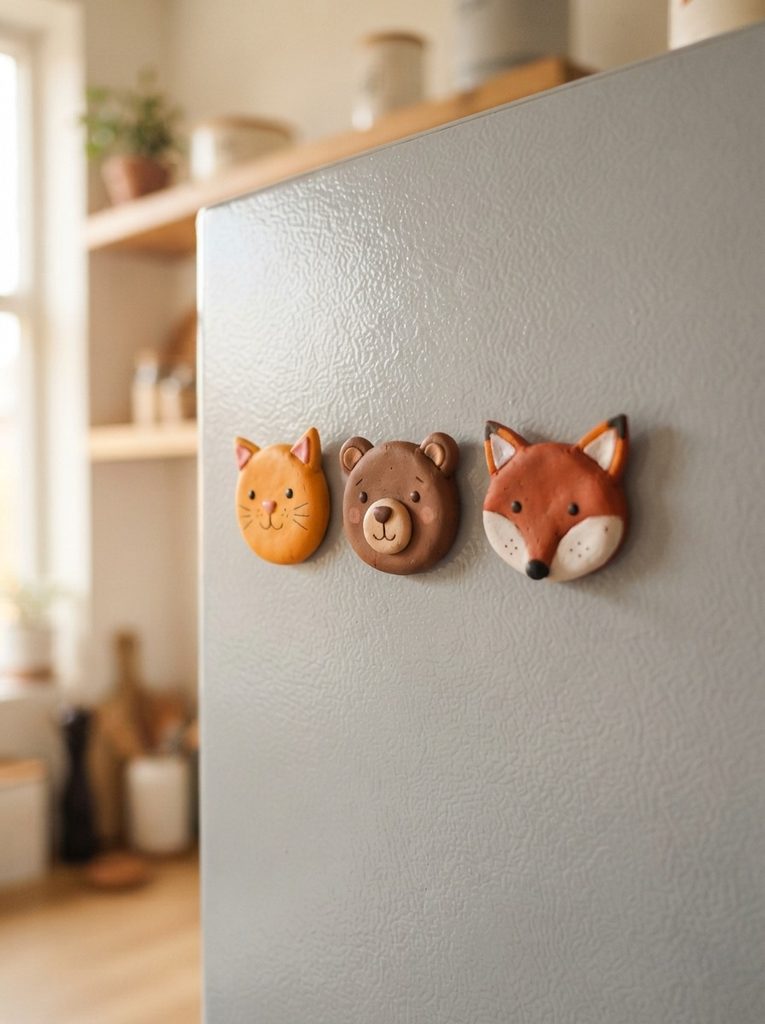
Animal face magnets are endlessly appealing and work for both kids’ spaces and adult kitchens.
Start with a round ball of clay flattened into a disc for the base face. This is the head.
For a cat: use orange or grey clay. Add two small triangle ears at the top. Press a tiny pink ball for the nose. Use a toothpick to draw whisker lines and a small mouth.
For a bear: use brown clay. Add a lighter circle for the muzzle area. Press it gently onto the face. Add two small round ears at the top.
For a fox: use rust-orange clay with a white muzzle and black-tipped ears.
Eyes can be tiny black balls pressed into the face, or drawn on with a toothpick after baking using black acrylic paint.
Beginner tip: Keep the design simple. Two ears, a nose, and some whisker lines are all you need for a recognizable animal face. Don’t overthink the details.
Bake, cool, and paint in any missing details. Seal with clear glaze.
A set of five animal magnets costs around 6–9 and takes about one hour, including baking time.
12. Ombre Gradient Round Magnets
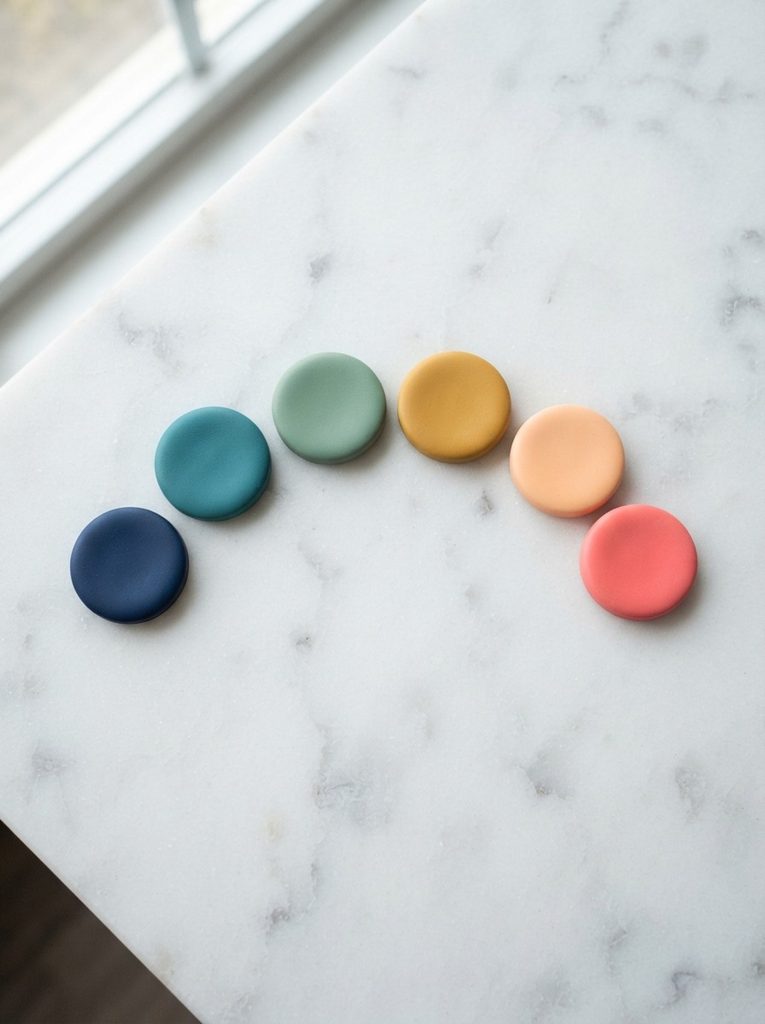
Ombre gradient magnets look modern, minimal, and almost like professional design pieces.
Pick two colors that blend well — blue and green, pink and orange, or purple and blue all work beautifully.
Take a small amount of color. Take a smaller amount of color two. Mix them partially — just a few folds — to create a streaky in-between tone. That’s your gradient middle point.
Roll each shade into a small flat disc about the size of a large coin. Smooth the edges with your fingertip.
Make four to six discs ranging from the darkest shade to the lightest in a clear sequence.
Bake flat. Sand lightly once cooled for a smooth finish. Apply a thin layer of clear glaze for a polished look.
Glue magnets to the back.
Display tip: Arrange them in gradient order on the fridge. The color sequence creates a simple, graphic look that feels intentional and styled.
These work beautifully in a minimalist or Scandinavian-style kitchen. They don’t need to shout for attention — the color does the work quietly.
Total cost for six gradient discs: around 5–8. Fast to make, easy to repeat in different color combinations.
Conclusion
Handmade clay fridge magnets are one of the most accessible DIY projects around. They’re affordable, quick to make, and genuinely satisfying to display. You don’t need a studio, special skills, or expensive materials. A basic clay kit, a pack of magnet discs, and a free afternoon are enough to fill your fridge with something personal and handmade. Whether you start with a simple sunflower, a tiny pizza slice, or a set of ombre discs, you’ll end up with something that makes your kitchen feel more like yours. Pick one idea from this list, gather your materials, and make your first magnet today. Once you start, it’s very hard to stop.