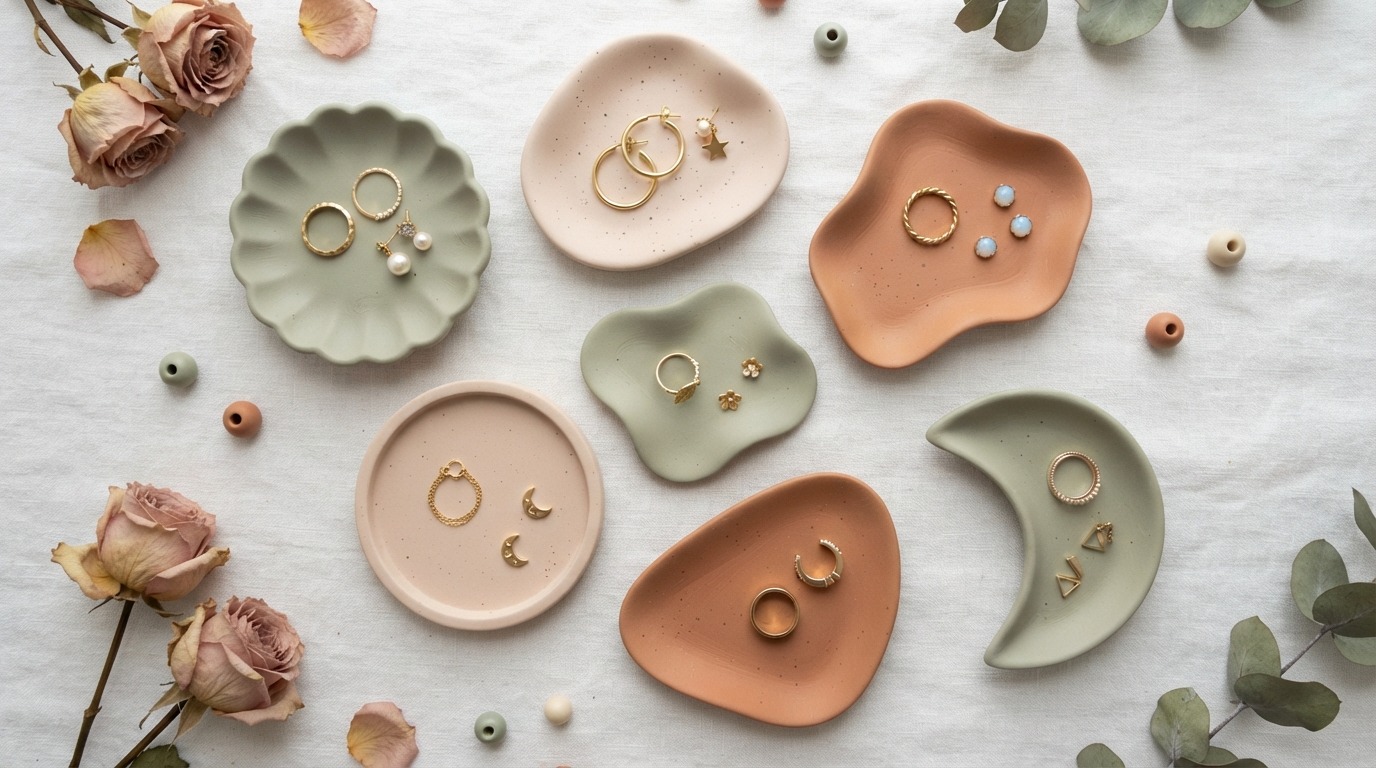
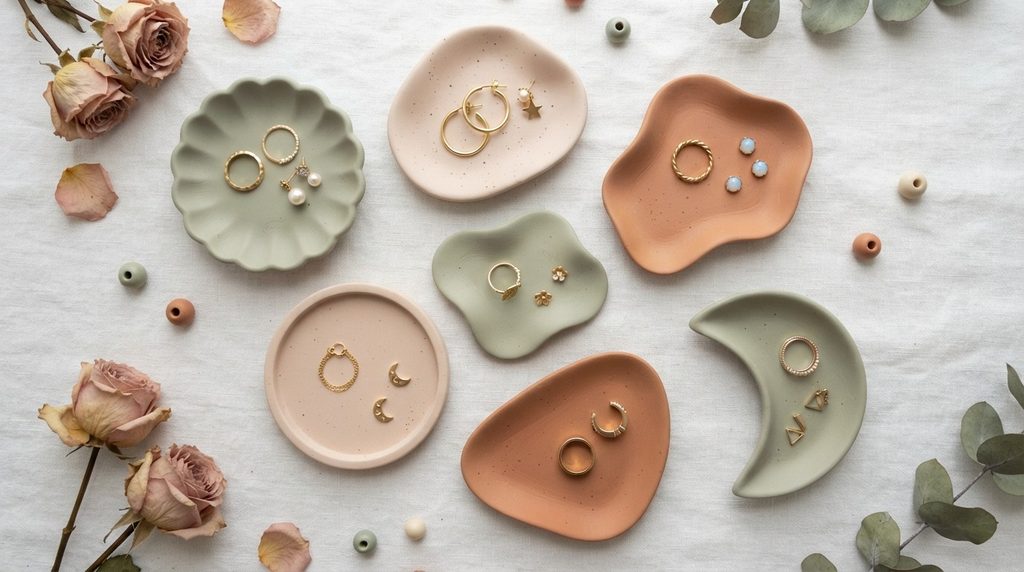
A scattered jewelry collection is one of those small daily frustrations that adds up fast. A missing earring back, a tangled chain, a ring left on the bathroom sink — these things happen when there’s no dedicated spot for your pieces to land. Clay jewelry trays solve that problem in the most personal way possible. You make exactly the size and shape that fits your space, in colors that match your room, for a fraction of what a store-bought dish costs. This guide covers 20 creative clay jewelry tray ideas — from beginner pinch trays to detailed textured designs — all made with affordable materials, simple tools, and a free afternoon. Whether you organize rings, earrings, bracelets, or all three, there’s a tray idea here that works for your space and your skill level.
1. Basic Round Pinch Tray
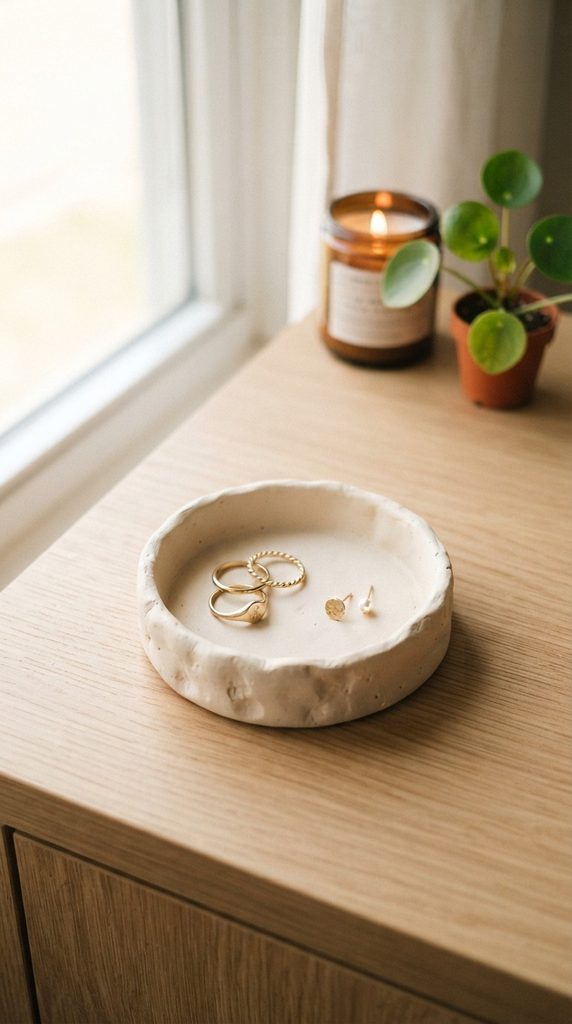
The round pinch tray is the best starting point for anyone who has never worked with clay before.
Take a golf ball-sized piece of air-dry or polymer clay. Press your thumb into the center. Pinch the walls upward and outward, rotating the ball slowly as you work.
Keep the walls low — about half an inch high. A shallow dish is more practical for rings and earrings than a deep bowl. You want to grab your jewelry quickly without digging around.
Smooth the interior with a damp finger to create a surface that won’t scratch delicate pieces.
The finished tray should sit at roughly 3 inches in diameter. That size holds 3–5 rings and a couple of pairs of studs comfortably.
Drying and curing:
- Air-dry clay: leave flat for 24–48 hours
- Polymer clay: bake at 275°F for 15 minutes
Once dry, paint in any color — terracotta, dusty rose, sage, or natural white all suit a vanity or dresser.
Seal with matte Mod Podge or clear varnish to protect from moisture and daily handling.
Cost: One tray costs under $3 in materials. A single clay pack makes 6–8 trays.
2. Marble-Effect Oval Dish
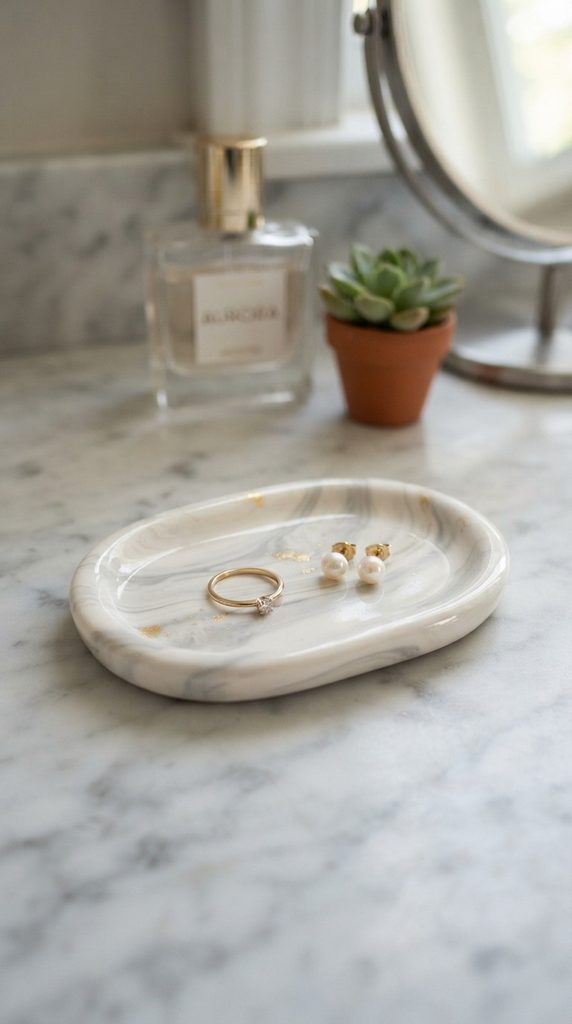
A marble-effect tray looks like something from an expensive boutique. The technique takes about five minutes to learn.
Start with white polymer clay as the base. Pinch off a small piece of grey or black clay — you only need a tiny amount.
Press the grey into the white. Fold the combined clay over itself three or four times. Stop before the colors fully mix. You want visible streaks, not a uniform grey.
Roll into a ball. Flatten into an oval slab about a quarter inch thick. The marble pattern appears across the surface on its own.
Use an oval cookie cutter or a craft knife to clean up the edges.
To give the dish a slight curve, drape the oval over the back of a spoon or a small bowl while still soft. Bake or dry in that position.
Once cured, apply a thin coat of clear gloss varnish. Gloss mimics real polished marble better than matte here.
Budget tip: You only need a marble-sized scrap of grey clay. A pack of white plus a scrap of black or grey costs around $5–$7 total and produces 10 or more trays.
The result looks far more expensive than it costs to make.
3. Pressed Leaf Texture Tray
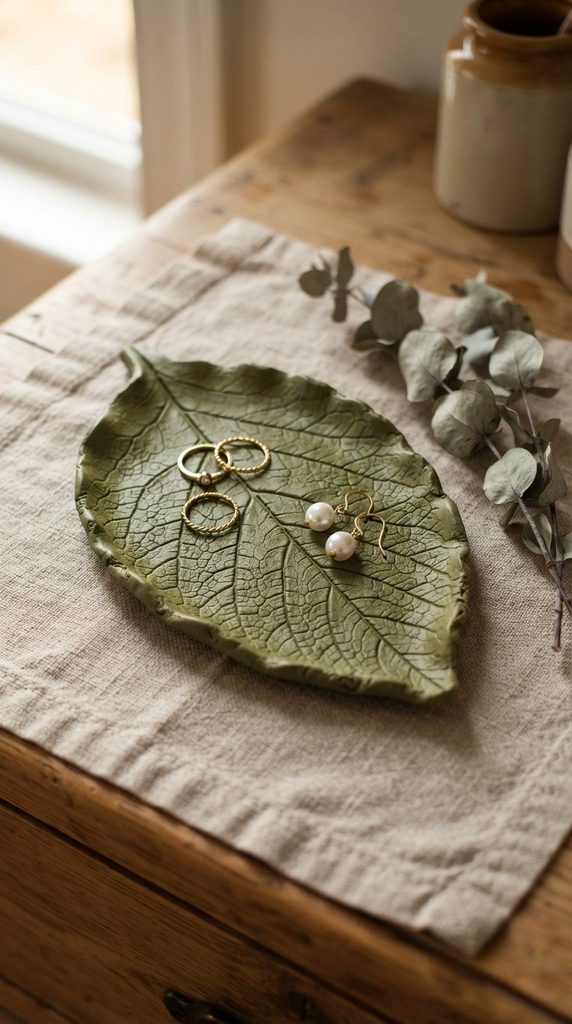
This tray uses a real leaf to create texture — no special tools needed.
Find a large, sturdy leaf from outside. Magnolia, rubber plant, and maple leaves all work well. Bigger leaves give you more surface area to work with.
Roll clay into a slab about a quarter inch thick. Press the leaf firmly onto the clay, vein-side down. Roll gently across the top with a rolling pin to press the texture evenly into the clay surface.
Lift the leaf carefully. The vein pattern transfers in clean, fine detail.
Cut around the leaf impression with a craft knife. Follow the natural outline of the leaf — irregular edges are part of what makes this tray look organic and handmade.
Drape the cut tray over a gently rounded surface while it dries — like a folded towel or the outside of a small bowl. This gives the tray a shallow dish curve.
Once dry, paint in olive green, rust, sage, or off-white. Dry-brush a slightly lighter tone over the raised veins to make the texture stand out.
Seal with matte varnish.
Cost: Around $3–$5 per tray. The leaf is free.
4. Scallop-Edge Ring Dish

Scalloped edges transform a basic disc into something that looks carefully designed.
Roll clay into a flat circle about 3–4 inches in diameter and a quarter inch thick.
Use a small round tool — a pen cap, a bottle cap, or the wide end of a piping nozzle — to press half-circle indentations around the outer rim. Space them evenly. Go slowly and overlap each impression slightly so the curves connect cleanly all the way around.
Once the scallops are done, use your fingers to gently curl the edges upward slightly. This creates a shallow dish that keeps jewelry from sliding off.
Tip: Polymer clay stays workable longer than air-dry, which gives you more time for detail work like scalloping. Use polymer clay if you want more control.
Bake or dry flat on parchment paper.
Once cured, sand the top surface lightly for a smooth interior finish.
Paint in blush pink, white, or pale cream. For extra detail, paint the interior one color and the scalloped edge in metallic gold. The contrast looks striking.
Seal with clear varnish.
Cost per dish: Around $2–$4. Fast to make, genuinely beautiful to display.
5. Square Geometric Tray
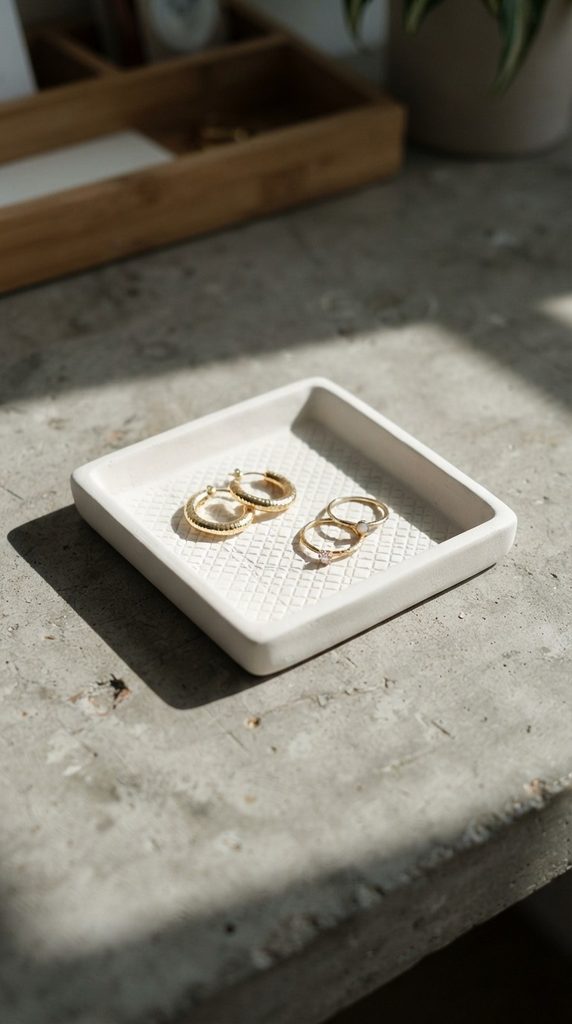
A square tray with a geometric pattern suits minimalist, modern, and Scandinavian-style interiors perfectly.
Roll clay into a flat square slab — about 3.5 inches per side and a quarter inch thick. Use a ruler and craft knife to cut clean, straight edges.
Pinch all four sides upward to create low walls, about a quarter to half an inch high. Press a ruler along each wall while shaping to keep them straight.
For the interior pattern, press a ruler edge, a fork, or a textured mat into the base. A simple crosshatch grid — lines pressed in both directions — looks clean and architectural.
Alternatively, press a small piece of burlap or linen fabric onto the interior for a woven texture effect.
Dry or bake flat.
Once cured, paint in matte white, concrete grey, or matte black. Avoid gloss — matte finish is what makes this style work.
Sand the top rim of the walls lightly for a smooth edge.
Practical note: Square trays organize jewelry more efficiently than round ones. The corners create natural sections — one for rings, one for earrings, and the middle for anything else.
Cost: Around $3–$5 per tray.
6. Two-Compartment Divider Tray
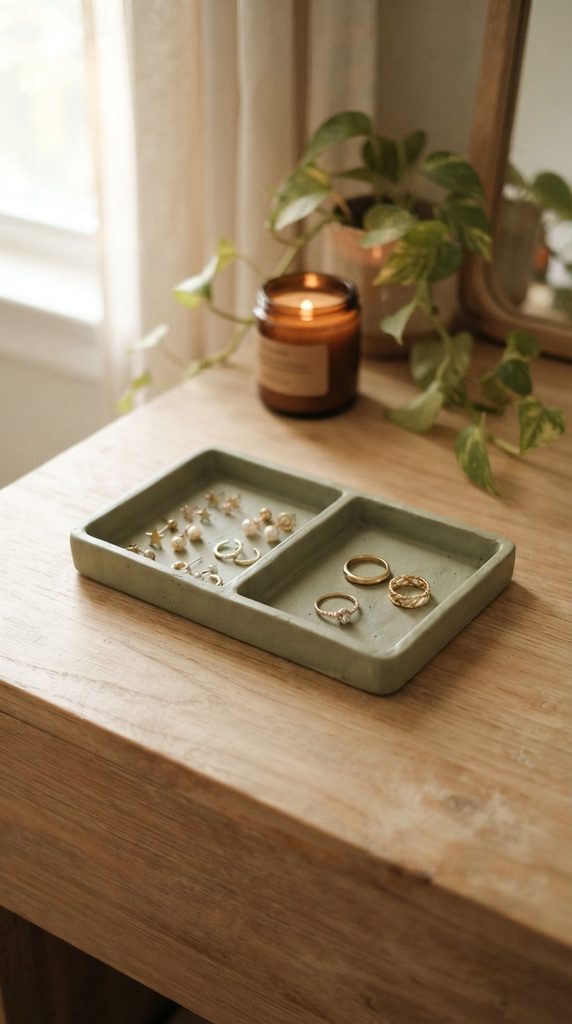
A divider tray keeps rings separated from earrings — simple organization that removes the daily sorting step.
Roll a rectangular slab of clay about 5 inches long, 3 inches wide, and a quarter inch thick. Pinch all four sides upward to form low walls, roughly half an inch high.
Roll a thin, flat coil of clay for the divider. Press it across the interior of the tray, connecting both long walls. Smooth the join points on both sides so the divider bonds firmly.
You now have two compartments. One side for rings. One side for studs and small hoops.
For polymer clay: Bake fully assembled. The divider bonds securely during baking.
For air-dry clay: Dry slowly. The divider may take an extra 12 hours to cure where it meets the walls. Don’t rush this step.
Sand the interior smooth once fully dry.
Paint in a single solid color — sage green, dusty blue, or warm white all look refined. A single color makes the divider less visually distracting.
Practical tip: Before drying, press a small letter into the divider wall — an R on one side, an E on the other. Subtle but useful labeling.
Cost: Around $4–$6 per tray.
7. Fluted Exterior Dish
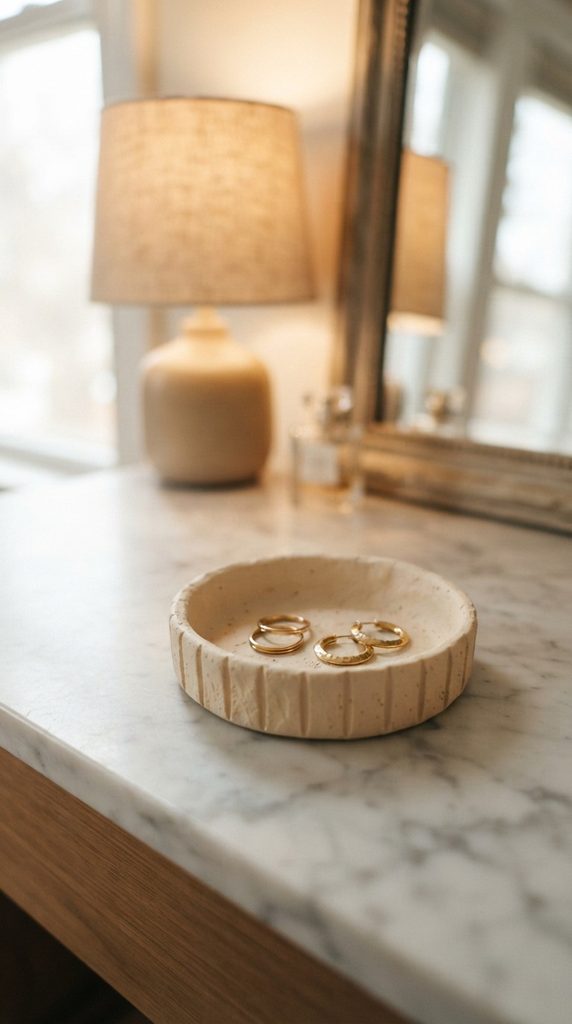
Fluted sides give a pinch tray an almost wheel-thrown ceramic quality — without any special equipment.
Start by forming a standard round pinch tray. Once the walls are formed and still soft, press vertical lines down the exterior using a toothpick, skewer, or the blunt edge of a butter knife.
Space each line about a quarter inch apart. Keep the lines parallel, running from the top rim straight down to where the wall meets the base.
Work slowly around the full exterior. Even spacing makes a significant difference in the finished look — take your time here.
Once all the fluting is done, smooth the interior of the dish with a damp finger. The inside needs to be smooth so it doesn’t catch on rings or scratch earring backs.
Dry or bake fully.
Paint the exterior only in terracotta, cream, or pale gold. Leaving the interior slightly lighter gives a refined two-tone effect without extra effort.
Seal with matte varnish.
Budget note: This technique works well with inexpensive dollar-store air-dry clay. The fluted texture adds so much visual detail that the clay quality matters less here than in other projects.
Cost: Under $3 per dish.
8. Heart-Shaped Ring Dish

The heart dish is one of the most consistently popular clay tray shapes — personal, practical, and easy to make.
Roll clay to about a third of an inch thick. Cut a heart shape using a cookie cutter or by hand with a craft knife.
A hand-cut heart doesn’t need to be perfectly symmetrical. Slight irregularities look more handmade and charming than a machine-precise shape.
The heart should be around 3–4 inches wide — large enough to hold several rings without pieces stacking on top of each other.
Pinch the outer edge of the heart upward gently to create a low rim. Just enough to stop rings from rolling away.
Rest the heart inside a small bowl while it dries or bakes to give it a natural, subtle dish curve.
Once cured, sand the surface smooth.
Paint ideas:
- Dusty rose for a soft, romantic look
- White with a thin gold rim for something more polished
- Deep burgundy for a moody, editorial feel
Add a person’s initial painted on the interior base to make it a gift that feels genuinely personal.
Seal with clear varnish.
Cost: Under $5 per dish, including paint and varnish.
9. Crescent Moon Tray
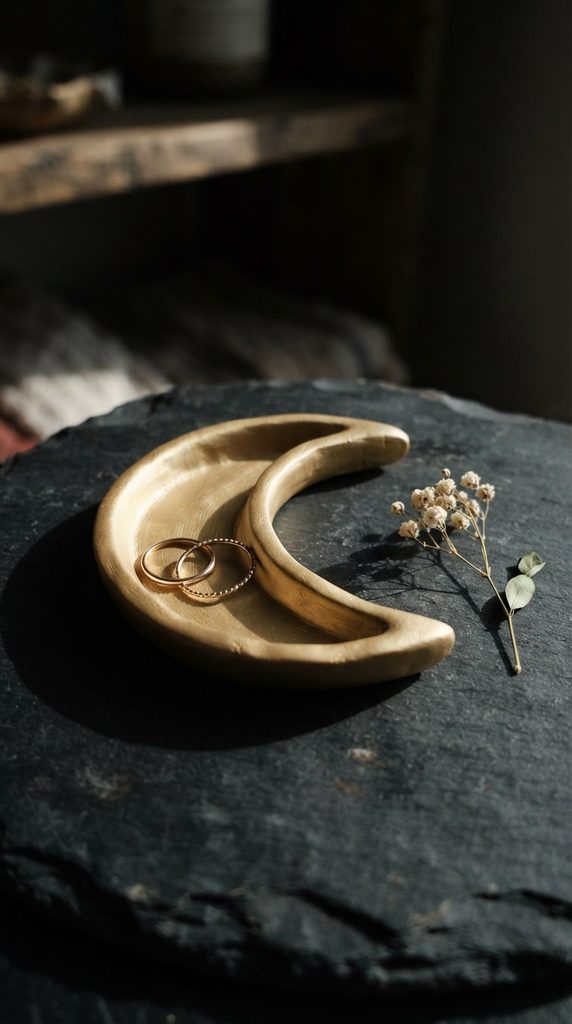
A crescent moon tray holds rings naturally in the inner curve of its shape — no dividers or compartments needed.
Cut a large circle from a flat clay slab — about 4 inches in diameter. Then cut a second, smaller circle from one side of the large circle to create the crescent shape.
The inner curved edge of the crescent is where rings rest. Keep this edge smooth and slightly rounded so it doesn’t catch on delicate jewelry.
Keep the clay about a quarter to a third of an inch thick. Thinner than that and the crescent becomes fragile, especially at the narrow tips.
Smooth all edges carefully. Bake or dry completely flat.
Once cured, this tray works two ways:
On a surface: Rings rest naturally in the inner channel.
Mounted on a wall: Attach with a small adhesive strip. The crescent becomes decorative wall-mounted jewelry storage.
Paint in matte gold, deep navy, sage green, or pure white. Gold suits the moon aesthetic. Navy gives a celestial, dramatic look.
Seal with clear gloss for metallic tones. Use matte varnish for other colors.
Cost: Around $3–$5 per tray. The result looks boutique-quality.
10. Lace Impression Tray
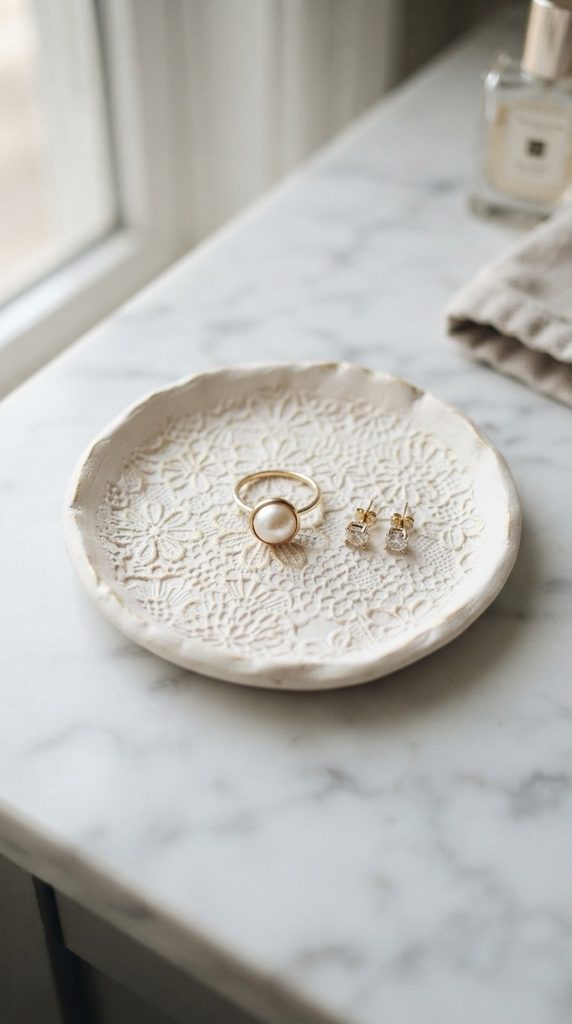
Pressing lace fabric into clay creates a texture so fine it looks like professional ceramic work.
Find a small piece of lace fabric — from a craft store, an old garment, or a thrift store doily. The lace pattern becomes your texture stamp.
Roll clay into your chosen shape — round, oval, or square all work. While the clay is still soft, press the lace firmly onto the interior surface. Press evenly across the whole area so no patches are missed.
Lift the lace carefully. The pattern transfers in fine detail across the clay surface.
Helpful tip: Lightly dust the lace with cornstarch before pressing. This prevents it from sticking to the clay and makes lifting much cleaner.
Dry or bake with the lace impression facing up and undisturbed.
Once cured, paint in white or cream as a base coat. Let it dry fully. Then apply a diluted wash of gold or bronze paint — water it down significantly. Wipe away most of the wash with a cloth immediately after applying. The gold settles into the recessed lace lines, highlighting the pattern beautifully.
Seal with matte varnish.
Cost: Under $4 per tray, including thrift store lace.
11. Stacked Three-Tier Tray Tower

Three small trays stacked together create a tiered storage tower that organizes more jewelry in less counter space.
Make three round or oval trays, each one slightly smaller than the one below. Try 4 inches, 3 inches, and 2 inches in diameter as a starting guide.
Paint each tray a different coordinating tone. Terracotta, sage, and cream together look earthy and cohesive. Or use three shades of the same color from darkest at the bottom to lightest at the top.
Stack them directly on top of each other at slight rotational offsets — turned about 30 degrees from each other so all three levels are visible from the front.
The bottom tray holds the largest pieces. The middle tray handles medium items like small hoops or chains. The top tray holds your most-used rings or a single favorite pair of earrings.
Add small adhesive non-slip pads between each tray to prevent sliding. This keeps the tower stable without permanently bonding the trays — they stay easy to separate for cleaning or rearranging.
Budget breakdown:
- Clay: $5–$8
- Paint: $2–$4
- Non-slip pads: $2
Total cost: Around $9–$14 for a three-tray tower that would sell for $40+ in a home goods store.
Conclusion
Clay jewelry trays are genuinely useful objects you can make yourself in an afternoon for under $10. Every idea in this list starts with simple materials — a pack of clay, a few paint colors, and basic tools you likely already own. The result is a tray that fits your space, holds your jewelry securely, and looks like something you’d find in a boutique home goods store. Whether you start with a basic pinch tray or try a lace impression design, the process is straightforward and the payoff is real. Pick one design that fits your style, gather your materials, and make your first tray this weekend. Your rings and earrings will finally have a proper home — and it’ll be one you made yourself.